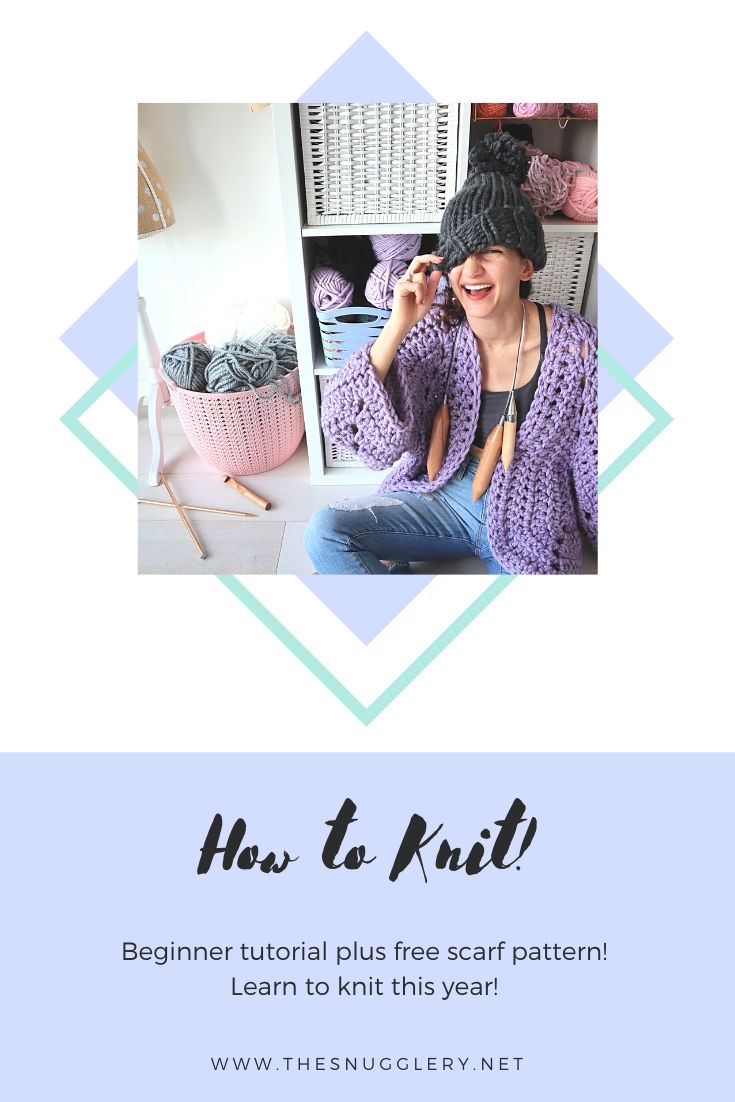
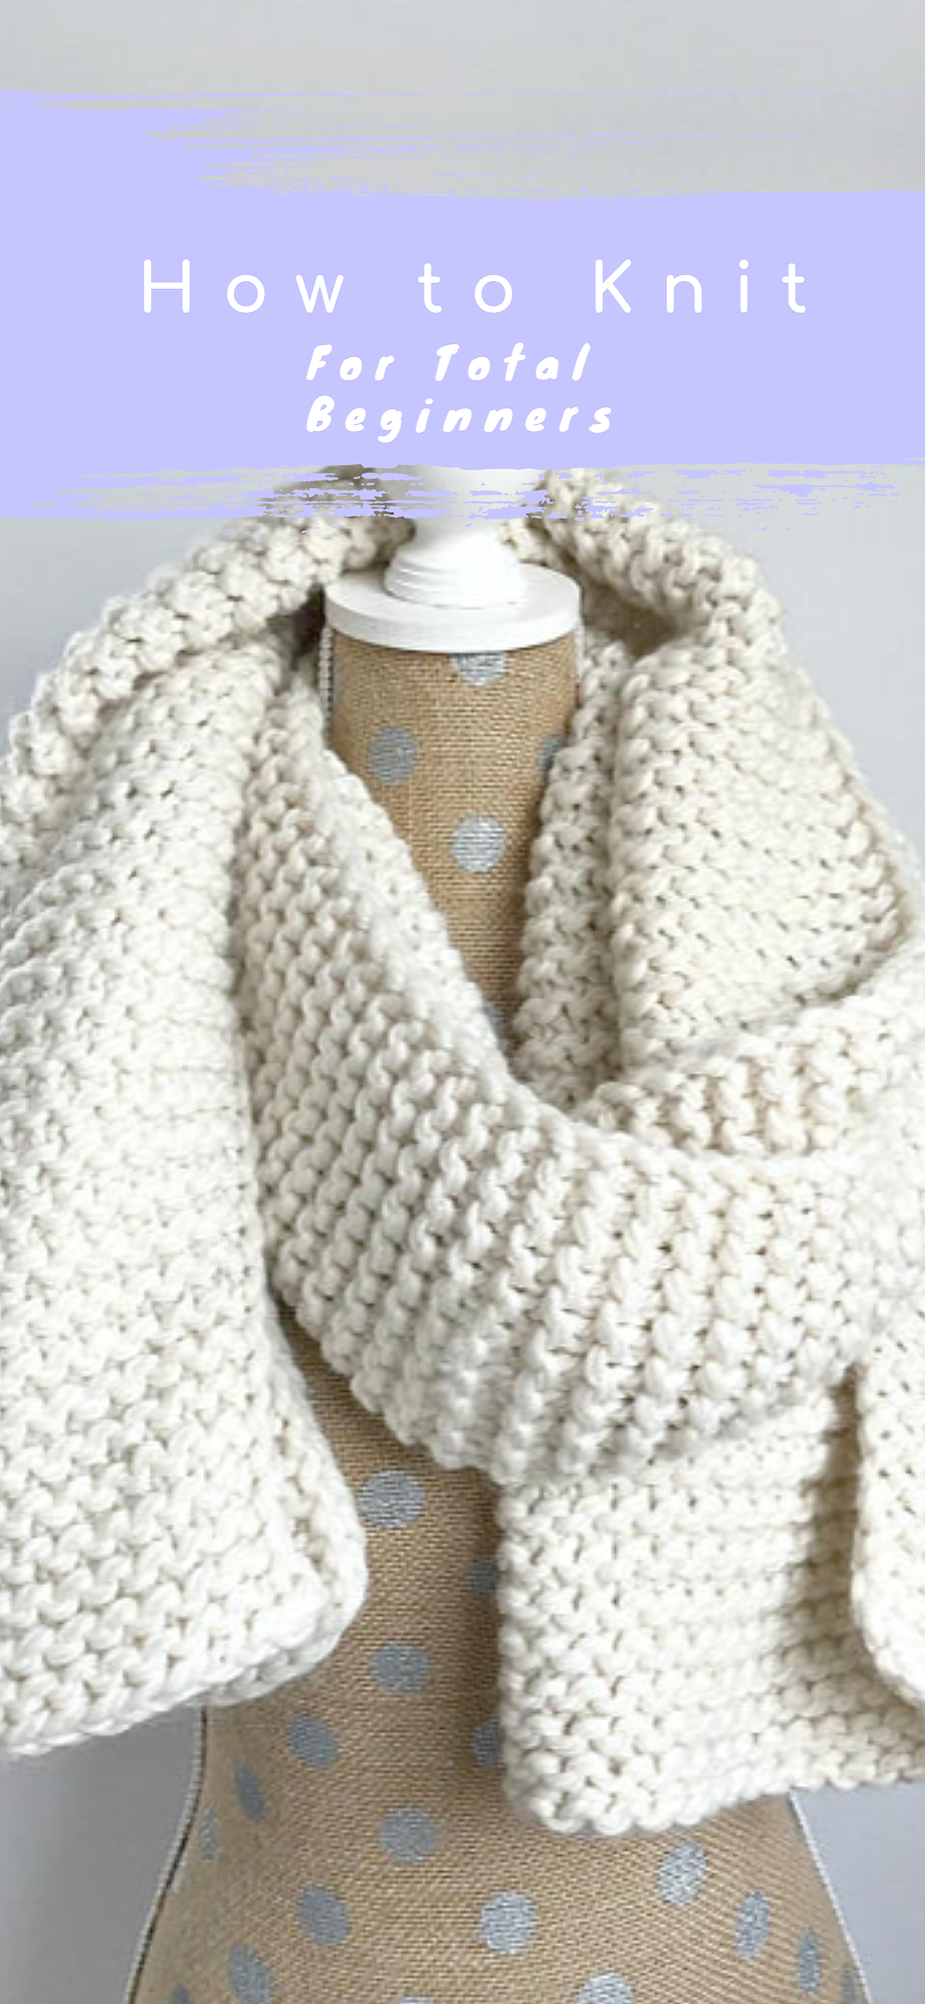
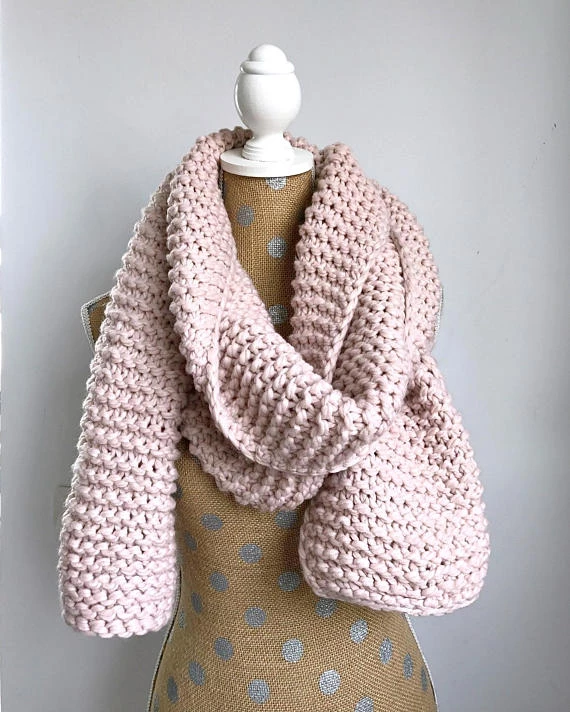
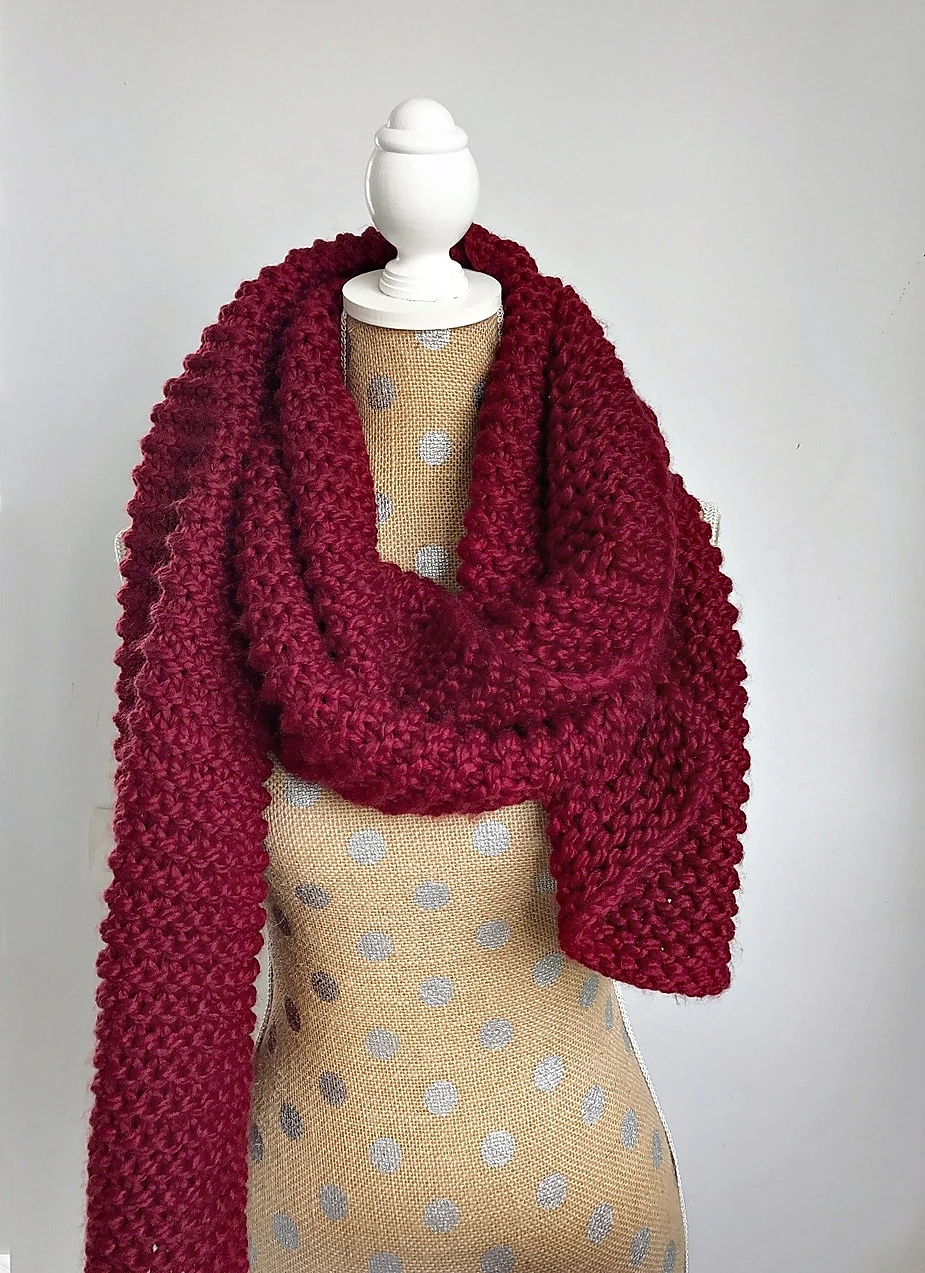
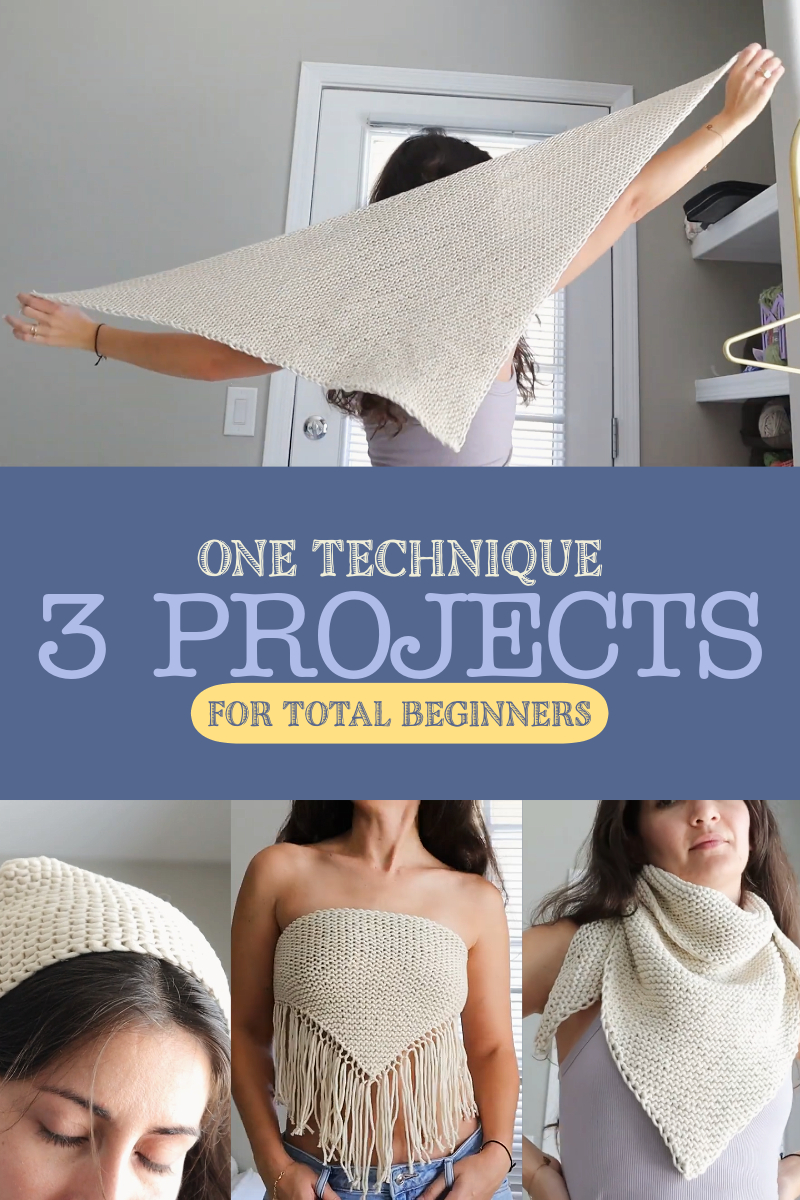
Maybe you had a loved one teach you years ago, maybe you crochet and want to take the plunge into knitting, or maybe you've never owned a ball of yarn in your life! Either way, 2020 is the year YOU learn to knit, baby! And this long, chunky scarf is the perfect beginner project. It uses only the knit stitch and is made with super bulky yarn for quick and motivating progress that will keep you knitting until you've made something you can be proud of.
Fortunately for you visual learners, I have a video tutorial to get you started with the basics of yarn and needle selection, casting on, knitting and binding off! Please check it out
here:
For this pattern, you'll need to pick up at least 260 yards (240 meters) of size 6 "Super Bulky" weight yarn like Lionbrand Thick & Quick or Paintbox Yarns Wool Mix Super Chunky and size 9mm (US 13) circular knitting needles at least 16" long.
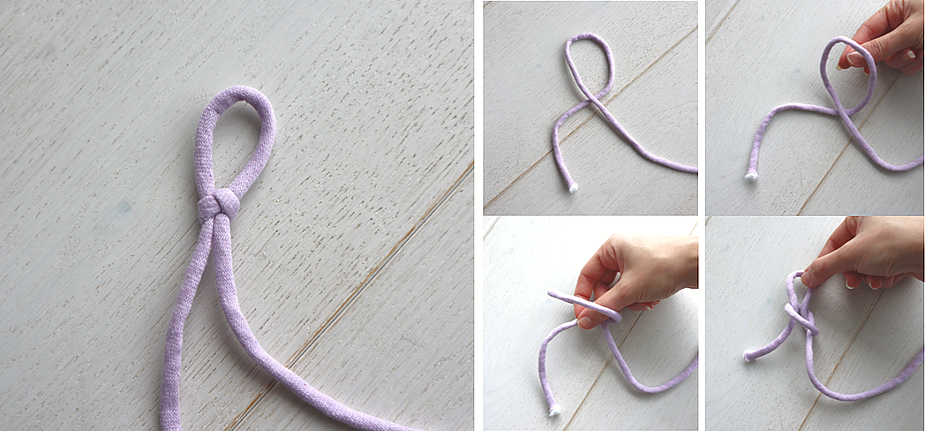
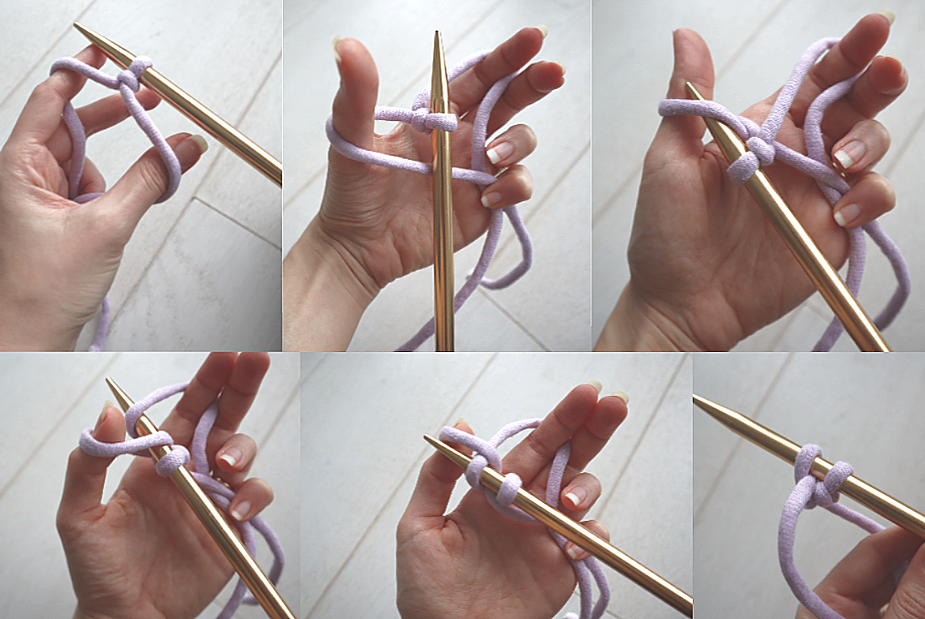
To begin, make a slip knot
Place the slip knot on your needle and use the "long tail cast on method" detailed below to cast on 20 stitches.
Wrap your yarn around you needle 20 times. Use that length of yarn for your tail. Fold the yarn, twist it once towards you to make a loop and reach into the loop and pull up a piece of the tail to make a slip knot. Place your slip knot on the needle.
Grab both strands of yarn coming off the slip knot in your hand and separate them with your index finger and thumb. Turn your palm up to make a heart shape. Reach the tip of your needle under the first strand on your thumb, over the next strand coming off of your thumb and under the 3rd strand around your index finger. With the needle, pull the strand from your index finger through the loop on your thumb and tighten the new stitch on your needle.
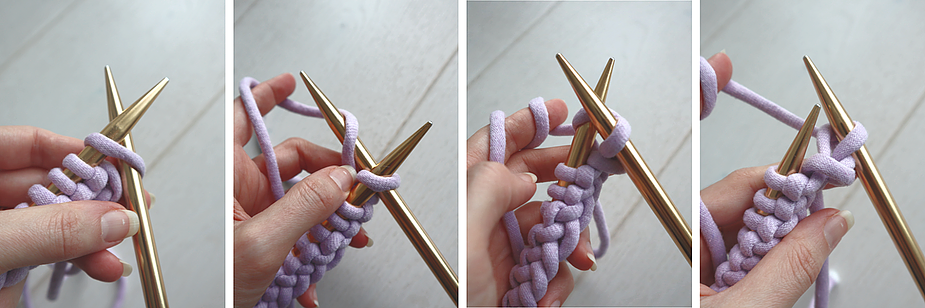
Once you've cast on 20 stitches, turn your work so the needle with all the stitches on it is in your left hand, with the right needle free. You can choose to hold your working yarn (the yarn coming off your ball) in your right hand or left hand. I gave a detailed demo of the difference in my "
Learn to Knit" video so please check it out!
how to knit
Whichever knitting style you choose, insert your right needle into the first stitch from front to back. Wrap the working yarn around the right needle counter clockwise and pull the wrap through the stitch on your left hand needle.
Once you've pulled the yarn wrap through the first stitch and it's securely on your RIGHT needle, you can slip the first stitch off of the LEFT hand needle.
You've officially knit your first stitch!
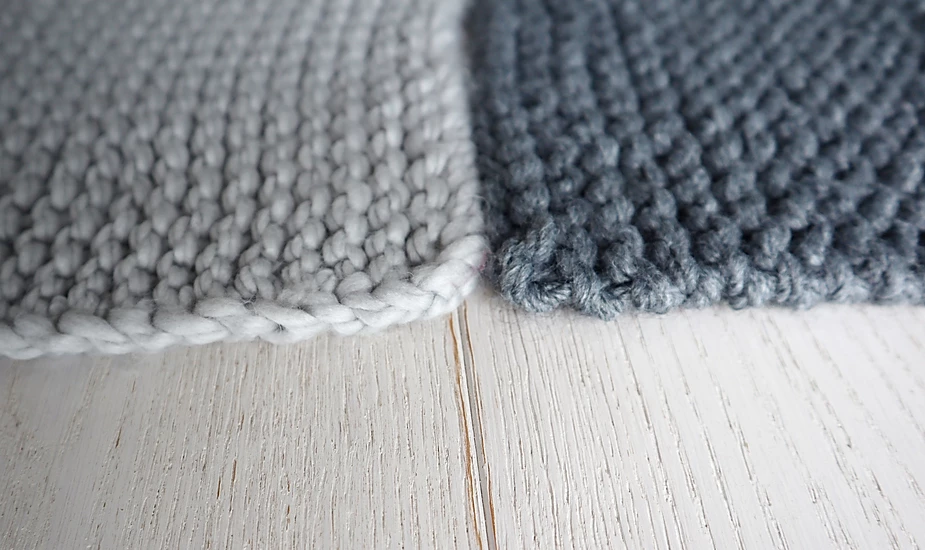
Knit every stitch every row to create the texture you see in the sample scarf.
This texture is called "garter stitch" and it's what you create when you knit each row of a flat piece.
Knit every stitch until your piece measures 6 feet long (2 meters). This will be about 300 rows but in garter stitch it's much easier to count the ridges going across your fabric rather than each row. It will be about 150 garter ridges.
Then bind off! To bind off, knit the first two stitches as normal, then pass the first stitch over the 2nd stitch and off the right needle. Then knit the next stitch, and pass the 2nd stitch over it and off the right needle. Continue until you've bound off all stitches. Cut your yarn and weave in or bury your ends.
That's it! Even as a total beginner, you can create this truly impressive piece. Now all you have to do is strut your warm neck around town and watch people's jaws hit the floor when you tell them you made it yourself!
I hope you enjoyed this tutorial and pattern and that you're totally hooked on yarn now! Subscribe to my e-mail newsletter for updates on new beginner patterns and feel free to share your projects on
Instagram or
Ravelry so I can see them too!