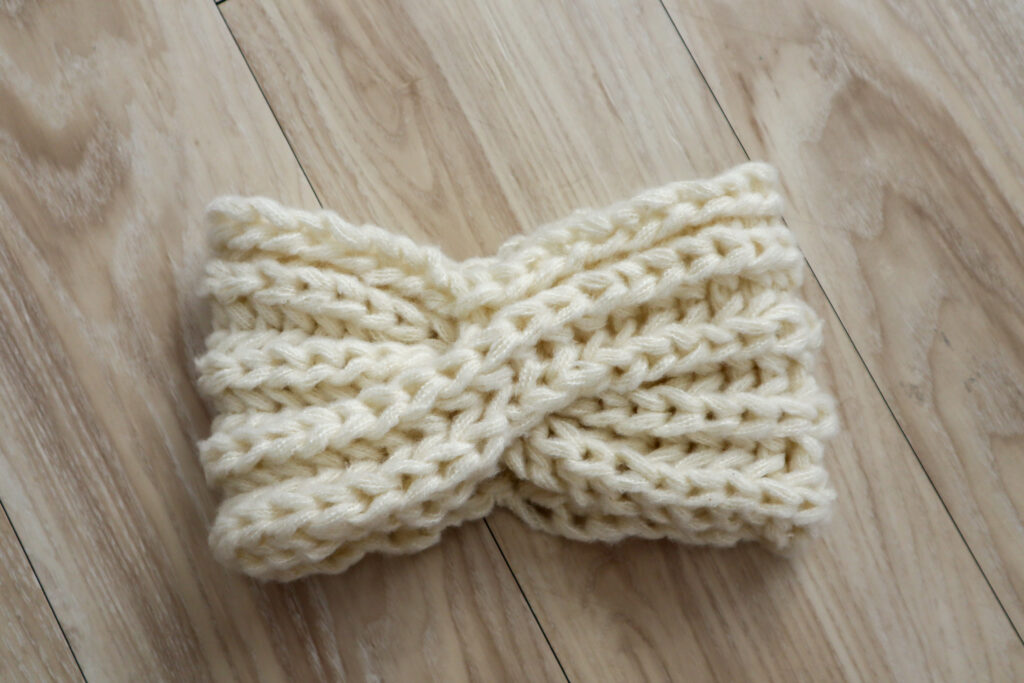
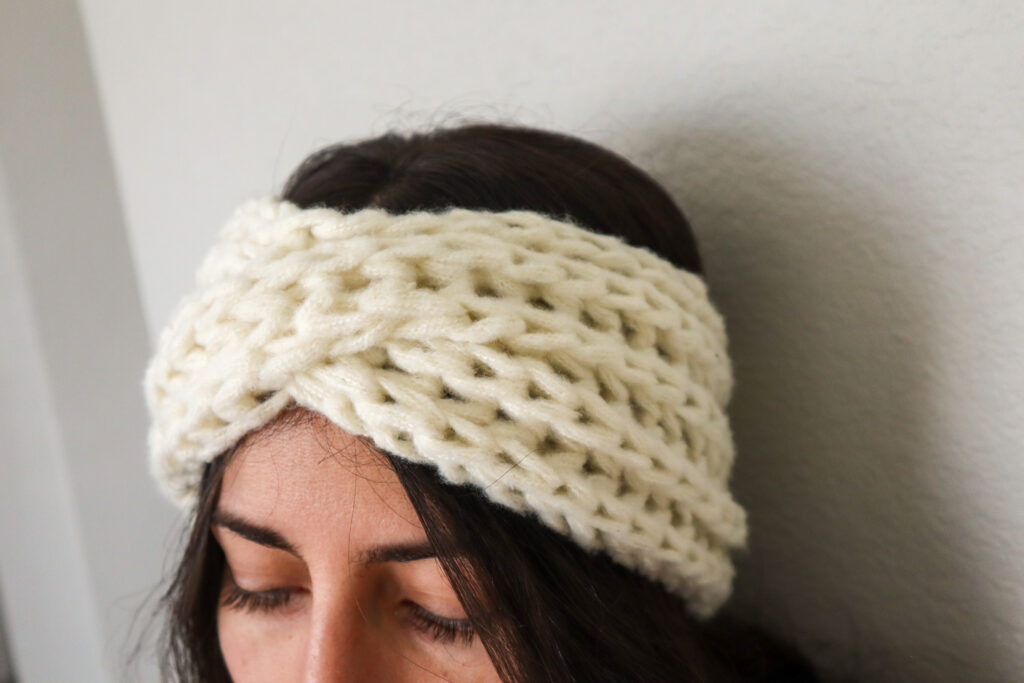
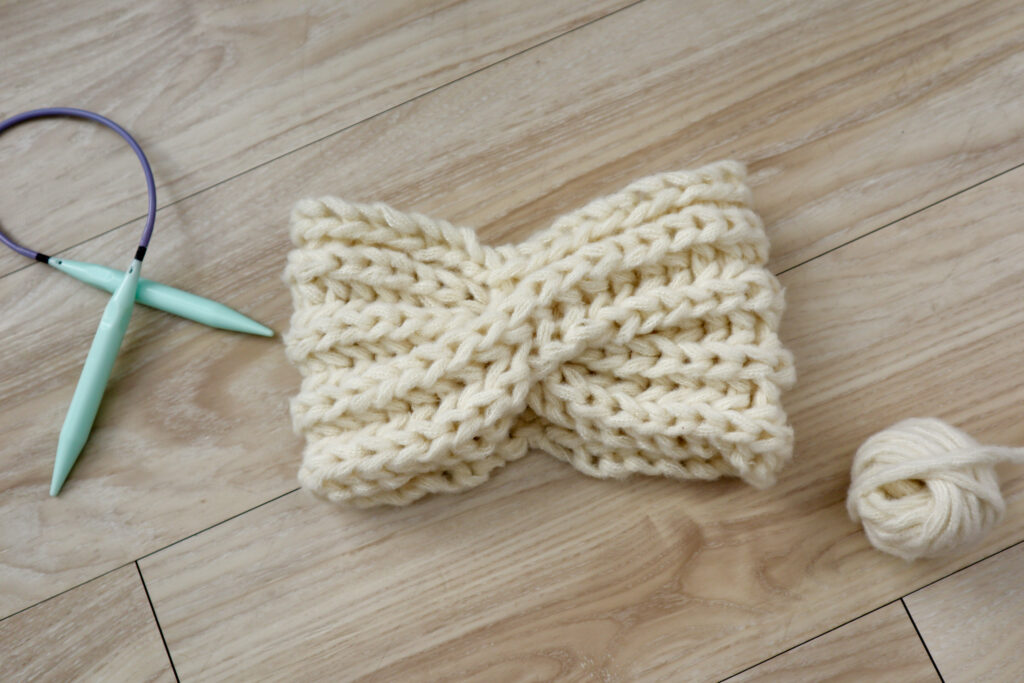
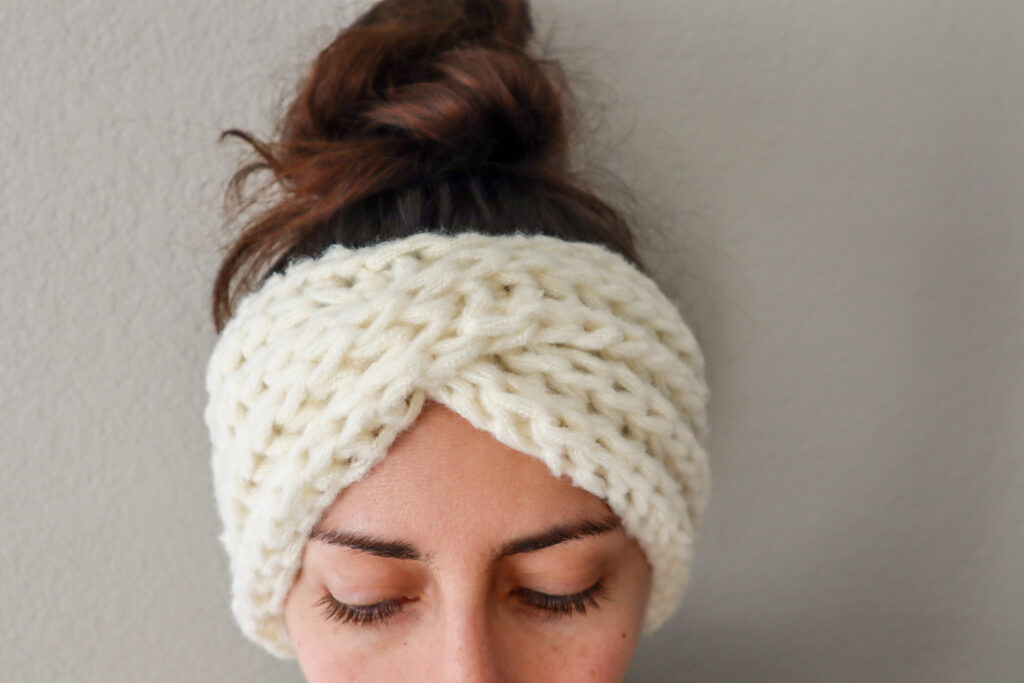
Curious about brioche but intimidated by a whole new type of knitting? Today I'm sharing a perfect first brioche project that's both satisfying and quick to complete. This Brioche Twist Ear Warmer features the spectacular brioche texture with a cool cable twist that adds a beautiful focal point.
Why You'll Love This Pattern
- Perfect for beginners - If you've never tried brioche before, this project's small size helps give you the motivation to not give up! Brioche can be slow going at first because it involves slipping stitches, so a small project is a smart start.
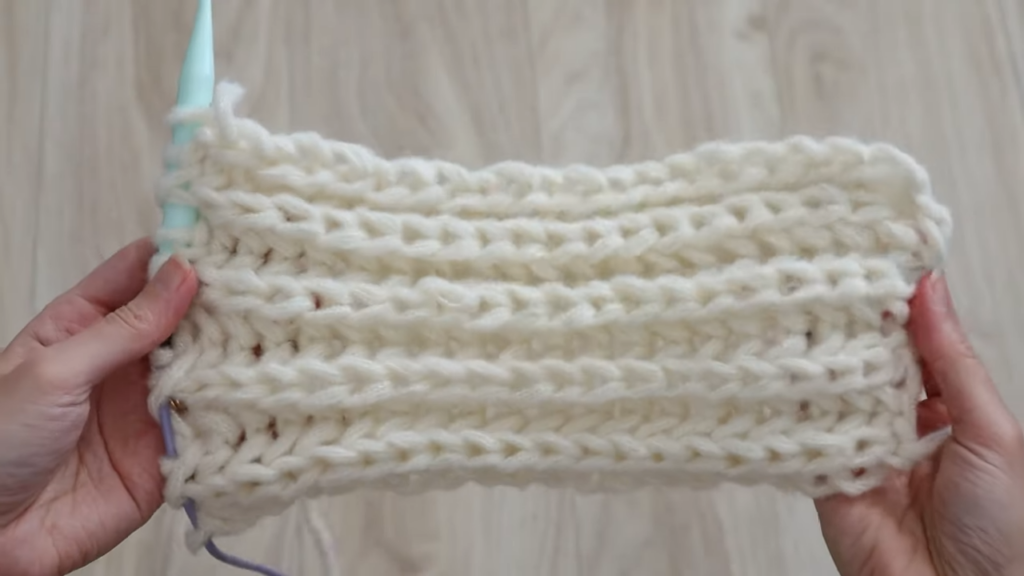
- Gorgeous texture - The brioche stitch creates a thick, squishy ribbing that's double thick but still light and airy. There's nothing quite like it!
- Simple cable detail - Just one row of cable work gives this headband so much personality
- Few ends to weave in - I've done other turban twist headbands before and since they usually involve cutting the yarn and reattaching, there are some extra ends to weave in at the end. Not with this one! We keep our yarn attached during the twist.
Video Tutorial
psst... hey visual learners, I've got a video tutorial for you! Enjoy watching the ear warmer's construction from cast on to seaming and all the brioche in between.
Materials
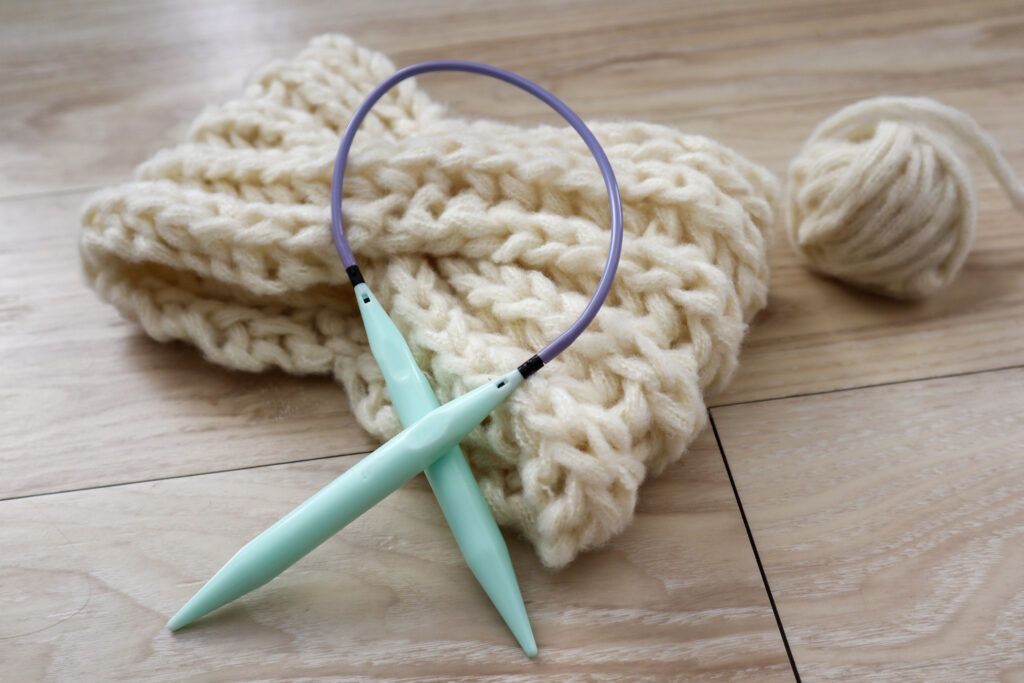
- Yarn: Super bulky weight yarn (I used Feels Like Butta Thick & Quick from Lion Brand)
- Needles: Size 17 (12.75mm) straight or circular
- Notions: Cable needle (or anything that can hold some stitches) and a tapestry needle for seaming
- Finished measurements: Approximately 21" circumference (sized to fit most adults)
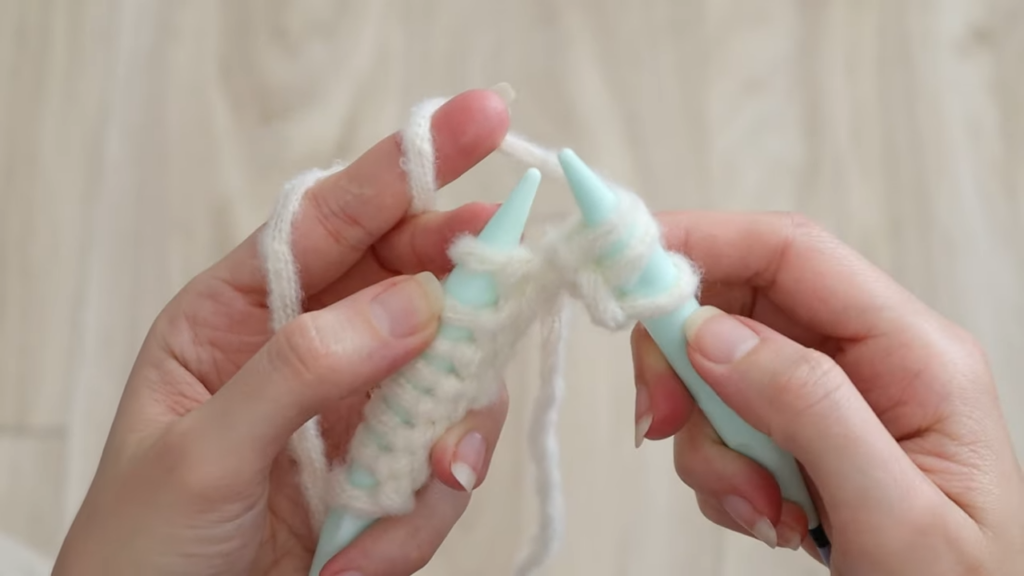
Abbreviations
- yo - yarn over
- sl - slip stitch
- brk - brioche knit (knit the slipped stitch together with its yarn over)
- p - purl
Pattern Instructions
Cast on
Cast on 10 stitches. (To alter the pattern for different yarn weights, cast on an even number of stitches, but adjust cable instructions accordingly.)
Setup Row
- Slip 1 purlwise with yarn in back
- yo, sl 1, k1 repeat to last stitch
- p1
Row 2 (one row repeat!)
- Slip 1 purlwise with yarn in back
- yo, sl 1, brk repeat to last stitch
- p1

Continue in this one-row repeat until your piece measures 10 inches from cast on edge.
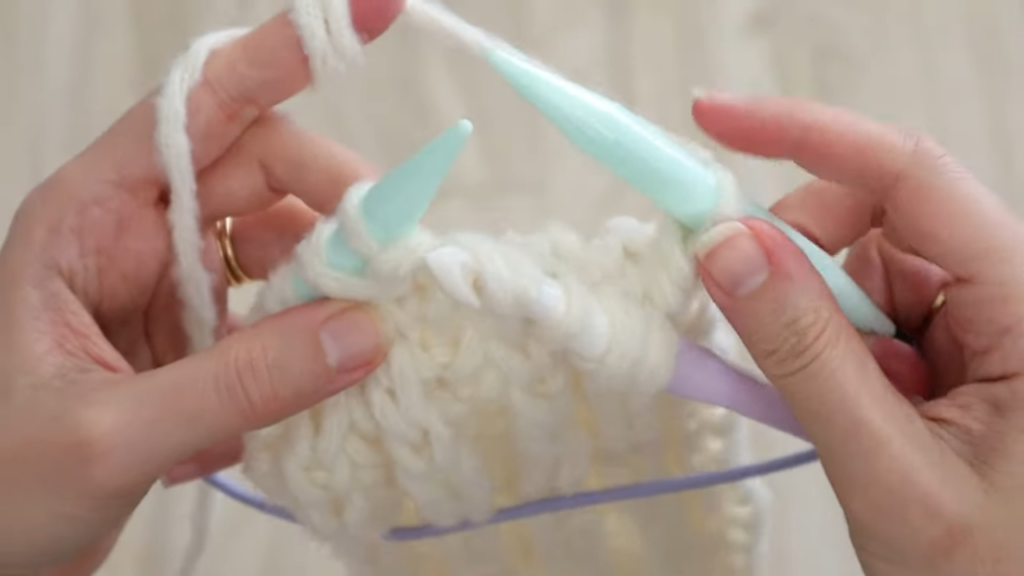
Cable Twist Row
- Slip 1 purlwise with yarn in back
- Transfer the next 4 stitches (with their yarn overs) to cable needle and hold in front of work
- Work the remaining stitches on left needle in pattern (yo, sl 1, brk)
- Before the last stitch, pick up the stitches from cable needle and work them in pattern
- Purl the last stitch
Continue in Pattern
Resume the one-row brioche pattern as before until your piece after the cable also measures 10 inches.
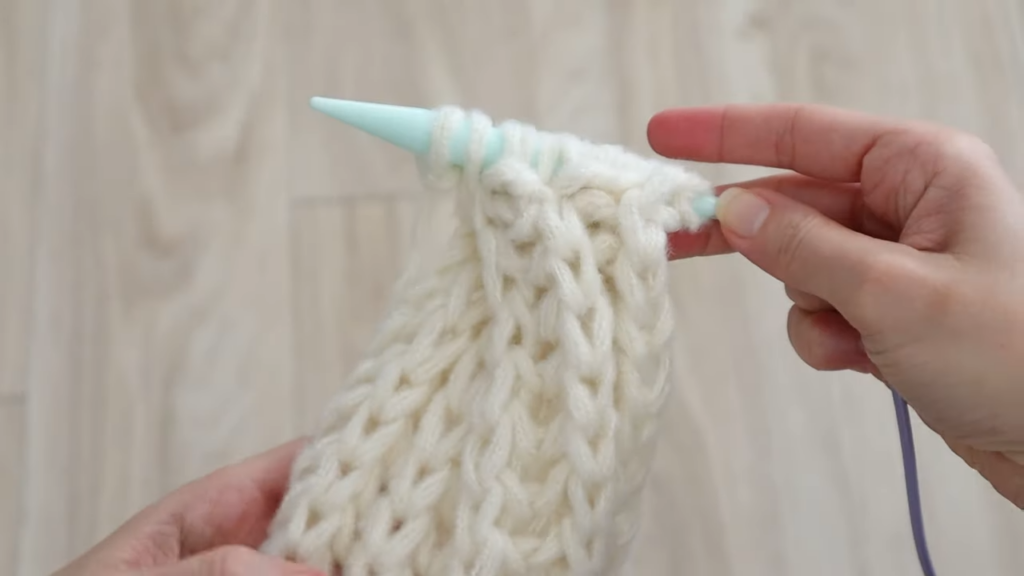
Bind Off
- Slip 1 purlwise
- Slip next stitch, pass first stitch over
- Brioche knit next stitch, pass stitch over
- Slip 1, pass stitch over, brk, pass stitch over repeat to end
- Knit last stitch and bind off

Finishing
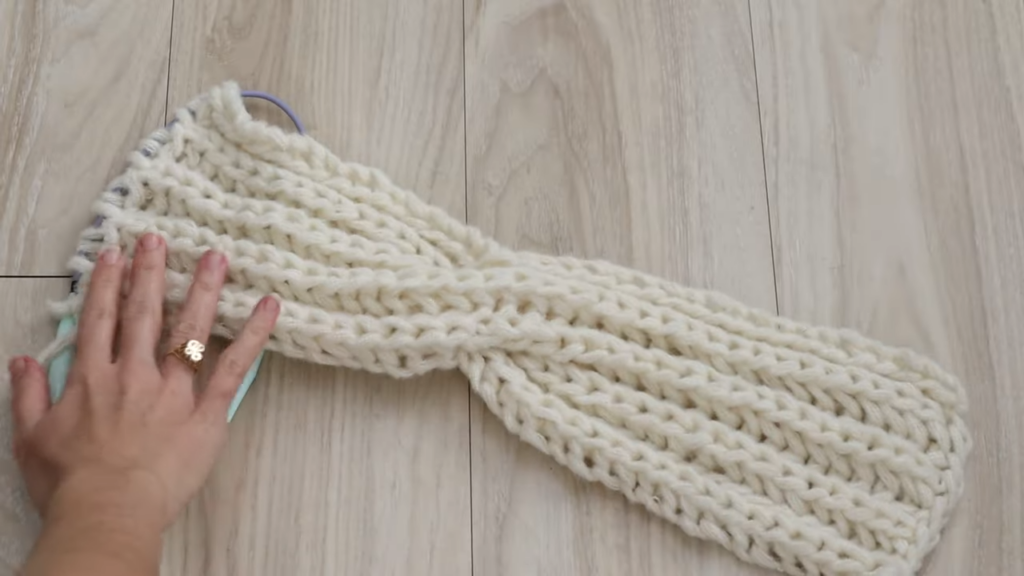
Seam the cast-on and bind-off edges together using a whip stitch.
Tip for Even Tension
If you notice a couple loose stitches at the edge of the cable twist area, you can even things out by pulling slack from that stitch and following it through your work until you find some tighter stitches within the cable. Let those tight stitches share some of the slack and even things out. Don't forget to check out the video tutorial to see how I did this in my ear warmer!
There you have it!
Brioche knitting might seem intimidating at first, but this ear warmer is the perfect way to get comfortable with the technique. The super chunky yarn makes it quick to complete, and the cable twist adds just enough interest to keep you engaged without overwhelming a beginner.
If you wanted to improve upon this pattern, I'd suggest trying to "graft" the cast on and bind off edges together for a perfectly seamless look! This involves starting with a provisional cast on and you can check out a tutorial I found for grafting brioche here:
So I'd love to see your finished ear warmers! Tag me wherever you are online so I can see 'em!
Happy knitting!