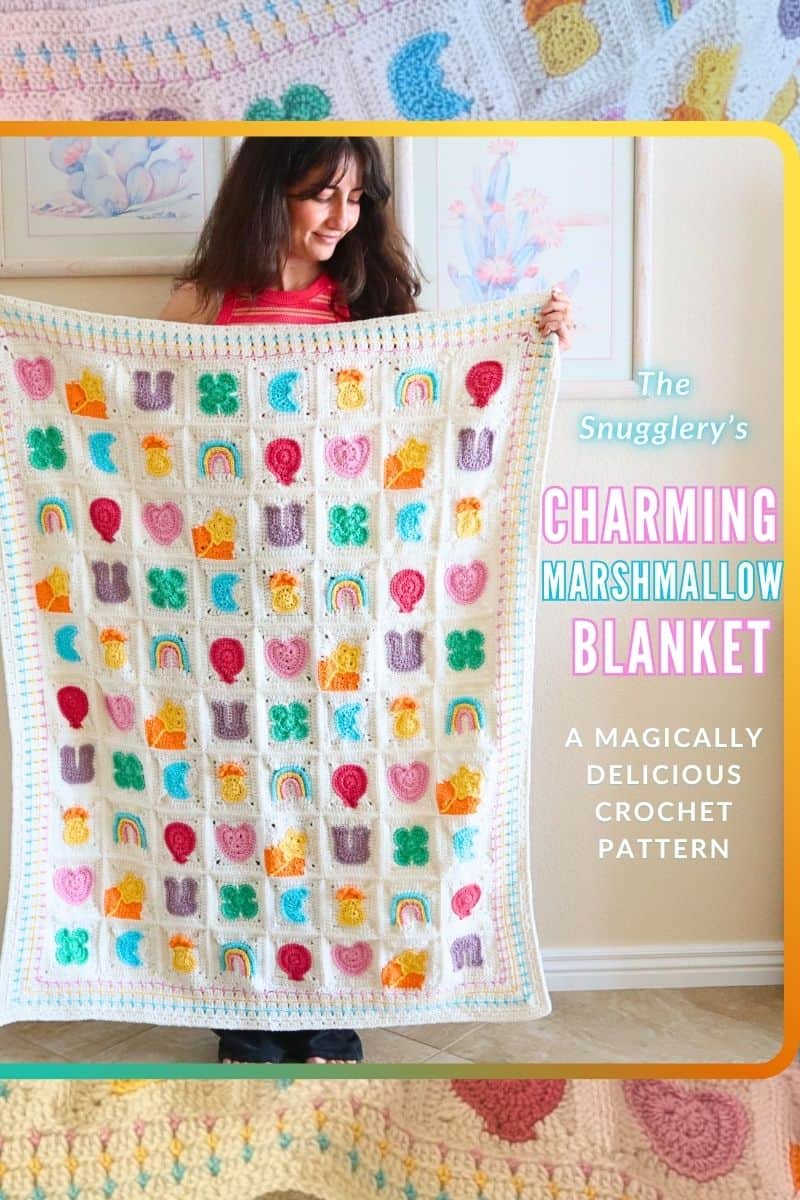
The Charming Marshmallow Blanket - A Magically Delicious, Free Crochet Pattern!
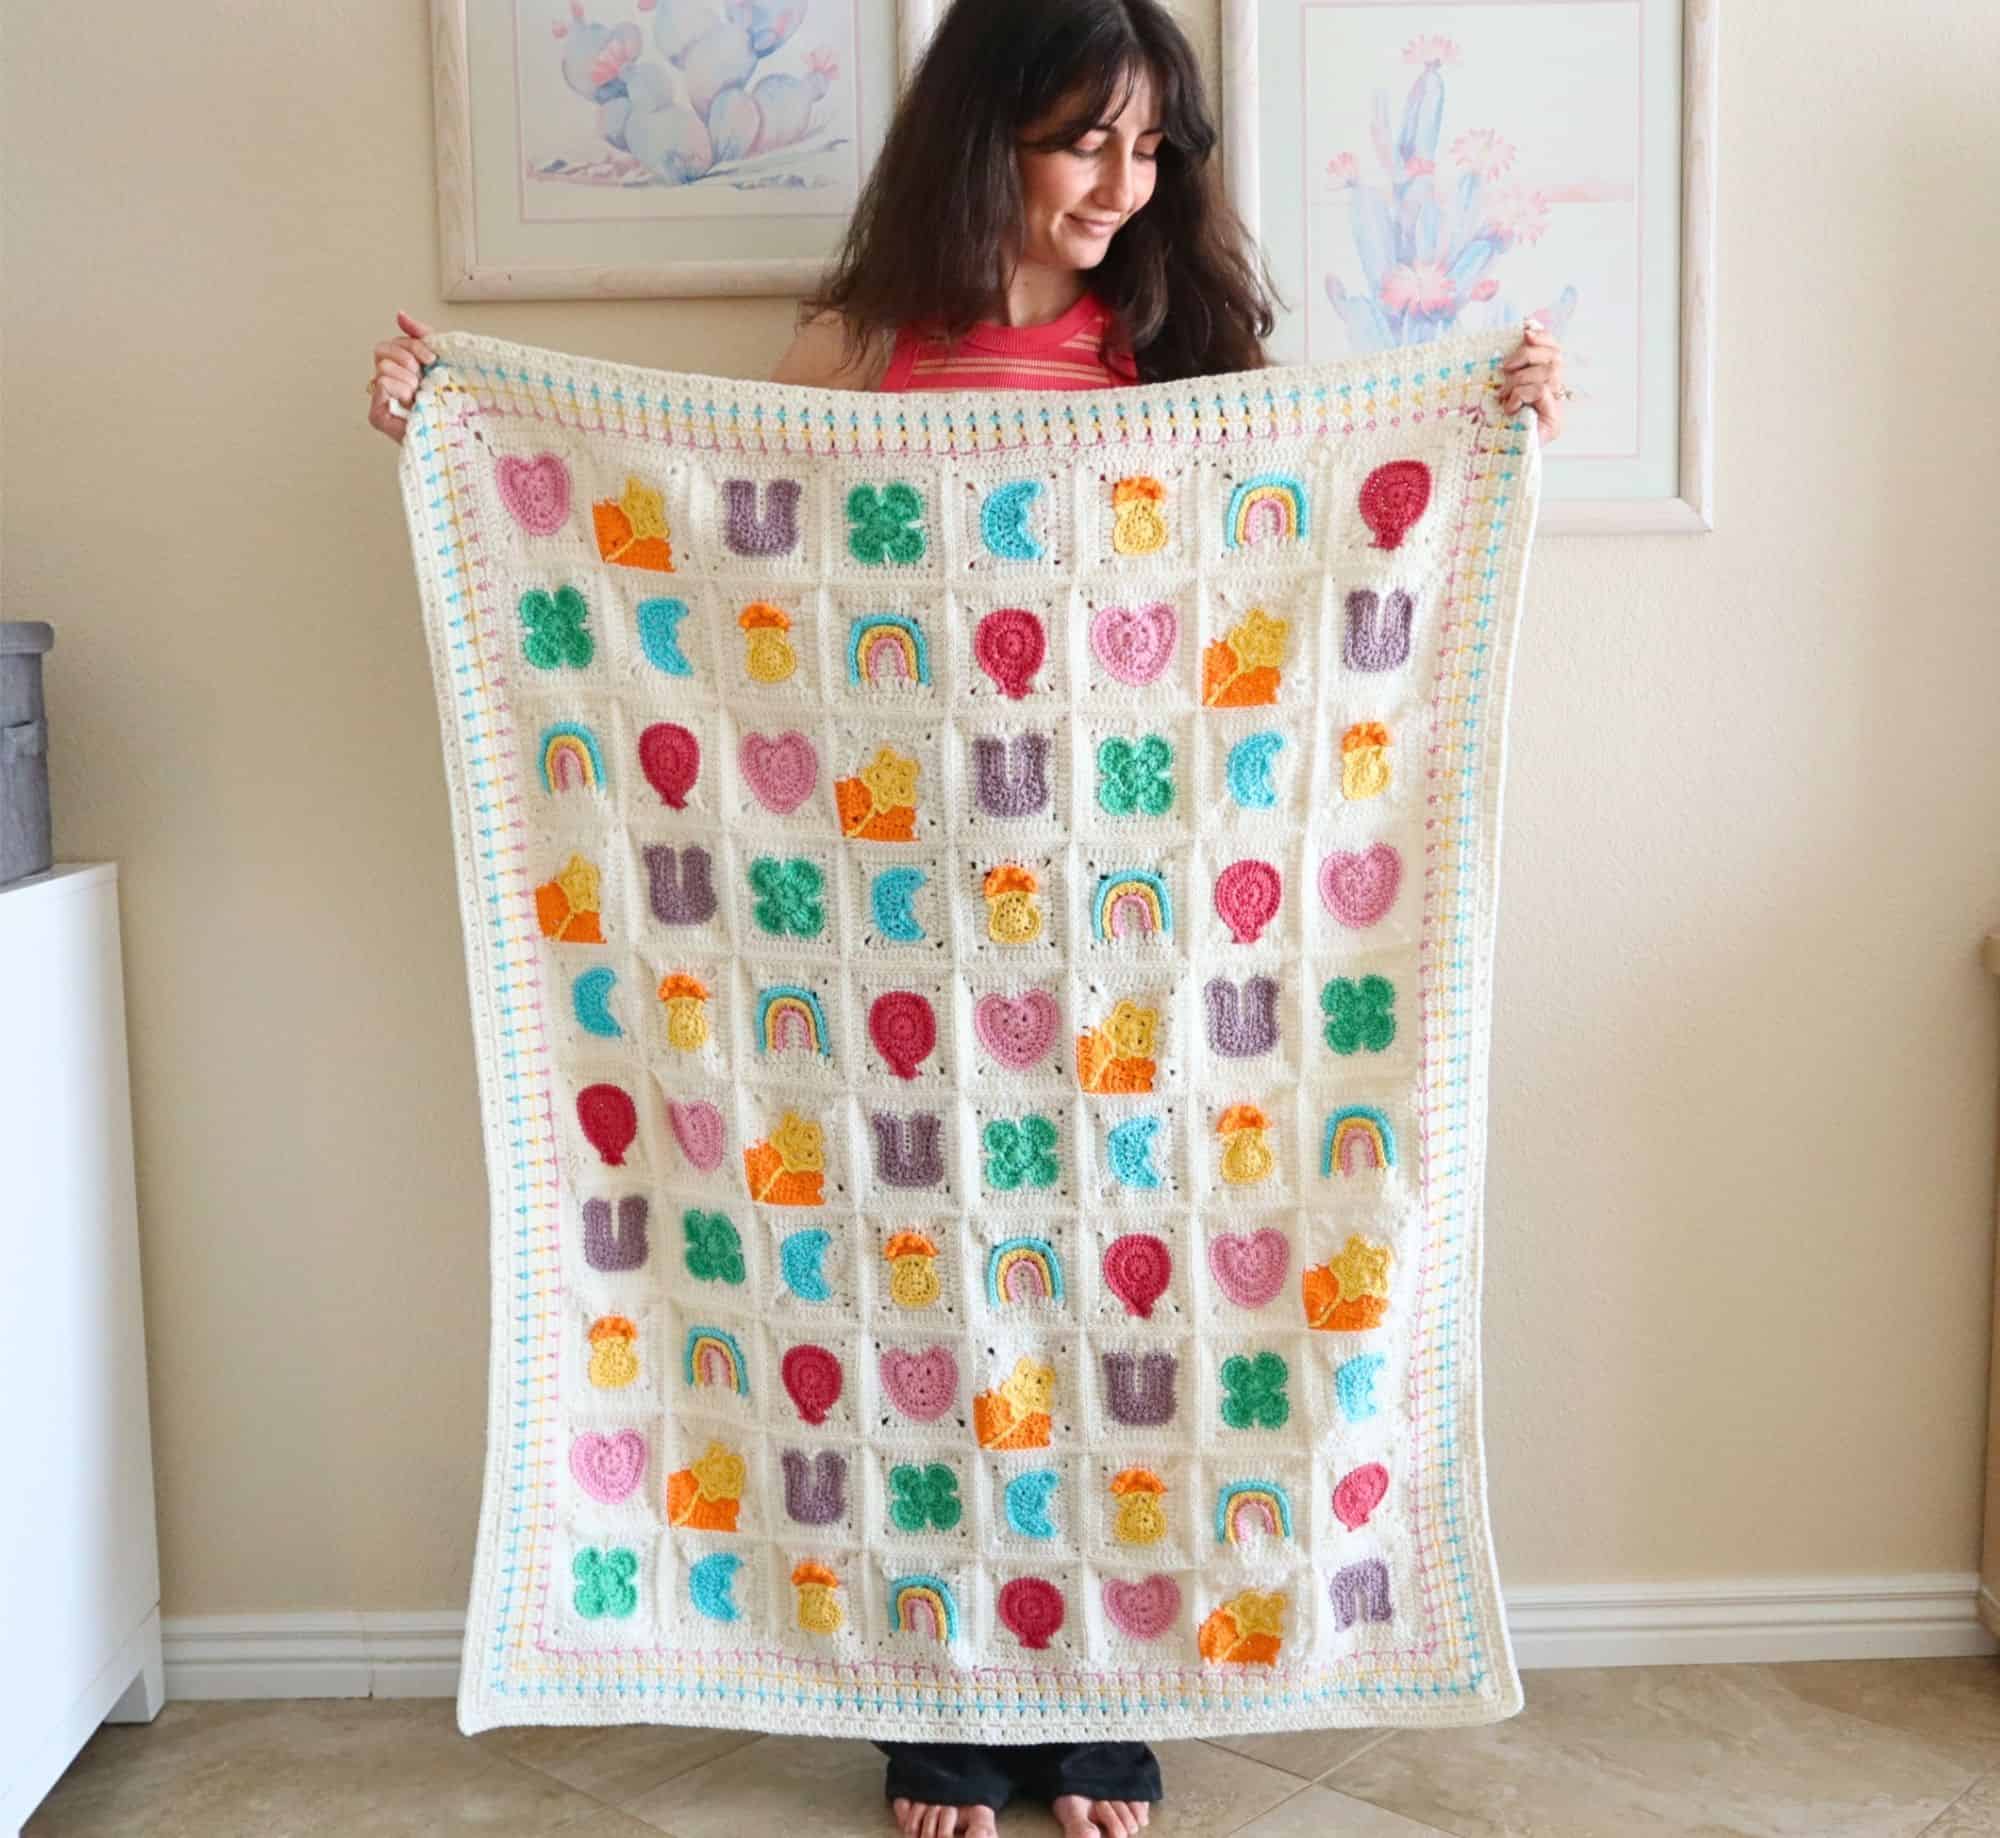
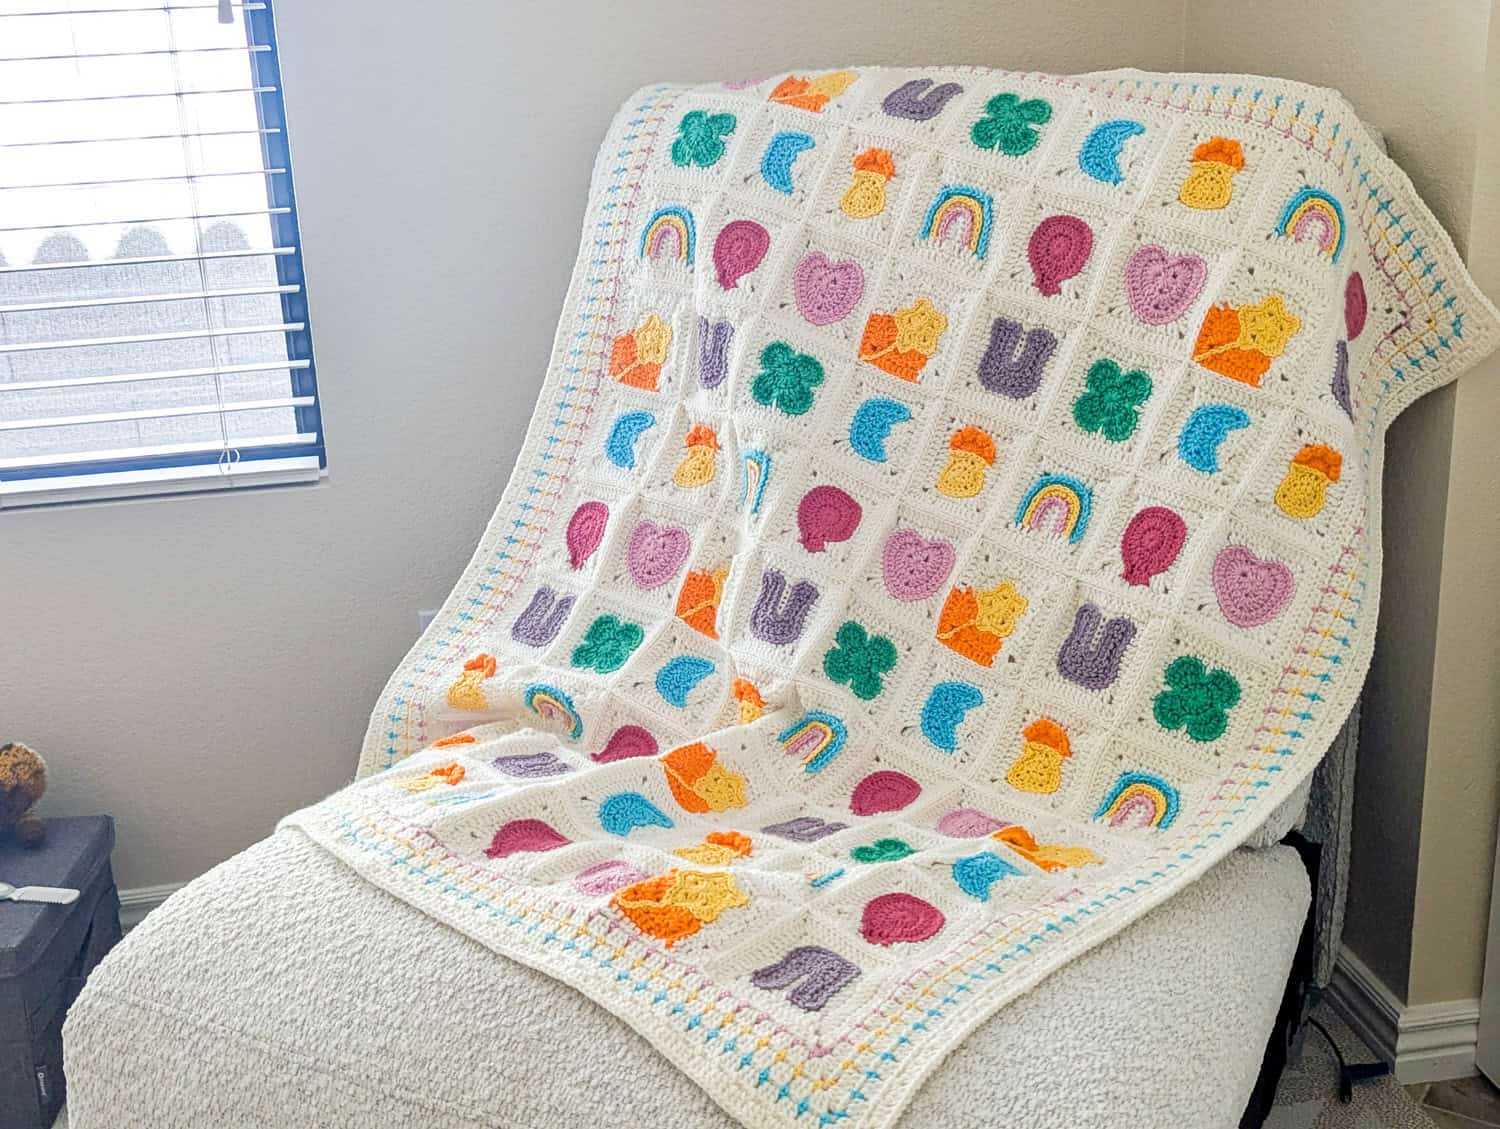
A bowl of Lucky Charms is a near daily fixture in my house. We love them so much that, after my baby was born, I wanted to have a blanket featuring those charming iconic marshmallow shapes. I thought they suited a baby blanket so well, so I set out looking for granny squares for each sort of marchmallow.
After a bit of digging, I noticed that even "common" shapes, like the heart and clover, were floating around online in granny square tutorials here and there. But they weren't exactly like their marshmallow counterparts. And the less common shapes? Forget about it! (Can you believe no one has crocheted that specific pot of gold before? haha).
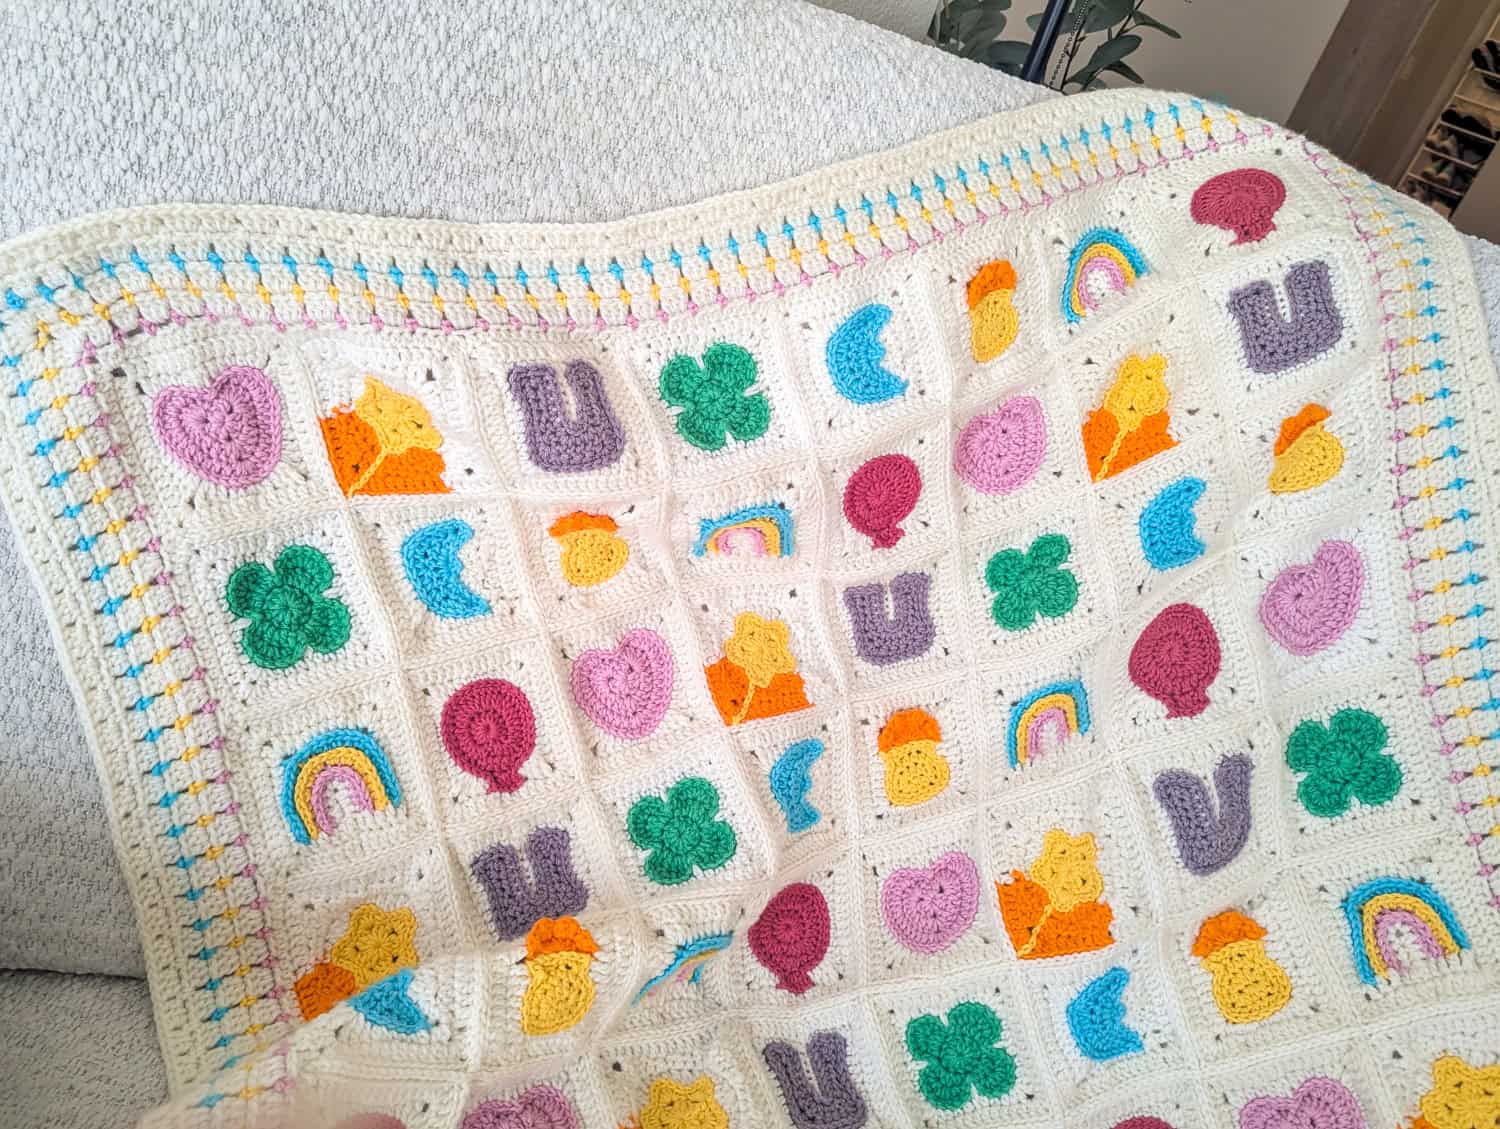
I needed a heart that was round and chubby. I needed a moon with a nose. I needed a very specific, strange little "horseshoe-esk" shape. Then... when you factor in the fact that they all need to have the same outer stitch count in order to be seamed together, it became obvious that I would have to write a pattern for each square... from scratch!
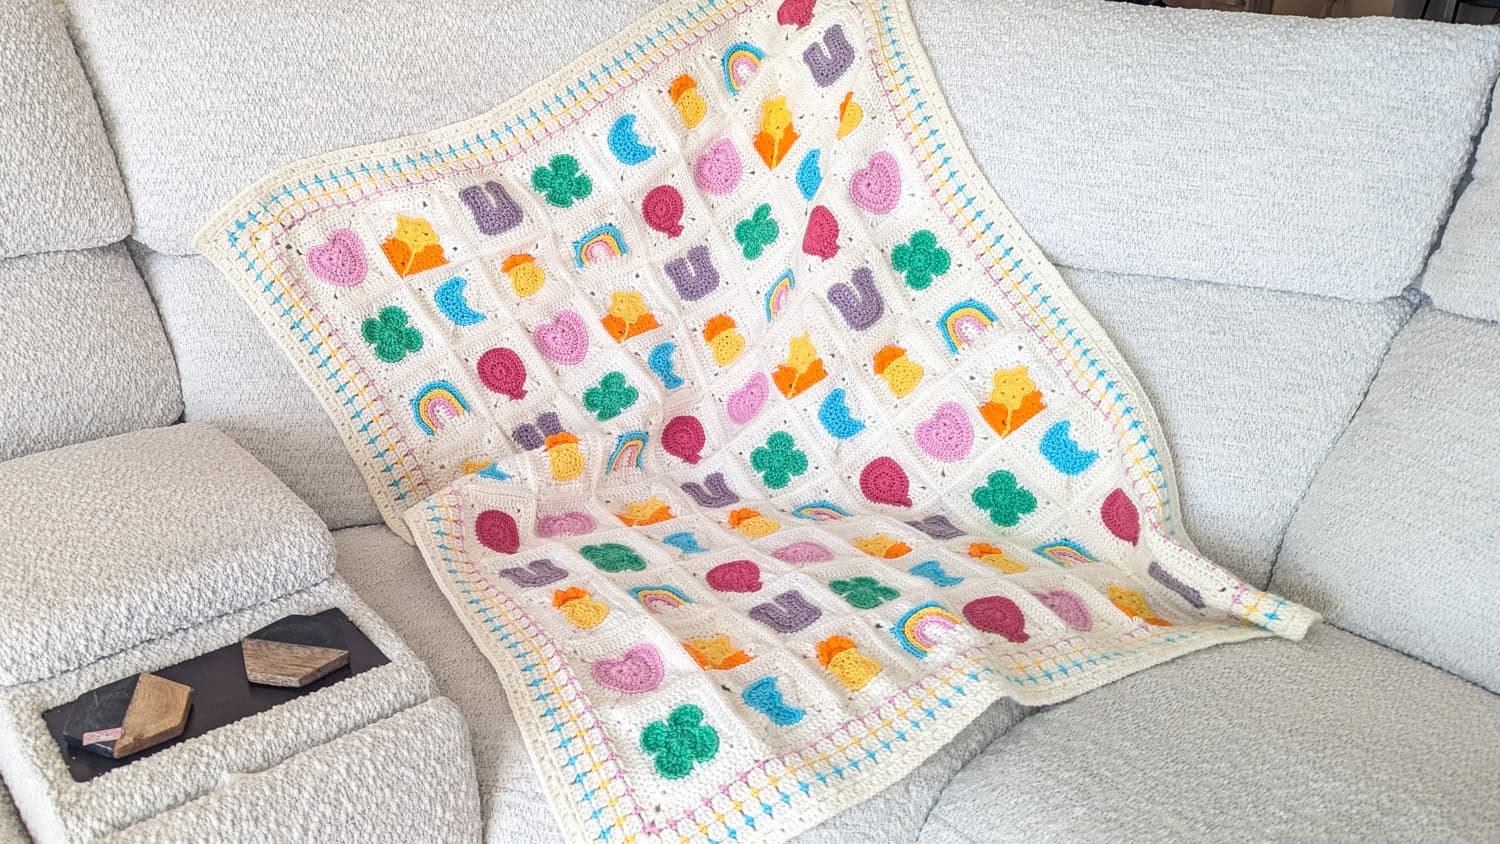
So that's what I did! Painstaking prototyping for each sort of square. It wasn't easy and there was a lot of frogging and erasing instructions, but when I really got a square down, it motivated me to keep trying and finish the whole lot of eight.
Speaking of the eight marshmallows. Let me introduce you guys if you're not familiar already.
We have...
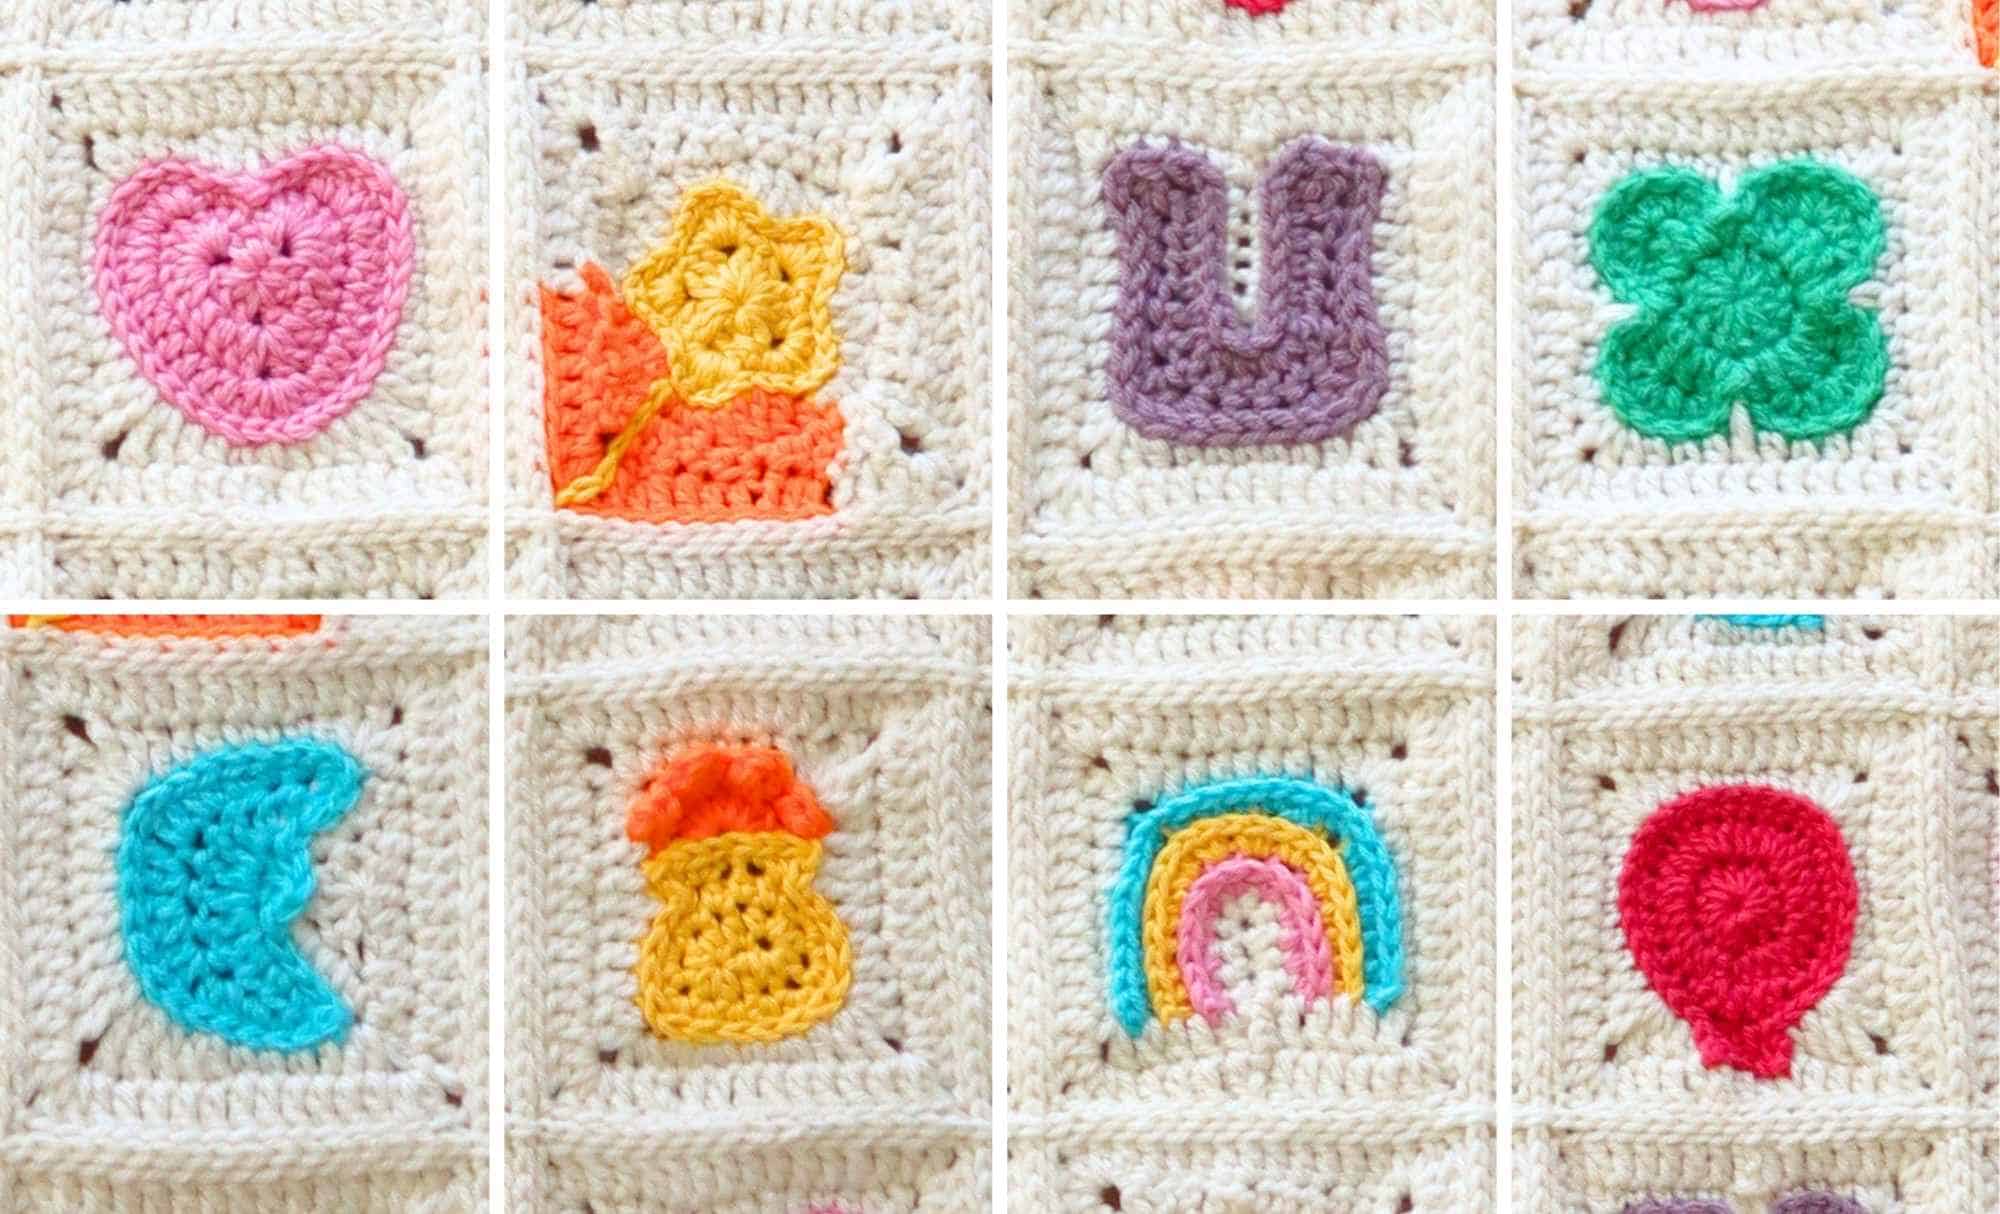
Each square got it's own step-by-step tutorial over on my Youtube channel. Most of the tutorials are about 10-15 mins long so, as you could imagine, I thought that having the written patterns for each square in one blog post would be kinda tricky to pull off.
So below, you'll find each square in a little accordion menu. Click the plus sign to drop down the instructions for your chosen square. I'll also link to more in-depth instructions on my dedicated granny square blog, when available.
Hook size, yarn and gauge
Before we get into the patterns, let's talk about the materials, hook size and stats of these squares.
- Hook: 4.5mm (US G+)
- Yarn: Worsted weight. One main border color and 7 marshmallow colors (pink, yellow, orange, purple, green, blue, red). Roughly 200 yards (180m) of each marshmallow color and 900 yards (825m) of the border color.
- Gauge: Each finished square measures a little over 4" across
Square count
I made a total of 80 squares and arranged them in an 8 x 10 grid for my blanket (more details about the layout below). Yarn estimates are based on this. But feel free to make a blanket with any number of squares!
Eight Charming Marshmallow Granny Square Instructions⤵
*Step-by-step photo tutorial available at my dedicated granny square site.*
To begin, with pink yarn, ch4, sl st to the first chain to create a ring.
Round 1
Ch3 (counts as 1dc) and make 2 more dc into the ch4 ring. *Ch1, 3dc into the ring* repeat once more. Ch1 and sl st to top of starting ch3 to complete the rnd.
Round 2
Sl st into the next stitch to reposition the yarn. Skip 1dc, Work 7dc in the next ch sp. Make 1dc in each of the next 3 sts. Into the next ch sp, work 2dc, ch1, 2dc. Make 1dc in each of the next 3 sts. Work 7dc in the next ch sp. Sl st to the first sl st to complete the rnd.
Round 3
1Sc in each of the next 2 sts. 2dc in each of the next 4 sts.
1dc in each of the next 6 sts. Into the ch sp, 2dc, ch1, 2dc.
1dc in each of the next 6 sts. 2dc in each of the next 4 sts. 1sc in each of the next 2sts. Sl st to the slst from prev rnd to complete the rnd. Fasten off.
Squaring The Heart
Fasten on border color at ch 1 sp (bottom of heart). 1sc in ch sp. 1sc in next st. 1hdc in next, 1dc in next. In the next stitch, make 1dc and 1tc. Ch2 and make 1tc and 1dc in the next st. 1dc in next. 1 hdc in each of next 2 sts.
You've worked the first corner and are half way up the side of the heart
1sc in each of next 4 sts. In next st work 1sc and 1hdc. Ch2, 1dc and 1hdc in next st. 1hdc in next st. 1sc in next st. 1hdc in the next stitch. 1dc in the next stitch.1dc in the sl st of the prev rnd.
You've reached the center top of the heart shape
1dc in the next st, 1hdc in the next st, 1sc in the next st. 1hdc in the next stitch. Into the next stitch, work 1hdc and 1dc. Ch2, 1hdc and 1sc into the next st. 1sc in each of the next 4 sts.
You've just worked your 3rd corner and are half way down the other side of the heart
1hdc in each of the next 2 sts. 1dc in the next st. Into the next st, work 1dc and 1tc. Ch2, 1tc and 1dc in the next st. 1dc in the next st. 1hdc in the next st. 1sc in the next st. Sl st to the top of your first sc to complete the rnd.
Round 5
Ch3 (counts as 1dc) and work 1dc in each stitch from the prev rnd. Into the ch2 corner, work 2dc, ch2, 2dc.
Work 1dc in each stitch along the side of the heart. Into the first top ch2 corner, work 2dc, ch2, 1dc.
Continue working 1dc in each st from prev rnd. in 2nd top ch2 corner, work 1dc, ch2, 2dc. Work 1dc in each stitch along the other side of the heart. Into the last, bottom ch2 corner, work 2dc, ch2, 2dc. Work 1dc in each rem stitch and sl st to starting ch3 to complete the rnd. (15dcs between each corner)
Add a surface crochet border in pink around the heart shape.
*Step-by-step photo tutorial available at my dedicated granny square site. *
Inner Star Motif
To begin, with yellow yarn, ch4, sl st to the first chain to create a ring. Alternatively, you can use a magic ring.
Round 1
Ch3 (counts as 1dc) and make 2 more dc into the ch4 ring. *Ch1, 3dc into the ring* repeat between ** 3 more times. Ch1 and sl st to top of starting ch3 to complete the rnd. (5 3dc clusters, 5 ch1 sps)
Round 2
Without chaining, skip the next dc sts and into the next ch1 sp, work 1sc, 1hdc, 1dc, ch1, 1dc, 1hdc, 1sc all into the chain space.
Skip the next 3dc cluster and again, into the ch sp work 1sc, 1hdc, 1dc, ch1, 1dc, 1hdc, 1sc. Continue working 1sc, 1hdc, 1dc, ch1, 1dc, 1hdc, 1sc into each ch1 sp from the prev rnd. Sl st to the first sc to complete the rnd. Fasten off yellow.
Round 3
Attach your border color at any chain 1 space. *1sc in the ch sp. 1hdc in the next st. 1dc in the next st. Dc2tog across the next two sts (two scs from the prev rnd). 1dc in the next st, 1hdc in the next st.* Repeat between ** two times. Work 1sc in the next ch 1 sp (4th star point) then switch to orange yarn (leave border yarn attached) and continue the repeat stitch pattern until you've worked into every stitch from the prev rnd. Sl st to the first sc to complete the rnd.
Squaring The Star
We have a beautiful circle around the star but it is two stitches too few for the squaring process. To add a stitch, still in the orange yarn, ch2 (doesn't count as a stitch) and work 1dc into the sl st from the prev rnd, this will add 1 to your stitch count.
Then, work 1hdc, 1hdc, 1sc, 1hdc, 1hdc, 1dc across the next six sts. In the next stitch, work a "corner" by making (1dc, 1tr, ch2, 1tr, 1dc) all in the same stitch. Across the next 7 sts, work 1dc, 1hdc, 1hdc, 1sc, 1hdc, 1hdc, 1dc (change to border color after the sc).
Make another corner (1dc, 1tr, ch2, 1tr, 1dc all in the same stitch) and begin the 1dc, 1hdc, 1hdc, 1sc, 1hdc, 1hdc, 1dc "flat side" sequence again. This time, to add that second stitch we need, work the 1hdc and 1sc into the same stitch this time only.
Make the 3rd corner. Repeat the 1dc, 1hdc, 1hdc, 1sc, 1hdc, 1hdc, 1dc sequence across the next 7 sts. Make the final corner and sl st to the first dc of the rnd to complete the rnd.
Round 5
Ch3 and turn, still in border color (counts as 1dc) and work 1dc in each stitch from the prev rnd. Into each ch2 corner, work 2dc, ch2, 2dc.
When you reach your color change, work 1 border color stitch into the first orange, then change to orange yarn for the remainder of the square. Sl st to the starting ch 3 to complete the rnd.
Surface Crochet Border And Shooting Star Flair
Reattach your yellow yarn at the outer, orange corner. With the yarn held in back, work a line of surface crochet towards your star. Then, keeping the yarn in back, make a surface crochet border around the star shape. Fasten off.
*Step-by-step photo tutorial available at my dedicated granny square site.*
Row 1 - Inner Space of the Horseshoe
In border color, ch7. Skip the first ch (doesn't count as a stitch) and make 1sc in each of the next 5chs. In the first chain, make 5sc, tilting your work to work on the underside of the foundation chain. Make 1sc in each of the next 5 chains along the underside of your foundation chain.
Row 2 - Horseshoe motif
Change to purple color but leave border yarn attached to pick up later. Ch3 and turn (doesn't count as a stitch) 1tr in the first st. 1dc in the next st. 1hdc in each of the next 3 sts. *1dc in the next st. 3dc in the next st* rep between ** once more, 1dc in next st. 1hdc in each of the next 3 sts, 1dc in the next stitch, 1tr in the last st.
Row 3
Ch2 and turn (doesn't count as a st). 1dc in the first st, 1hdc in the next. 1sc in each of the next 4 sts. 1hdc and 1dc in the next st, 1dc and 2hdc in the next st. 1sc in each of the next 3 sts. Working in reverse order of what we just did: 2hdc and 1dc in the next st, 1dc and 1hdc in the next, 1sc in the next 4 sts, 1hdc in the next, 1dc in the last st.
Fasten off purple color but leave a long tail for the surface crochet edge detail at the end.
Squaring The Horseshoe
Pick up the border color in the bottom center of the motif and chain 1 (doesn't count as a stitch). Working along the bottom edge of the motif, work 1hdc in the center of the border color piece we made at the beginning.
Work 4 sc evenly along the bottom edge. In the dc from the start of the prev row, work 1sc, 1hdc, ch2, 2sc all in that same st.
You just worked halfway along the bottom of the motif and completed the first corner
1hdc in the next st, 1dc in each of the next 3 sts. 1hdc in each of the next two sts. 1sc in the next st. Into the next st, work 2hdc, ch2, 1dc, 1 hdc all in the same st.
You just worked along the right side of the motif and completed the second corner
Work 1hdc in the next st, work 1sc in each of the next 5sts. 1hdc in the next st. Into the next st, work 1hdc, 1dc, ch2, 2hdc all in the same st.
You just worked along the top of the motif and completed the third corner
Work 1sc in the next st, work 1hdc in each of the next two sts. Work 1dc in each of the next 3 sts. 1hdc in the next st. Into the last st of he prev row, work 2sc, ch2, 1hdc, 1sc all in that same st. Evenly work 4 sc along the bottom edge. Sl st to the starting hdc to complete the rnd.
Round 5
Ch3 (counts as 1dc). Do not turn your work. Work 1dc in each stitch from the prev rnd. Into the first ch2 corner space, work 1dc, ch2, 2dc. Continue working 1dc in each st from prev rnd and work 2dc, ch2, 2dc into the next two corner ch2 spaces. Into the last corner ch2 space, work 2dc, ch2, 1dc. And then after working each corner and 1dc in each stitch, sl st to starting ch3 to complete the rnd. (15dcs between each corner)
Surface Crochet Outline
With right side facing you, insert hook into a stitch on the outter edge of your horseshoe and find that long yarn tail we left earlier.
Keeping the yarn in back work in surface crochet around the outline of the horseshoe shape making sure to highlight the distinctive points on the ends. This has the added benefit of closing up the gappy stitches at the bottom of the horseshoe.
*Step-by-step photo tutorial available at my dedicated granny square site.*
Inner Clover Motif
To begin, with the green yarn, ch4, sl st to the first chain to create a ring. Alternatively, you can use a magic ring.
Round 1
Ch3 (counts as 1dc) and make 11 more dc into the center of your ch4 ring. Sl st to the top of your starting ch3 to complete the rnd. (12dc)
Round 2
Ch2 (counts as 1hdc) and make 1 hdc in the same stitch. *2hdc in the next st* rep to the end of the rnd. Sl st to starting ch 2 to complete the rnd. (24hdc)
Round 3
Sl st to the next st. *skip 1 st, 2dc in the next st, 3dc in the next st, 2dc in the next. skip 1 st, sl st in the next st.* rep between ** to the end of the rnd, making your final sl st into the sl st from the start of the rnd to complete the rnd. Fasten off green yarn with a very long tail (about 3 yards) for the surface crochet detail at the end.
Squaring The Clover
Pick up the border color in any slip stitch. *Work 1 spike dc all the way down into the top of the stitch from rnd 1 directly below the sl st.
Working back up on the prev rnd, 1hdc in the next st, 1sc in the next, 1hdc in the next, (1hdc, 1dc, ch 1, 1dc 1hdc) all in the next stitch to make a corner in corner. 1hdc in the next st, 1sc in the next st, 1hdc in the next st.* Rep between ** to the end of the rnd. Sl st to the top of the first spike dc to complete the rnd.
Round 5
Ch3 (counts as 1dc). Do not turn your work. Work 1dc in each stitch from the prev rnd. Into the corner ch2 sps, work 2dc, ch2, 2dc. Sl st to starting ch3 to complete the rnd. (15dcs between each corner)
Surface Crochet Outline
With right side facing you, insert hook into the side of the spike dc stitch and pull up a loop from the clover yarn tail. Work in surface crochet around the outline of the clover shape taking care to work down and around the spike dc stitches.
I found that adding an extra chain right at the lower tip of the spike stitch improved the look of the "dips" between clover leaves.
*Step-by-step photo tutorial available at my dedicated granny square site.*
Row 1 - Semicircle to build moon on
In border color, Ch5 (counts as ch1, 1dc) and make 5 more dc into the first chain (6dc)
Row 2 - Continuing the semicircle and adding the "nose"
Ch1 (does not count as a stitch), and turn. 2hdc in the first st, 2hdc in the next st. Switch to blue color and work 2hdc in the next stitch while carrying the border color. Switch back to border color and make 2hdc in each of the next 2 sts while carrying the blue yarn. Leave the blue working yarn out, in back of your work, to pick up later and work 2hdc in border color in the last dc (prev row's starting ch) to complete the row. (12hdc)
Row 3 - First moon motif row
Don't fasten off border color but remove hook (use a stitch marker or other method to save live loop). Pick up blue yarn through the previous border color stitch.
Ch1, turn, 1sc in the next st. 1hdc in the next st. 1hdc and 1dc in next st, 2dc in each of next two sts, 1dc and 1hdc in next st, 1hdc in the next, 1sc in the next st, sl st in the next st.
Row 4 - Second moon motif row
Ch1, turn. skip the slipped stitch from prev row, work 2sc in the next st. Work the following stitch sequence across the next twelve sts: 1sc, 1hdc, 2hdc, 2dc, 2dc, 2dc, 2dc, 2hdc, 1hdc, 1sc, 1sc. Sl st into the next hdc of the border color. Fasten off blue yarn but leave a long tail for a surface crochet outline at the end.
Squaring The Moon
Pick up the border color live stitch. Ch3 (counts as 1dc) do not turn your work. Work one more hdc into the same st. Evenly work 7 hdc along the underside of our starting half circle towards the opposite corner of the moon. Into the very corner of the moon (the sl st or turning chain from last moon row), work 1hdc, 1dc, ch2, 1dc, 1hdc.
You've worked a row of border color along the right side of the moon, completing the top right corner.
1hdc in the next moon st. 1sc in each of the next 3 moon sts. 1hdc in the next st. 1hdc in the next, 1dc in the next. Into the next moon st, work 1dc, 1tr, ch2, 1tr, 1dc, all in the same st.
You've worked a row of border color along the top of the moon, completing the top left corner.
2dc in each of the next 3sts. 1dc in the next st. Into the next st work 1dc and 1tr. Ch2, and into the next st work 2tr.
You've worked a row of border color along the back of the moon, completing the bottom left corner.
Across the next 6 sts, work the following sequence: 1dc, 2hdc, 1sc, 1sc, 1sc, 1hdc. And in the same stitch as your starting ch3, work 1hdc, 1dc. Ch2 and sl st to the top of your starting ch3 to complete the rnd.
Round 6
Ch3 (counts as 1dc) and work 1dc in each stitch from the prev rnd. Into the ch2 corner, work 2dc, ch2, 2dc.
Continue working 1dc in each st from prev rnd and work 2dc, ch2, 2dc into corner ch2 spaces. Sl st to starting ch3 to complete the rnd. (15dcs between each corner)
Surface crochet outline
With right side facing you, insert hook into the corner of the moon and pull up a loop from the moon yarn tail.
Work in surface crochet around the outline of the moon shape, taking care to highlight the little "nose."
Round 1: In yellow yarn, ch4. Skip the first ch, make 1hdc in each of the next 3 chs. 3 more hdc in last ch. Working in underside of chain, hdc 3 again. 3 more hdc in the last chain. Sl st to first hdc to complete the rnd (12hdc).
Round 2: hdc3, (2hdc)x3, hdc3, (2hdc)x3. Sl st to first hdc to complete the rnd (18hdc).
Handle row: 2hdc, sc 3, 2hdc. Fasten off yellow yarn
Gold row 1: Fasten on gold yarn at first hdc of prev row. 1sc, skip 2 sts, 7dc, skip 2 sts, 1sc.
Gold row 2: Ch1, turn. Skip 1 st. Working into back loops only: 2hdc, sl st, (1hdc1dc1hdc), sl st, (1hdc1dc1hdc), sl st, 2hdc, sl st. Fasten off gold yarn
Round 3: Fasten on border color to first single hdc in the underside of the pot. 1hdc, 2sc, 1sc, 2sc, 1hdc, (2dc, ch2, 2dc) - this makes your bottom edge and first corner. Then, hdc 2, 1dc, tr2, 1dc, 1tr, (2dc, ch2, 1tr1dc) - this makes your right edge and second corner. Then, 1dc, 1hdc, 2sc, 1hdc, (1hdc1dc, ch2, 1hdc1dc) - this makes your top edge and 3rd corner. Then, work dc 3, 1tr, dc 3, (1dc1hdc, ch2, 1hdc1sc)- this makes your left edge and fourth corner. Sl st to first hdc to complete round 3
Round 4: Ch3 (counts as 1dc) Make 1dc in each st from prev rnd. make 2dc, ch2, 2dc in each corner ch2 sp. Along top edge only, work dc3, 2dc, 1dc, 2dc, dc 3, between top corners. Sl st to starting ch3 to complete rnd 4.
Work surface crochet in yellow yarn around the pot shape.
*Step-by-step photo tutorial available at my dedicated granny square site.*
Row 1 - negative space under rainbow
In border color, Ch5. Skip the first ch, and work 1sc in each of the next 4 chs. In that last chain, work 4 more sc (5sc total in the last chain). Tilt your work to work along the underside of the foundation chain. Work 1sc in the underside of each of the next three chains. (11scs total)
Do not fasten off border color. You may pull the next color through the loop on your hook to close it but keep the border yarn attached for later.
Row 2 - First stripe
Pick up pink yarn, ch1 (doesn't count as a stitch) and turn. Work 1hdc in each of the next 4 sts. In each of the next 3 sts, work 2hdc. work 1hdc in each of the last 4 sts (14hdc). Fasten off pink.
Row 3 - Second stripe
Without turning your work, go back to the first stitch of row 2 and pick up yellow yarn in the back bar (camel stitch) of that first hdc.
Work 1hdc in the back bar of each of the next 4 sts. Working in the back bar of the next 6 sts, work 2hdc in each. Still working into that back bar, make 1hdc in each of the last 4 sts (20 hdc). Fasten off yellow.
Row 4 - Third stripe
Without turning your work, go back to the first stitch of row 3 and pick up blue yarn in the back bar of that first hdc. Work 1hdc in the back bar of each of the next 4 sts. Working in the back bar, across the next 12 sts, alternate 2hdc, 1hdc. Still working into that back bar, make 1hdc in each of the last 4 sts (24hdc). Fasten off blue.
Round 4 - Squaring The Rainbow
Pick up the border color in the center bottom edge of the starting piece. Ch3 (counts as 1dc) and make 5 more dc evenly along the bottom of your rainbow, making sure to put the last dc in the back bar of the first hdc from row 4. Ch 2 and work 2sc in the same back bar. 1sc in the back bar of the next 5 sts, 1hdc in the next 2 back bars. Into the next back bar, work 1hdc1dc, ch2, 2dc to make a corner.
Across the next 7 sts, still working into the back bars, make 1dc, hdc 5, 1dc. Into the next back bar, make a 2dc, ch2, 1dc1hdc corner. Across the next 9 back bars, work hdc 3, sc 6. Ch2 and evenly work 5 dc across the bottom edge of your rainbow, starting with 1dc . Sl st to the top of your starting ch3 to complete the round.
Round 5
Ch3 (counts as 1dc) and work 1dc in each stitch from the prev rnd. Into the ch2 corner, w ork 2dc, ch2, 2dc.
Continue working 1dc in each st from prev rnd and work 2dc, ch2, 2dc into corner ch2 spaces. Sl st to starting ch3 to complete the rnd. (15dcs between each corner)
In marshmallow color, ch4. Sl st to form ch4 ring
Round 1: 14hdc
Round 2: (2hdc)x6, 3hdc, 2hdc, 3hdc, (2hdc)x5 (30hdc)
Round 3: 1hdc, dc 2, 1hdc, sc 26
Balloon nibbie: sl st to next st, ch2, 2dc in next st, ch2, sl st in next st. Fasten off marshmallow color
Round 4: Fasten on border color to top of ending ch2. 1hdc, 1dc (2tr, ch2, 1tr, 1dc all in same st), 1dc, hdc 2, sc 3, 1hdc (2dc, ch2, 2dc all in same st), hdc 2, sc 3, 1hdc, 1dc, (2dc, ch2, 2dc all in same st), 1hdc, sc 3, hdc 2, 1dc, (2tr, ch2, 1tr, 1dc all in same st), 1dc, 1hdc. Sl st to top of first nibbie ch2.
Round 5: ch3 (counts as 1dc) make 1dc in each st from prev rnd, 2dc, ch2, 2dc in each ch2 corner sp.
Work a surface crochet border around the outside of the balloon shape.
A couple of notes about the 8 marshmallow granny squares:
- Each square (besides the rainbow) features a surface crochet outline of stitches at the end, to highlight the shape. You may leave a long tail to prepare for this or reattach your marshmallow color yarn. I did a mix of both, actually!
- I posted some of these squares in slightly different forms over on my dedicated granny square blog, The Granny Square Fair. Some details about the squares over on that site might be slightly different than what I mention in the videos.
- Each square should have 15 double crochet stitches between chain space corners on their final rounds.
Weaving in ends
I learned A LOT about weaving in ends over the course of this project. When you count 'em all up, there are 400 ends to weave in for this blanket alone.
You read that right.
400 ends!
Don't let that discourage you, though. Weaving in ends is less intimidating when you have a plan and principles to follow. I may do a dedicated blog post on weaving in ends. In the mean time, enjoy this video where I share my end weaving techniques
Layout
I wanted to stay true to the beloved jingle from the 1990's. I think every 90's kid can still hear it in our heads!
Hearts, Stars, Horseshoes, Clovers and Blue Moons, Pots of Gold and Rainbows... and Red Balloons!
So, of course, I had to lay out my squares in proper jingle order. But, I realized that If I just went 8 by 8, I would only have a square blanket. To make it rectangular, I added two more rows of squares.
10 rows and 8 columns meant I needed 80 squares, 10 of each motif.
Then, there was the question of how to lay out the squares. I tried a few different configurations, keeping the jingle order consistent.
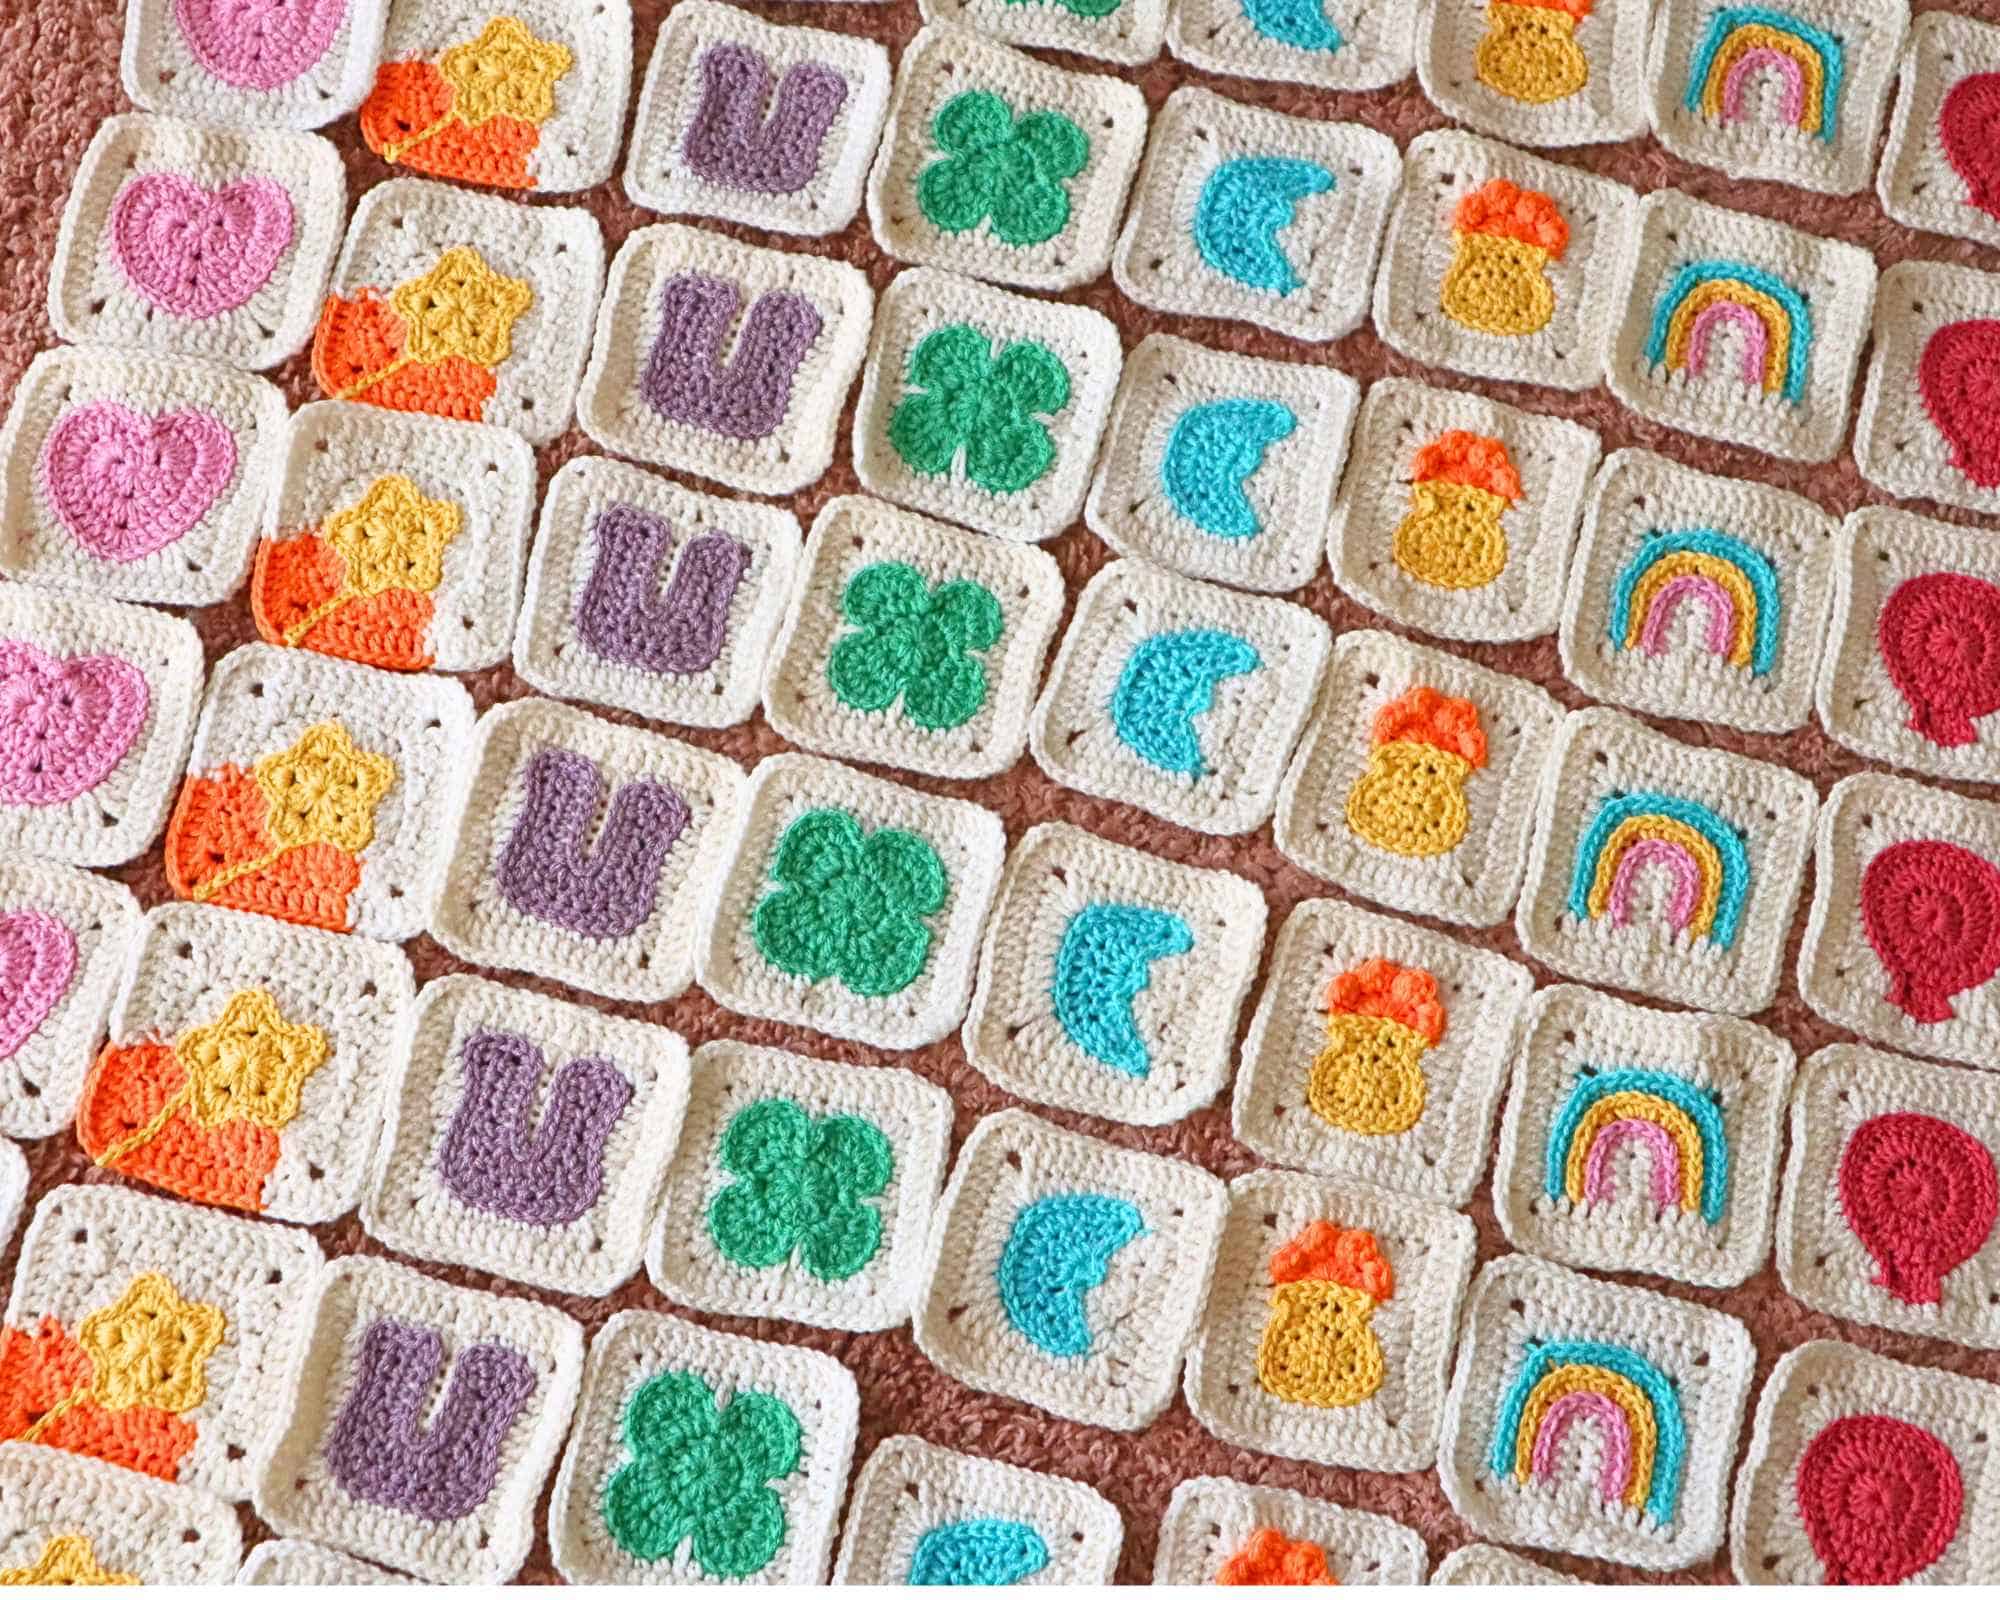
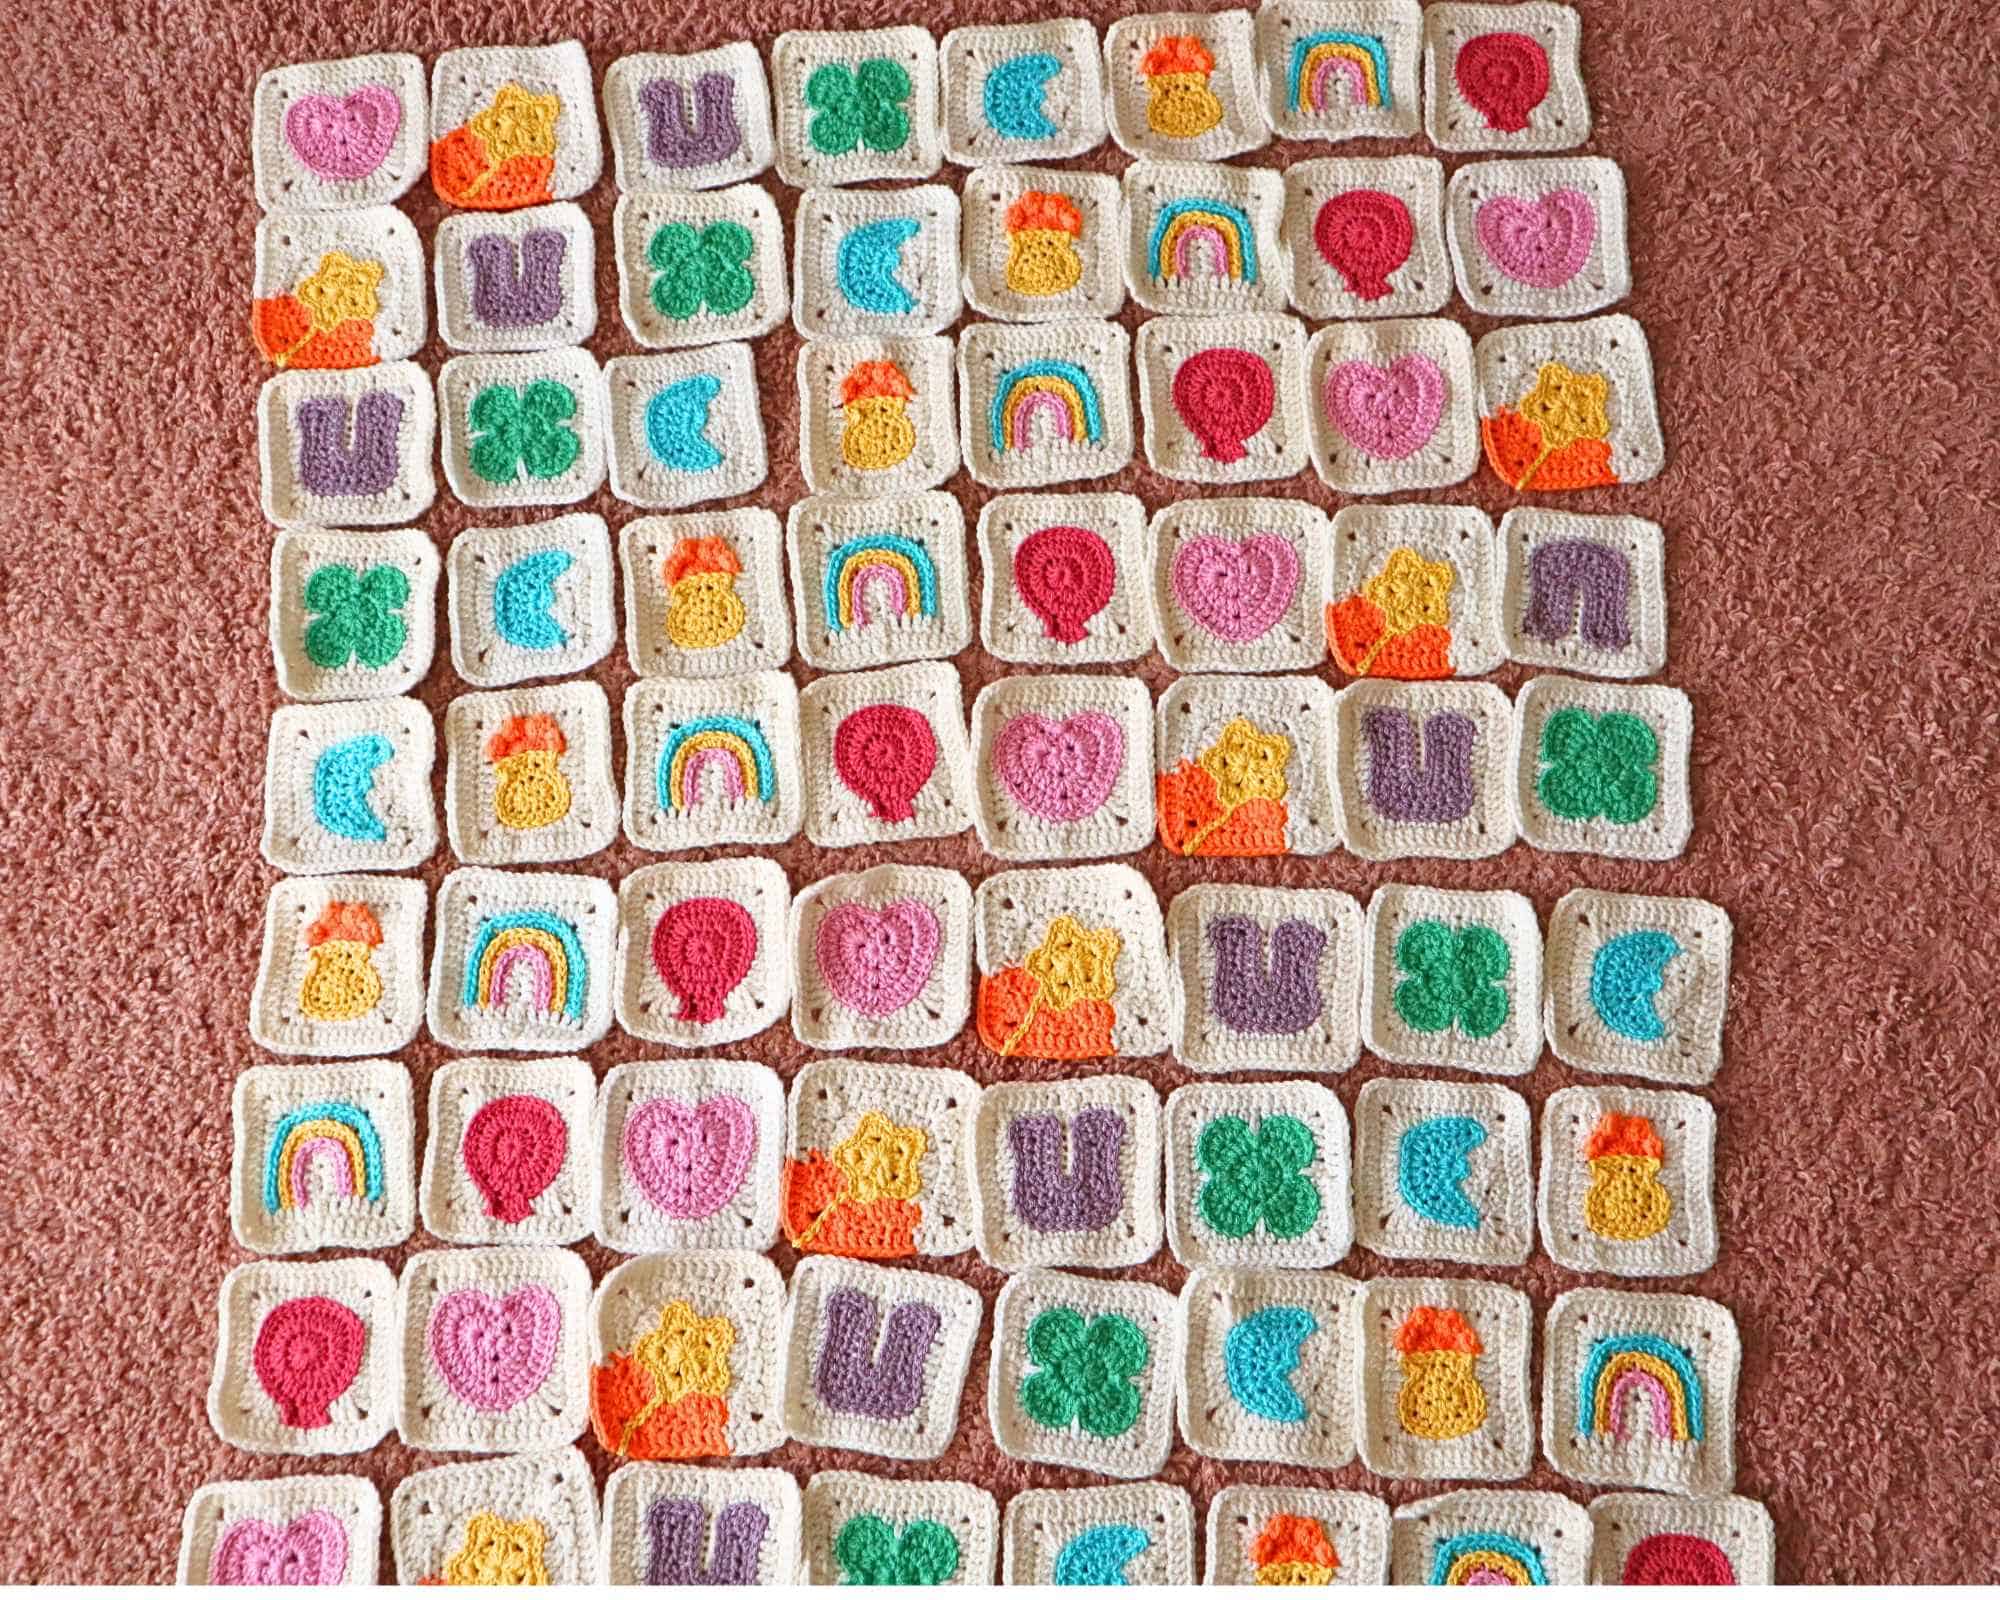
But I thought that any obvious visible pattern (like having all the marshmallows in a row or diagonal) wasn't in the spirit of a random bowl of cereal!
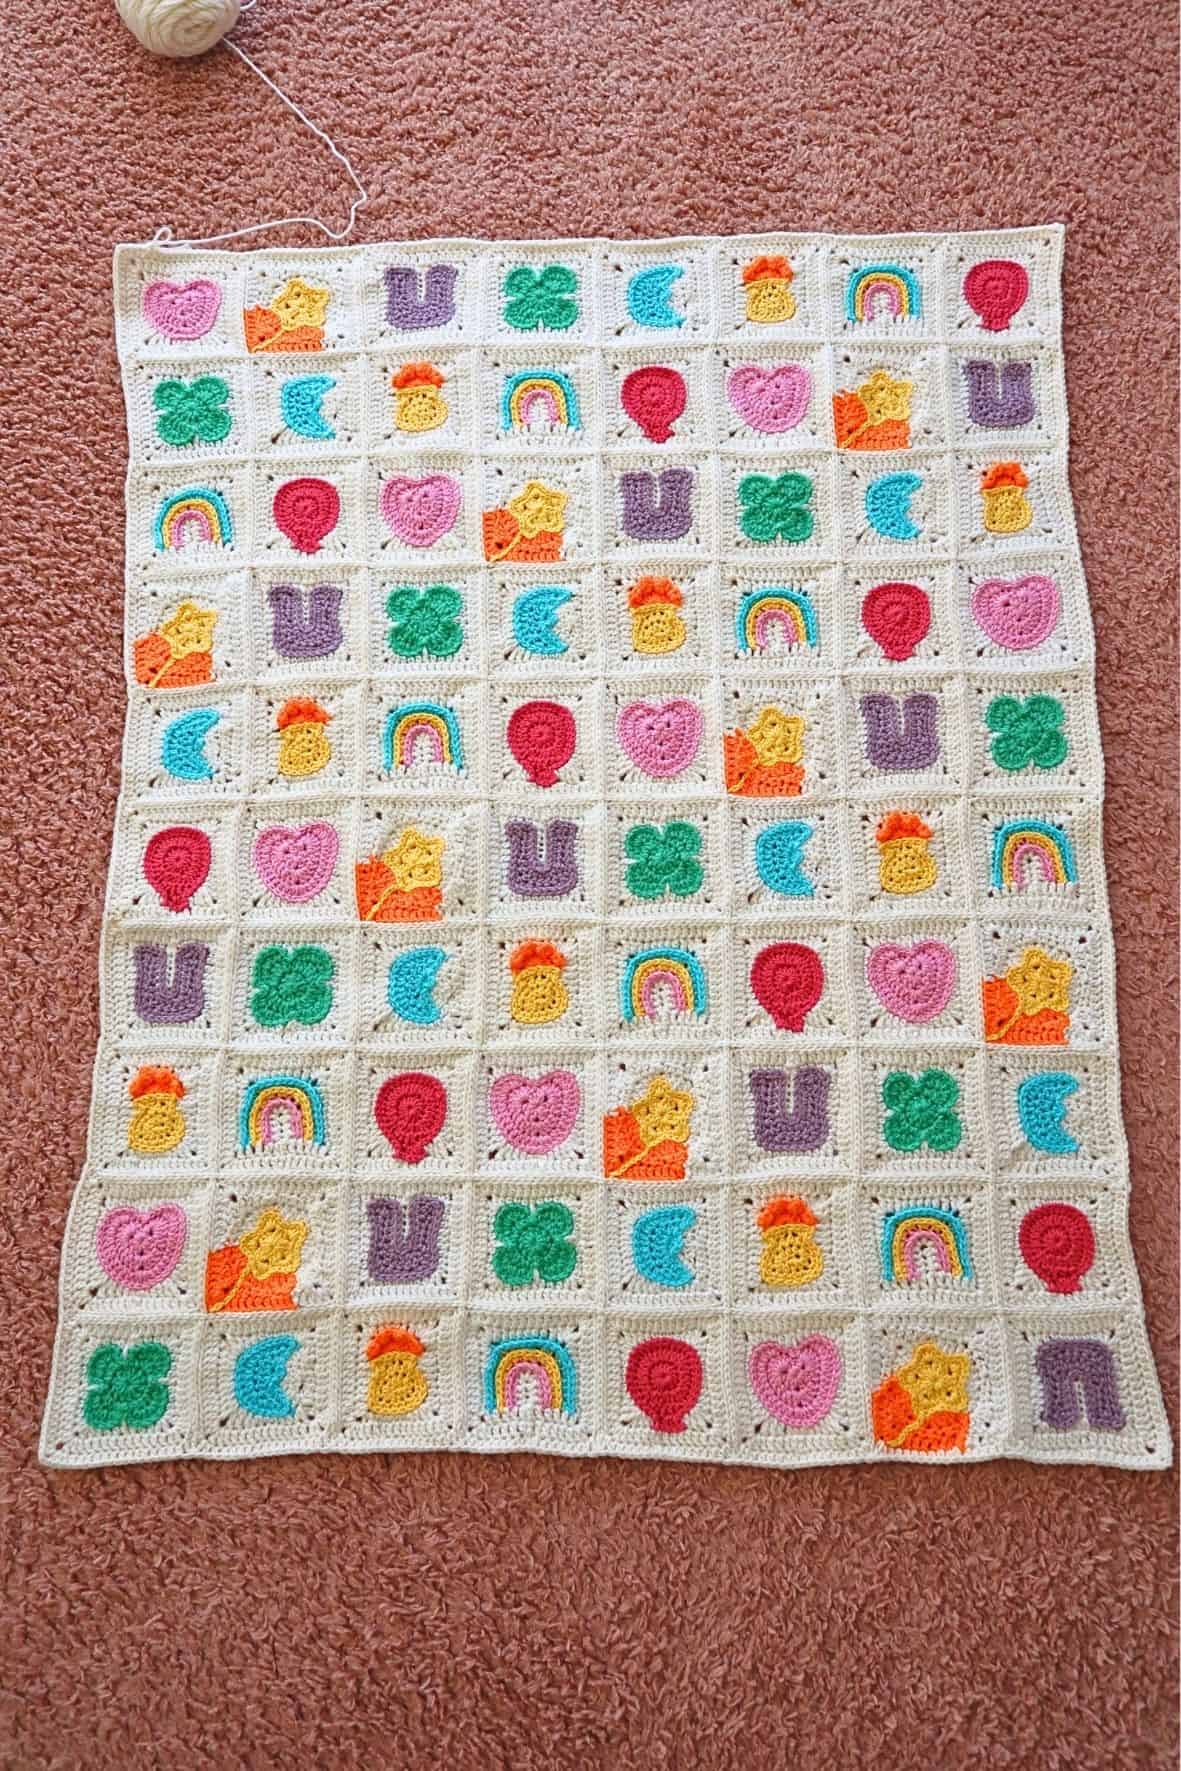
That's how I settled on this more randomized pattern:
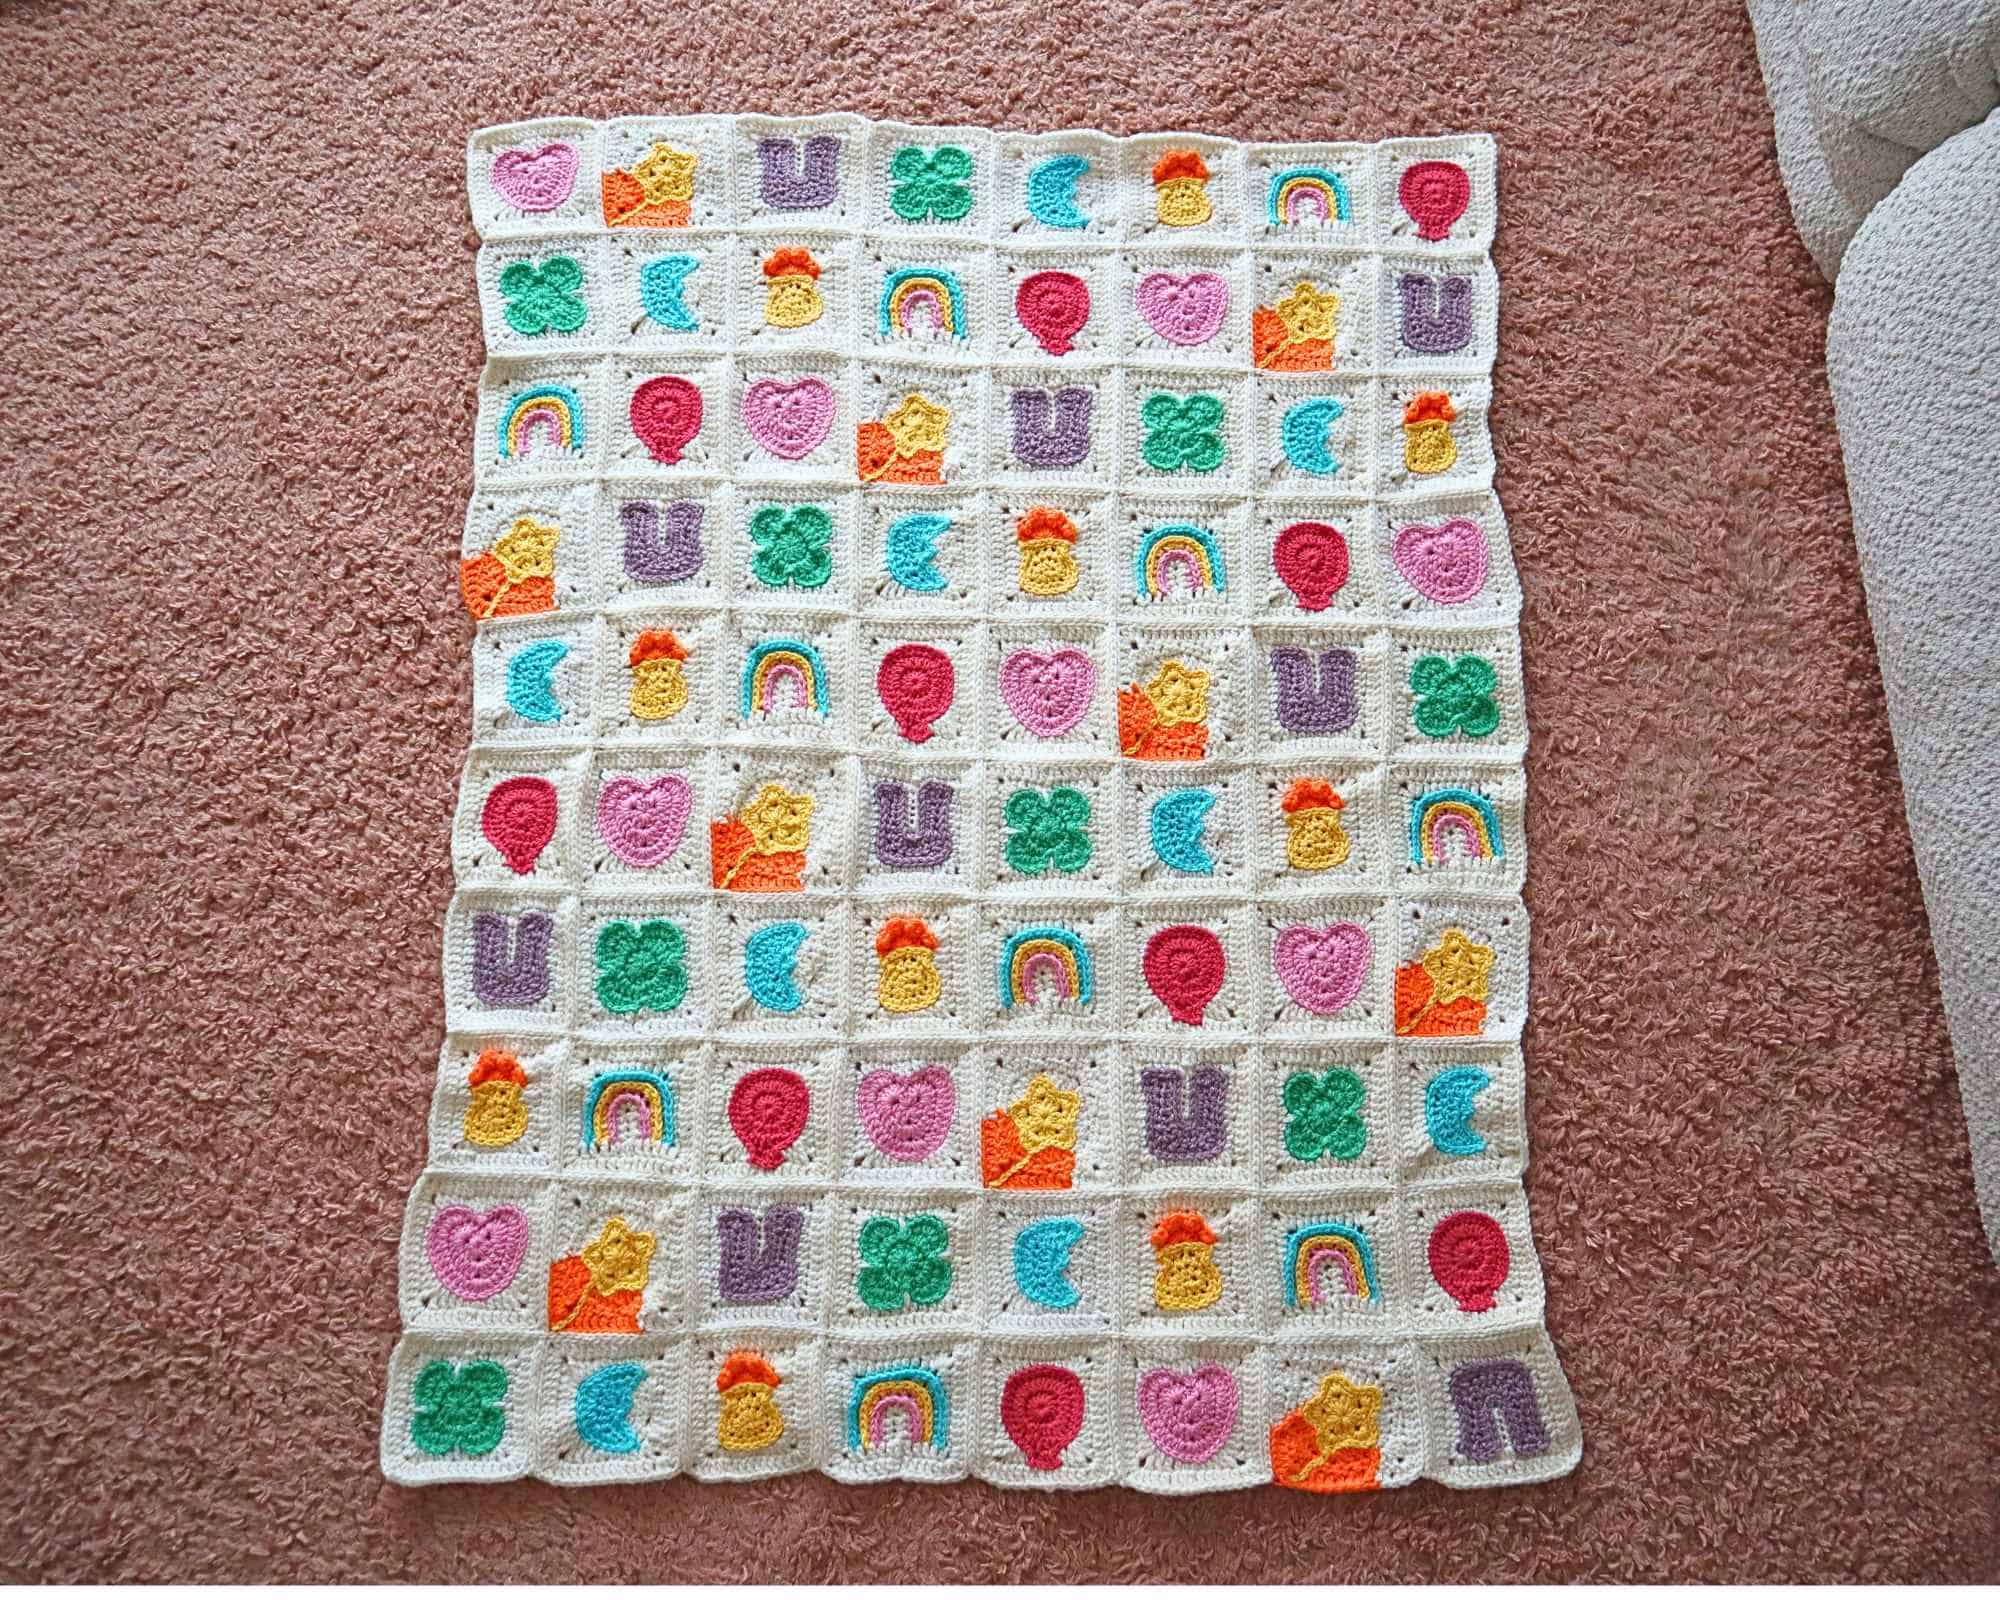
All the marshmallows are still in jingle order, in each row. I just alternated which marshmallow I started the rows out with. To copy this exact placement, I made a handy chart! Click the image of the chart to get a PDF download of it as well.
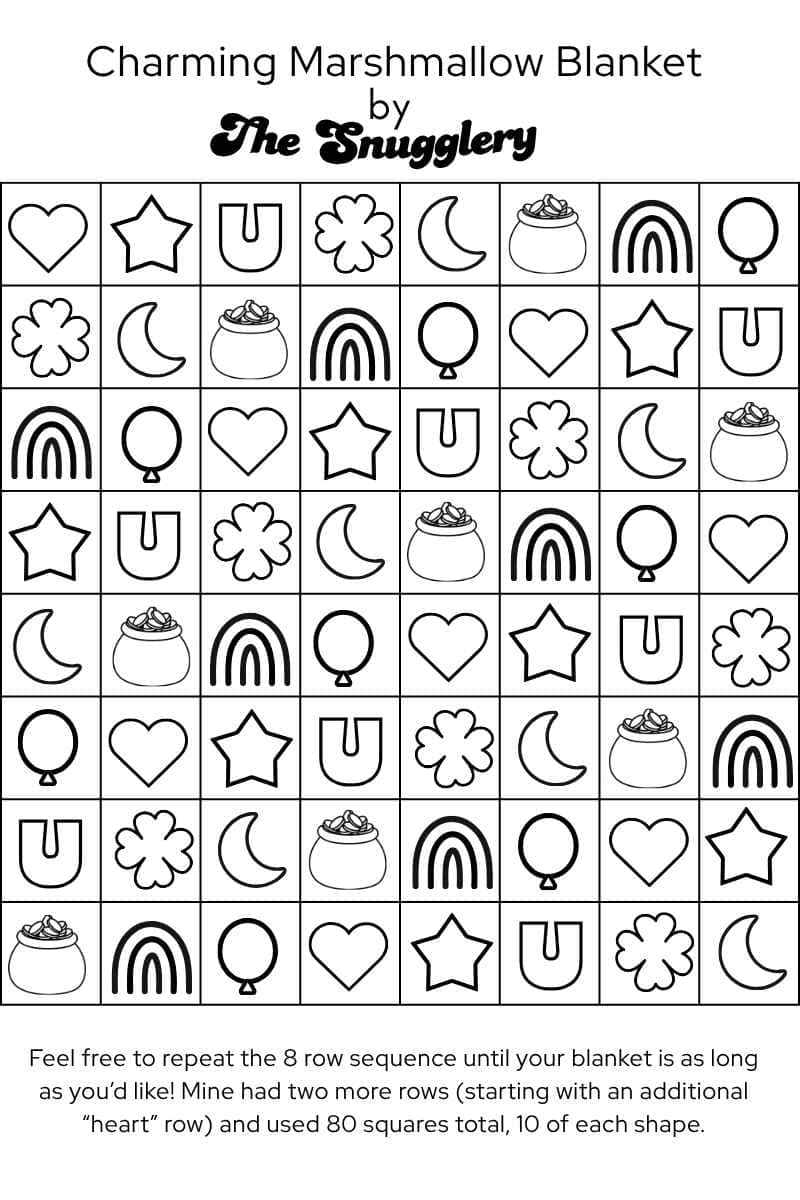
The eight rows you see in the chart are a sequence that can be repeated, starting with a heart row.
Seaming
With your squares laid out, it's time to seam! Of course, you may use any seam you'd like. I went with the back loop slip stitch seam. I did this for a few reasons:
- Uses a crochet hook (no needle needed)
- Easy to undo
- No need to premeasure yarn needed
- Flat and solid
I found it easiest to do all vertical seams first, followed by horizontal seams.
Border
I started with a set-up border of half double crochet to even out my blanket. To make the edges straighter and compensate for the natural dips that happen where the seams are, I worked dc3tog across granny corner chain spaces and the seam.
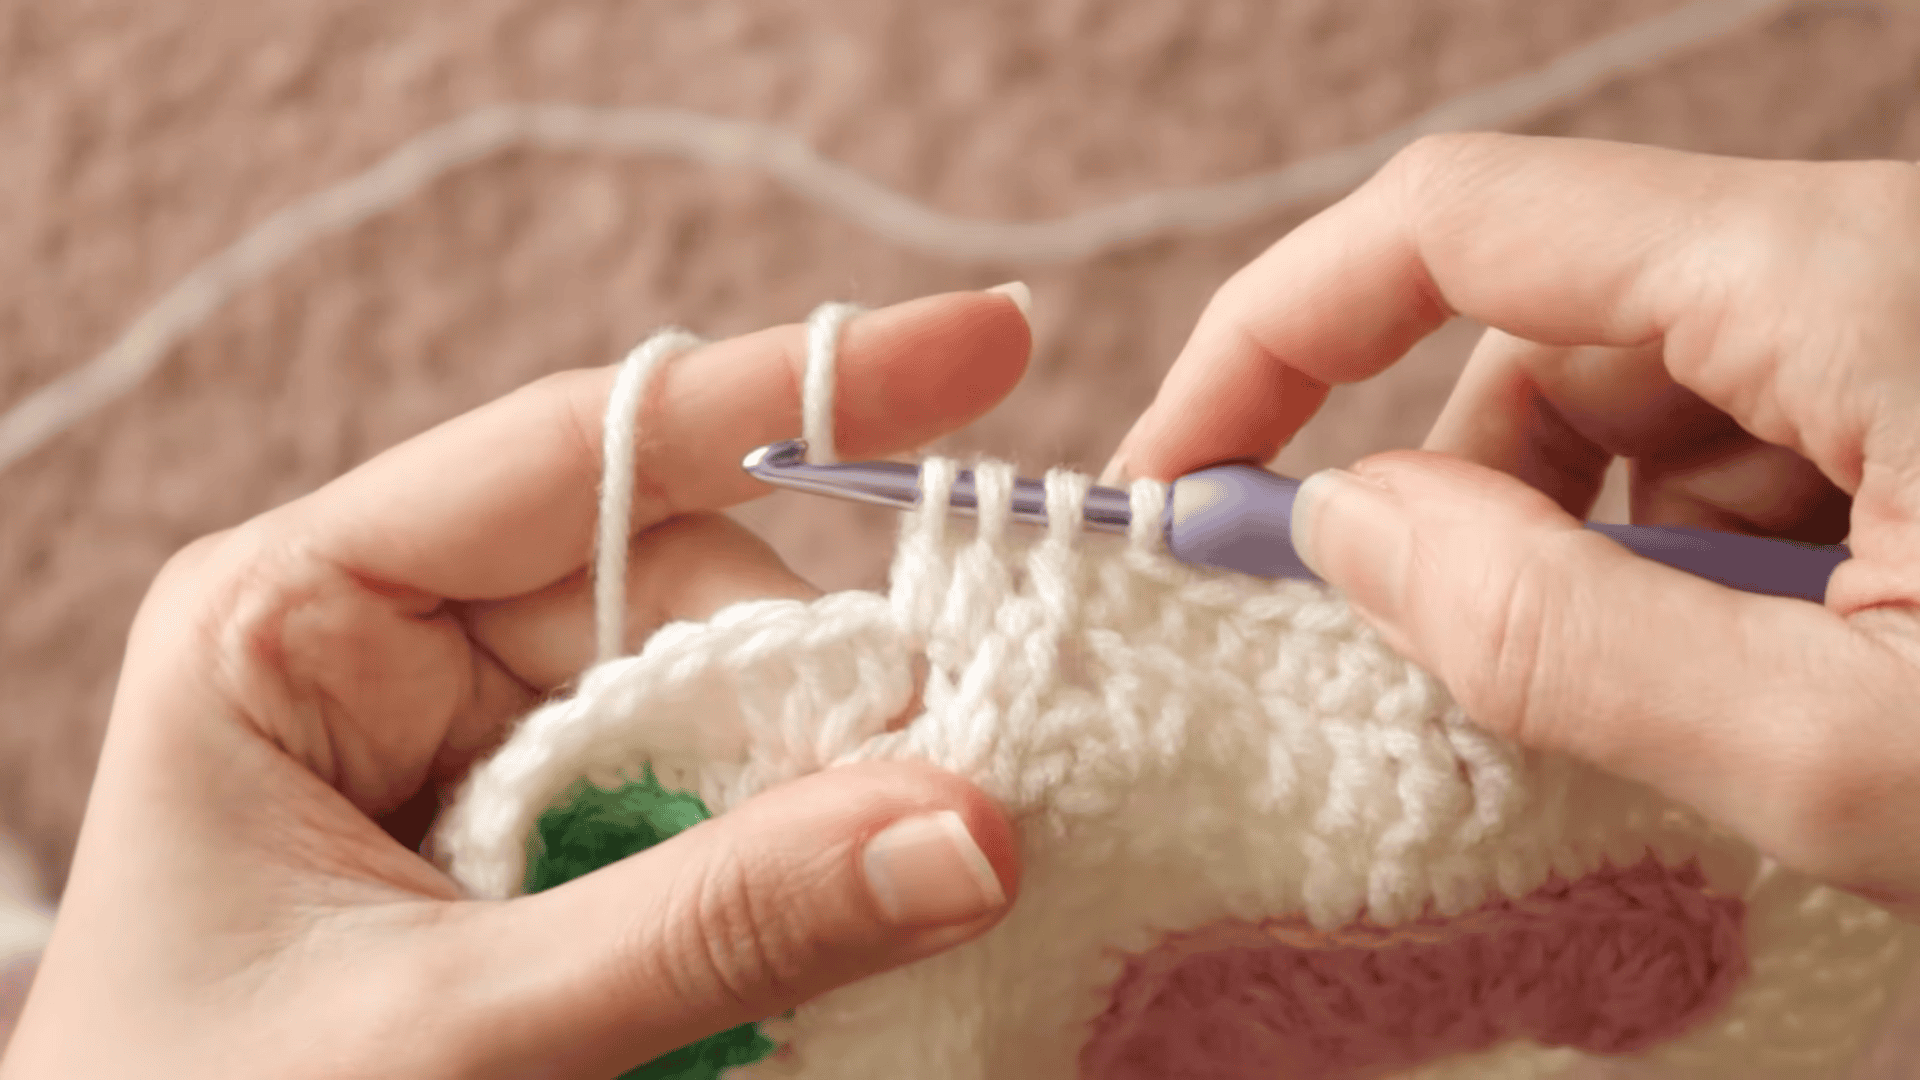
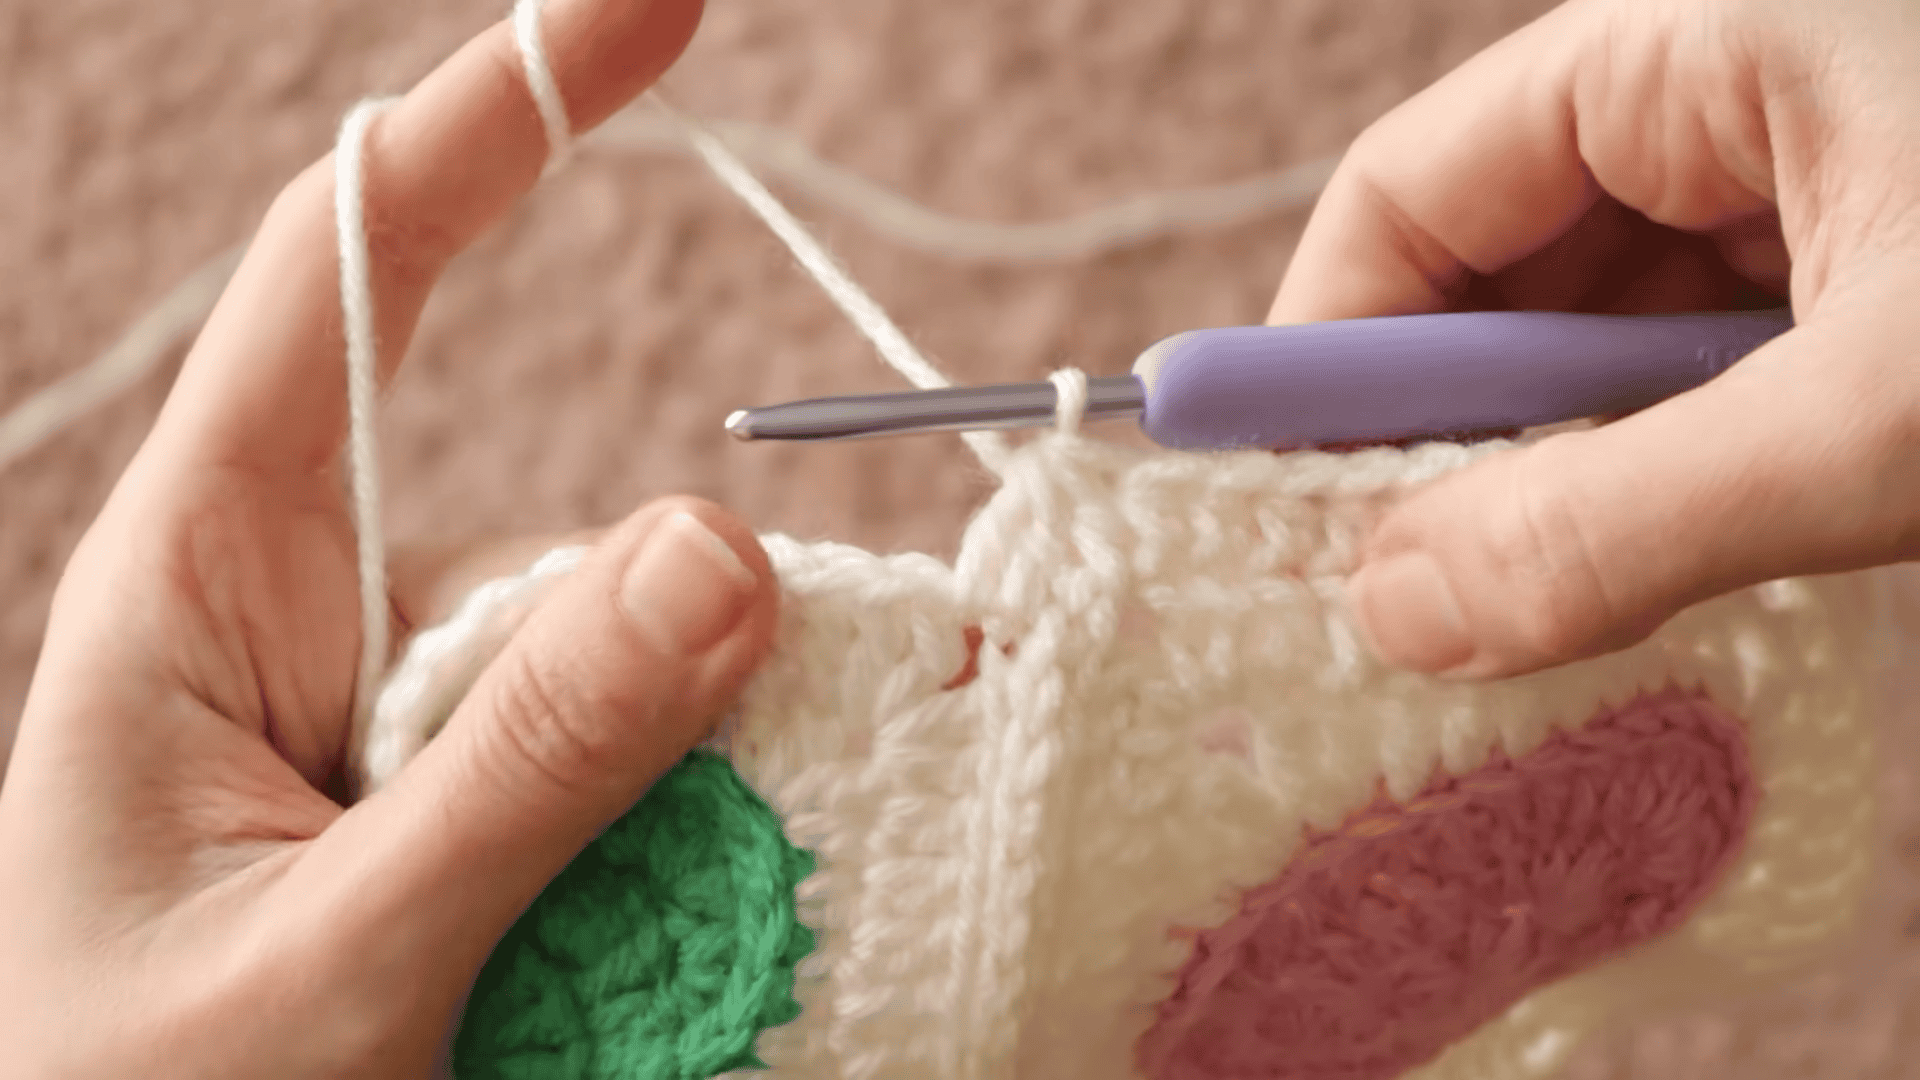
You can see in the before and after images below how much straighter and more even the blanket lays after the round of half double crochets with the decrease trick.
Then, I went with the forgiving block stitch border, a great border for any granny square blanket!
Simply attach a new yarn in the color of your choice. 1sc, ch2, skip 2 and work 1sc. Into ch2 corners, work 1sc, ch2, 1sc.
On the following round, attach the border color and work 3dc blocks into the ch2 spaces.
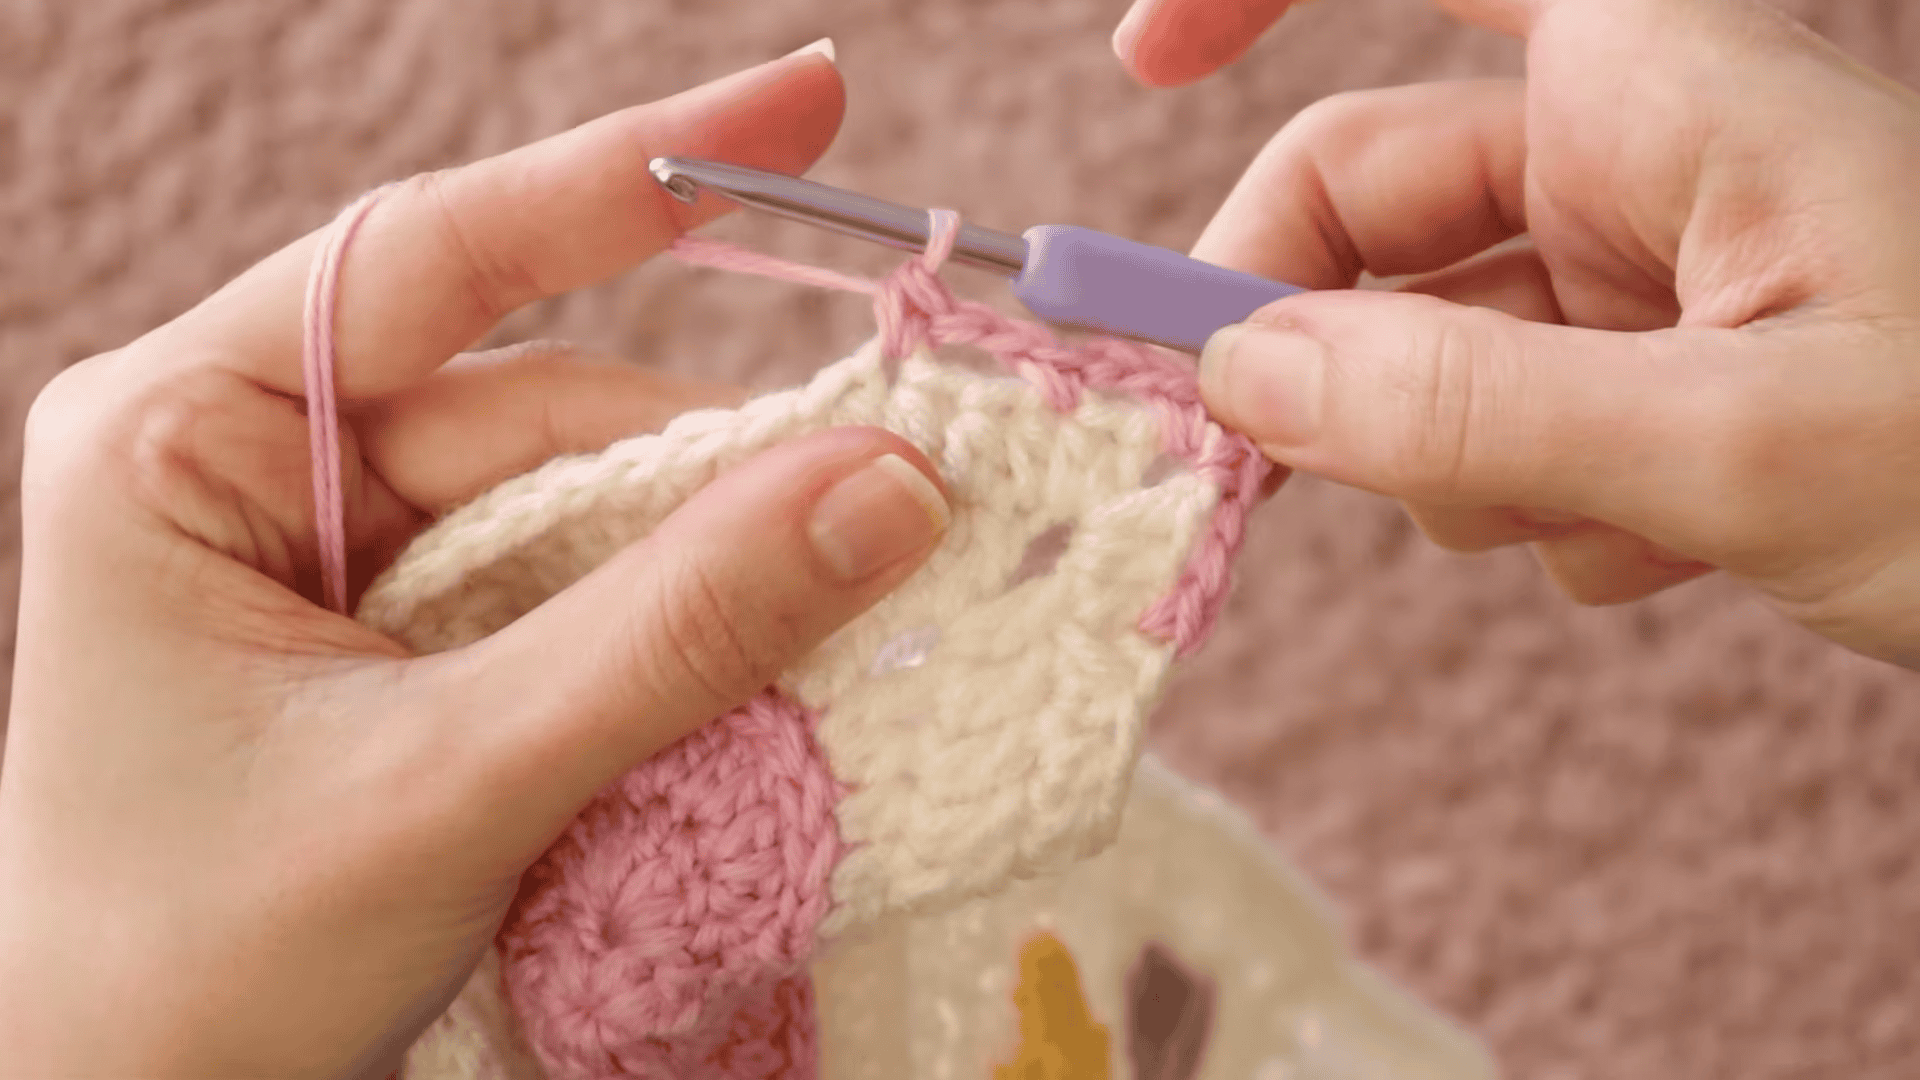
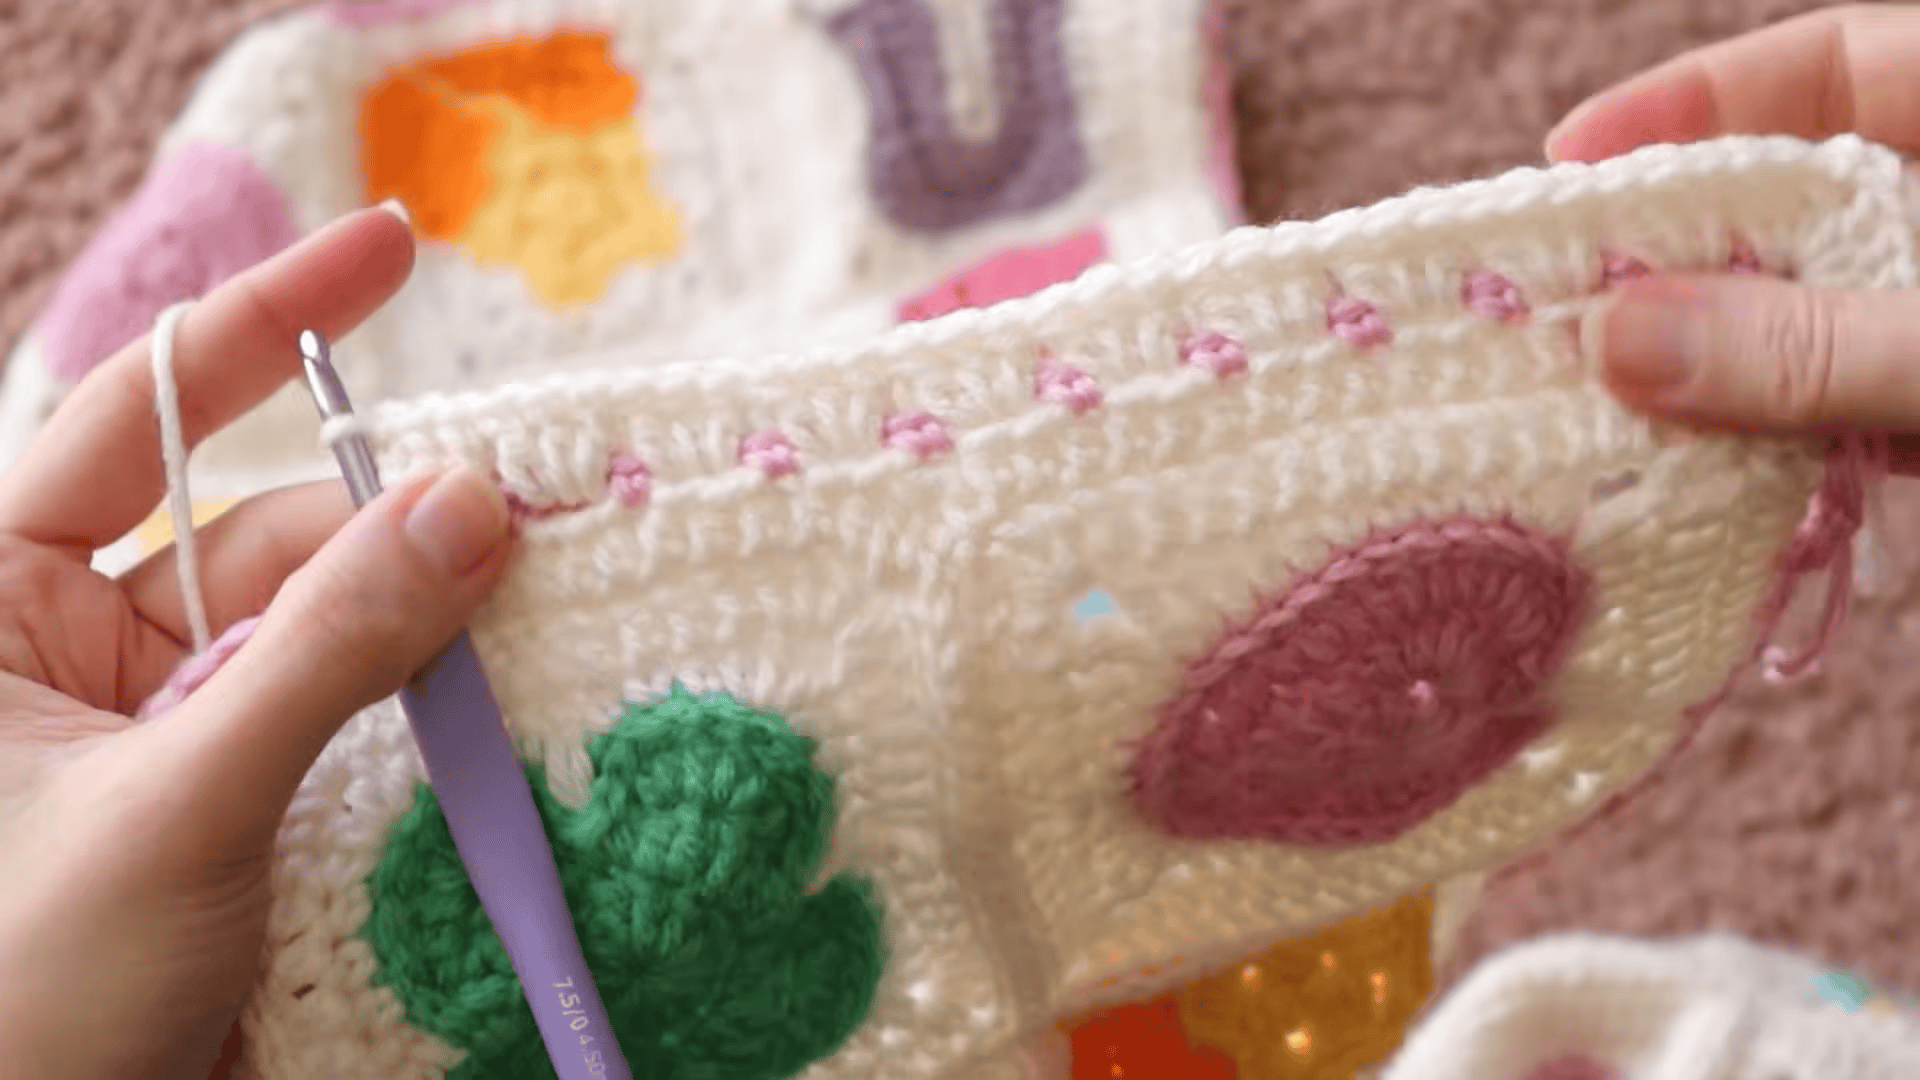
Subsequent rounds get the 1sc, ch2 in between the 3dc block rounds from the previous round.
I covered everything you need to know about seaming and adding this border in the Charming Marshmallow Finihsing video:
Work 8 rounds of block stitch for a border the same as mine.
Have a magically Delicious Day!
I hope you enjoyed this project and learn as much as I did! Make sure to check out the full playlist of videos that go along with this blanket. There's a wealth of knowledge there!
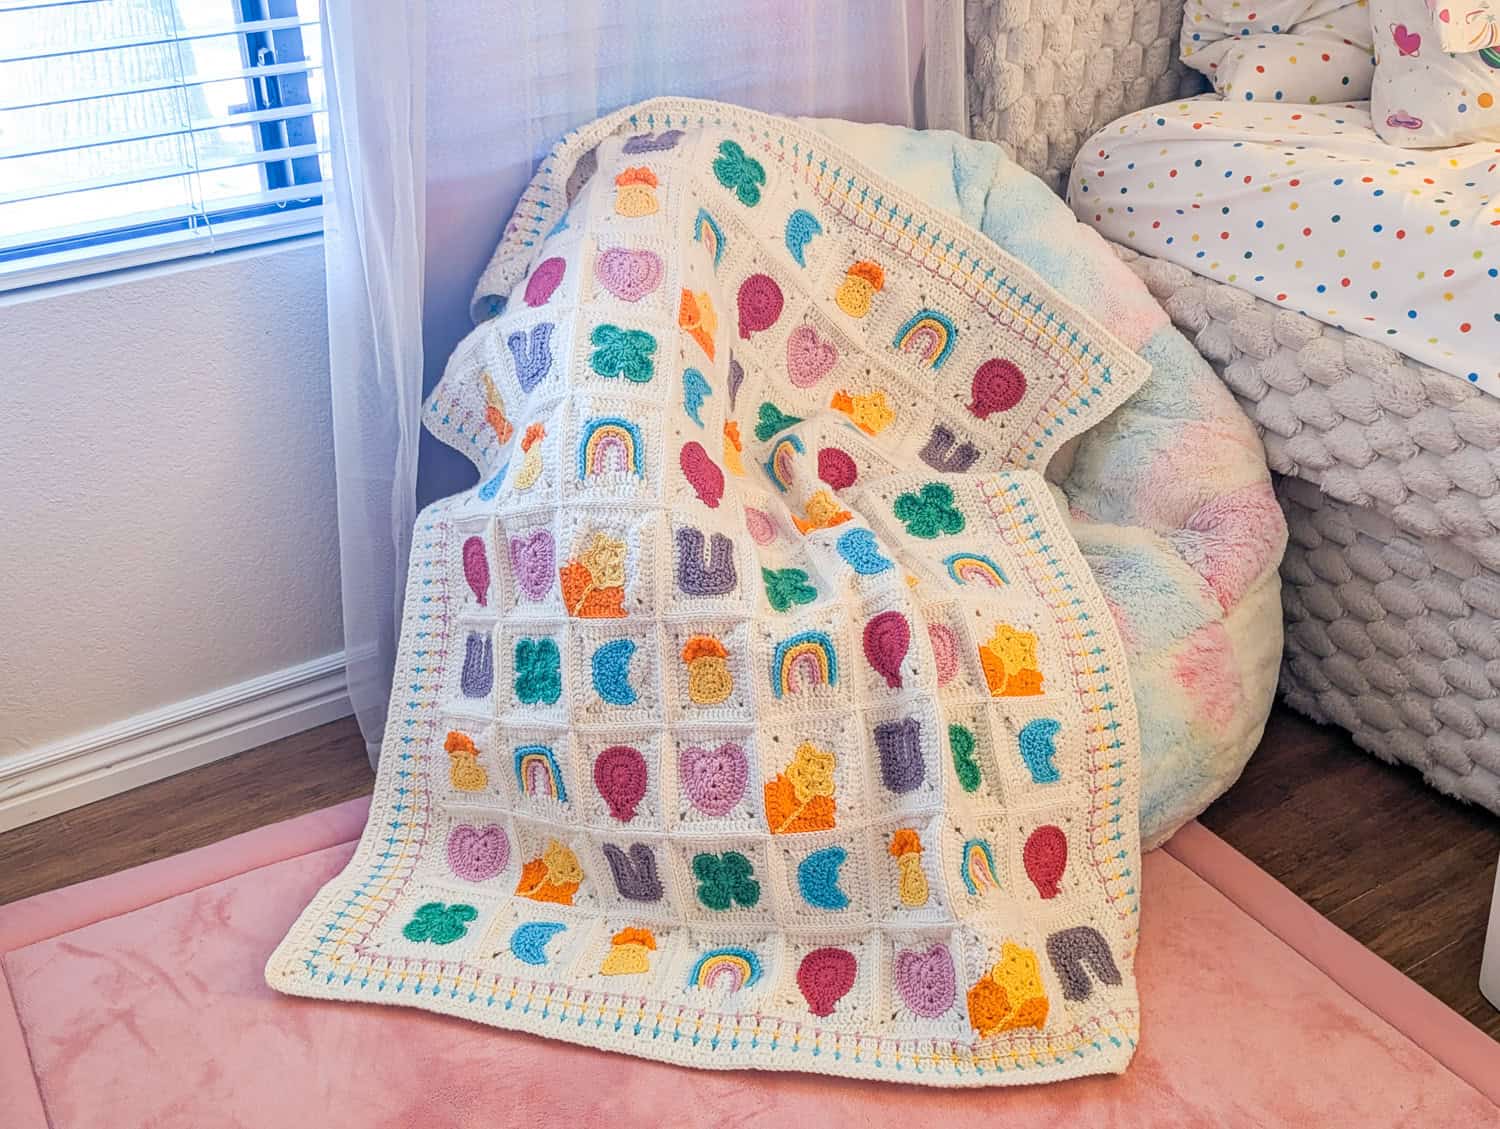
I can't wait to see what you make with these squares. I had someone tell me they were looking to make a lucky charms cardigan and might use my patterns to do it! I think that would be insanely cute. Also a pillow or tote would be a great use of these iconic square shapes (and you wouldn't need to make 80... lol!).
Well, if you do make ANYTHING using anything you've learned from this Charming Marshmallow Blanket project, please tag me wherever you are online so that I can see what you made! Thanks so much for checking out this project and following along with me!