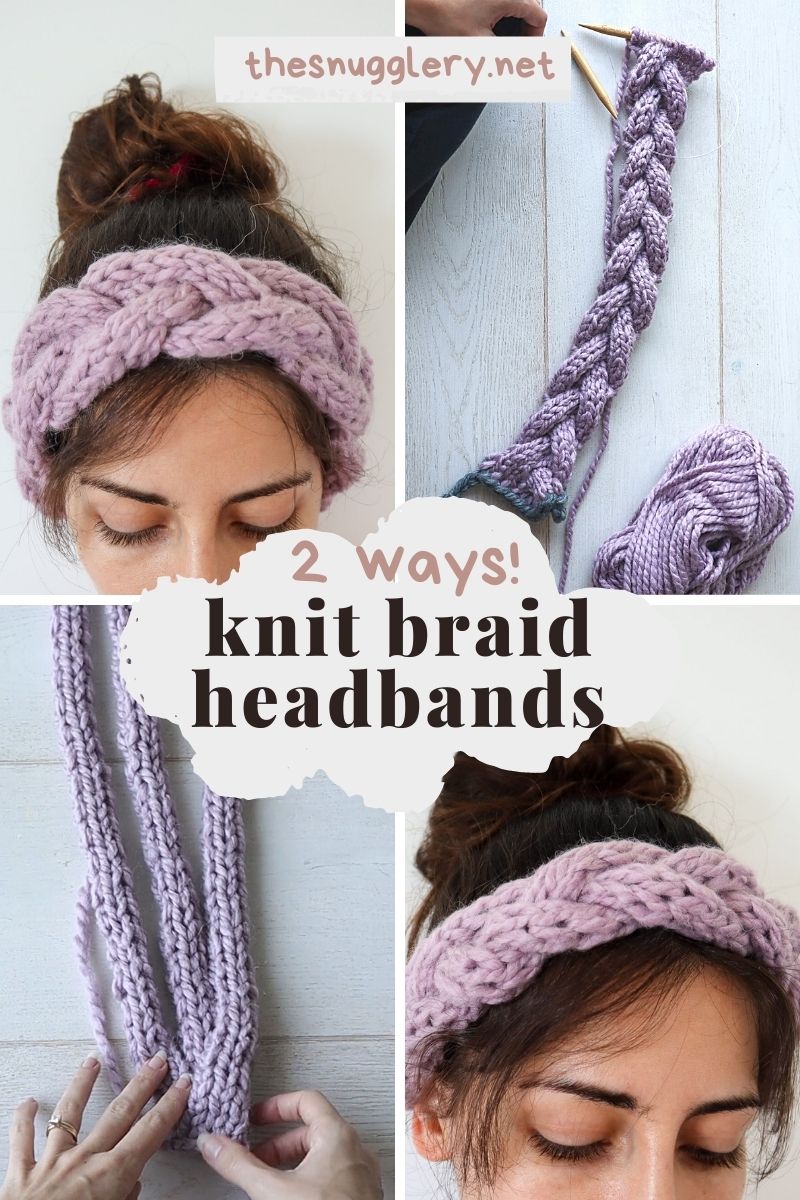
You know what they say; "There's more than one way to braid a headband." Oh? They don't say that? Well then how come I've got these two completely different ways to knit a braided headband? So that there's one for the beginners and one for the advanced knitters? That makes total sense! Oh hi, I didn't see you there. Welcome to my blog post about how I made these two very similarly beautiful, rustic chunky knit braided headbands.
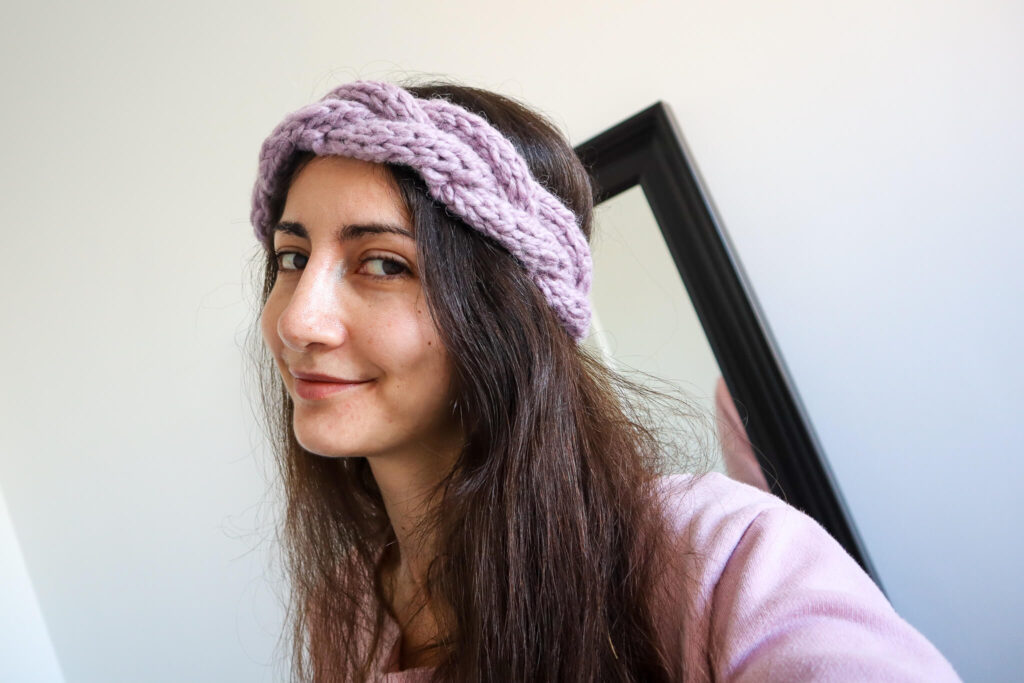
That is where the similarities end, however! These two methods for creating a knitted braid headband could not be more different! The first one, which I'm designating as the beginner version, makes perfect sense if you already know how to knit a three strand braid.
We will literally knit three pieces of knitting, four stitches wide, braid them, then seam the whole thing into a headband! Requiring only knits and purls and some really easy (no fuss) seaming, this method is perfect for new knitters or even loom or finger knitters!
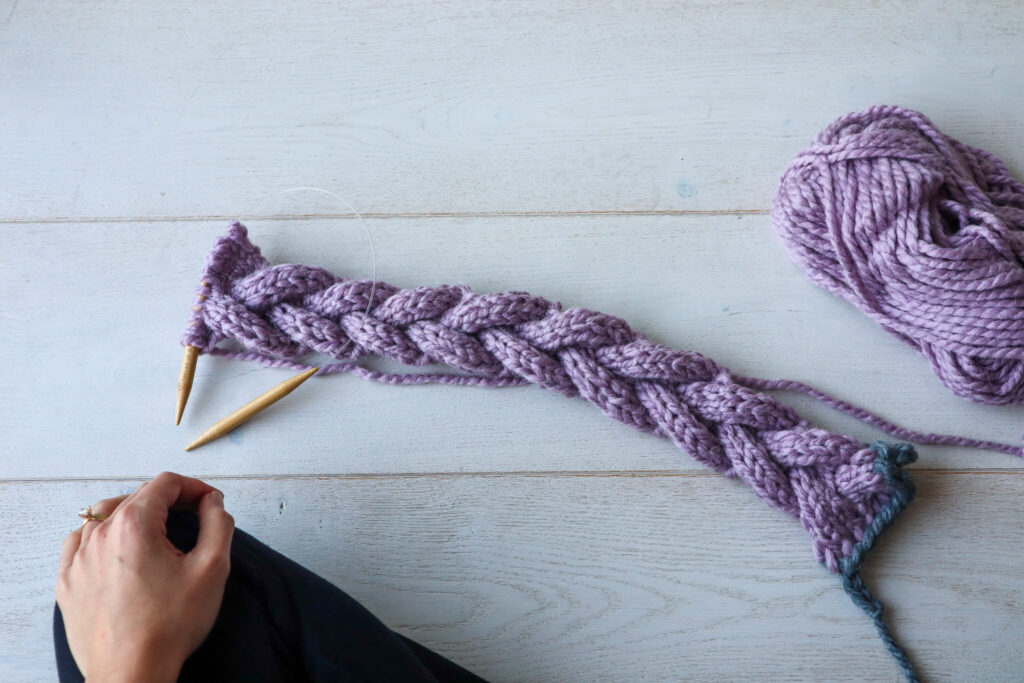
The braided headband for advanced knitters is a different story. With this one, I wanted to make the process as elegant and seamless as possible. That's why this knit braid starts with a provisional cast on. This allows us to pick up the first row of stitches later so that the whole piece can be bound off and seamed in one fell swoop via the "3 needle bind-off."
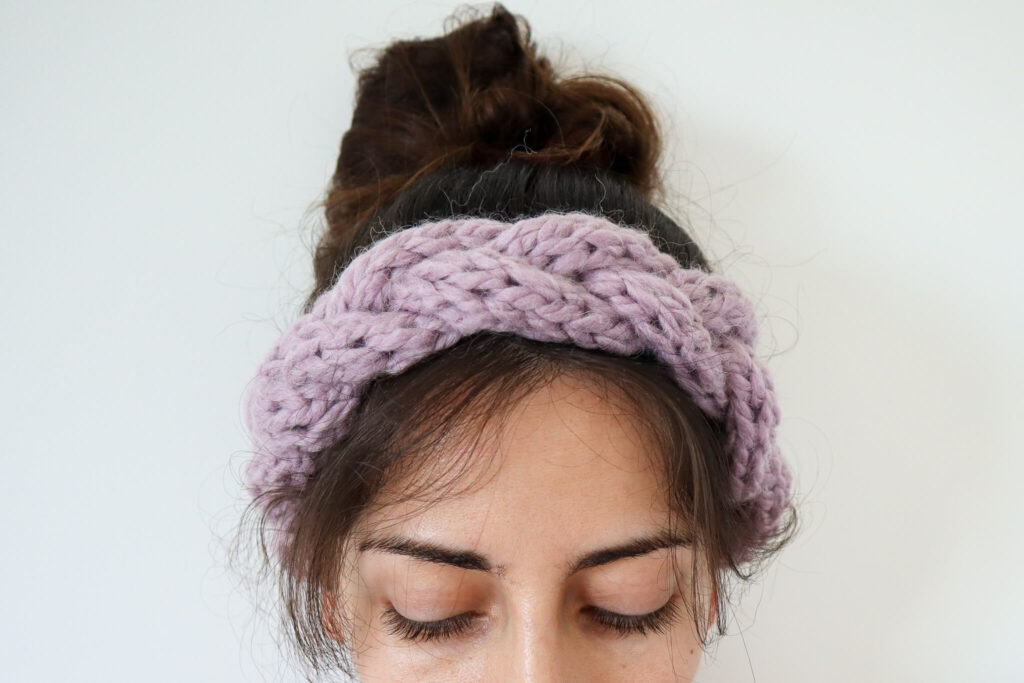
As for the headband itself, no knitting separate pieces here. The bulk of the bulky knit headband is worked as a simple basic cable with an 8 row repeat that perfectly matches up from cast on to bind off for a seamless braid once everything is said, done and knit!
Visual learner? Lucky for you, there's a video tutorial! For a demonstration of the finer points of these patterns you can watch it here:
Materials
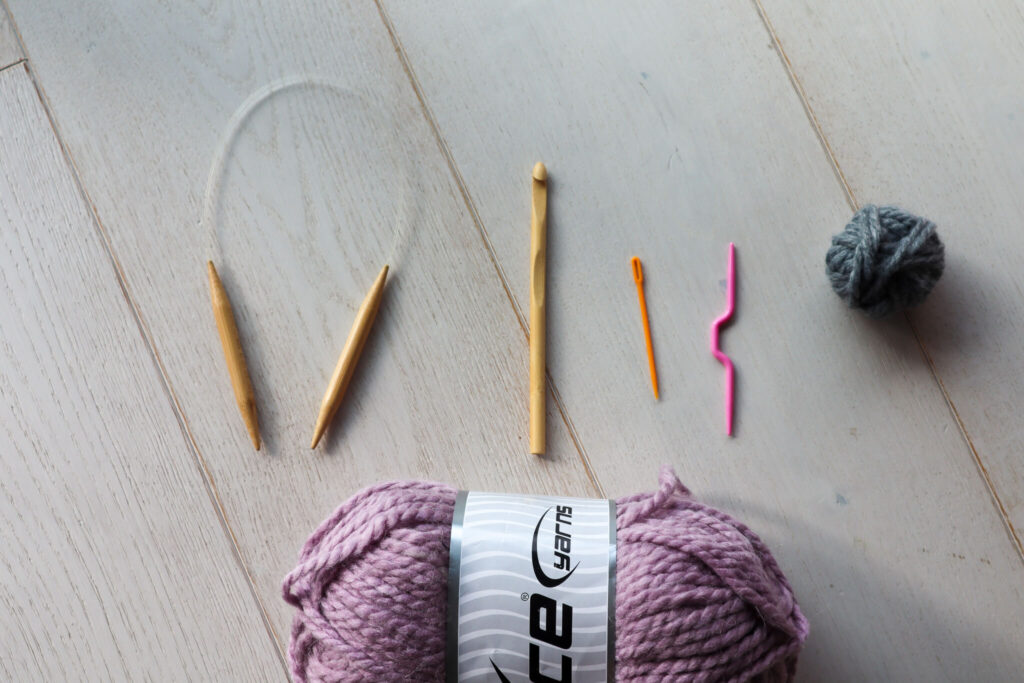
So let's get into the materials. You'll need a super bulky weight yarn like this one that I used, Ice Yarns Alpine Alpaca. No more than 60 yards (50 meters) or so.
You'll also need a set of 9mm (US 13) knitting needles. I used circulars but you could absolutely use straight needles.
For the beginner headband only, you'll need a tapestry needle.
For the advanced headband, you'll need a bit of scrap yarn, a crochet hook, a cable needle and one additional needle (not pictured above) in any size for the three needle bind-off.
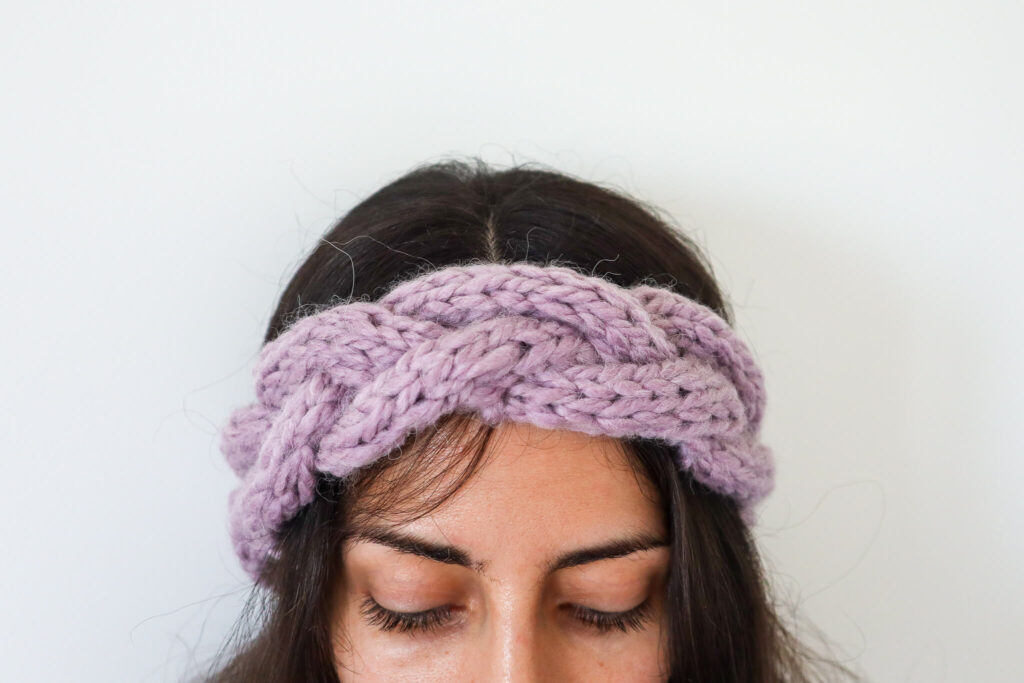
Beginner Knit Braided Headband
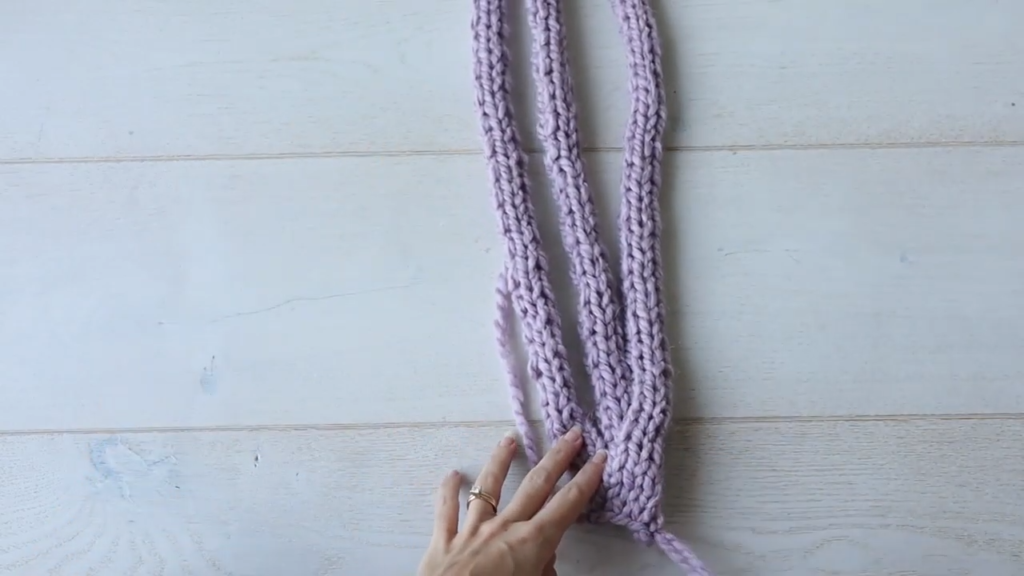
Braid Strand (make 3)
To begin, cast on 4 sitches.
Row 1: Purl all sitches
Row 2: Knit all stitches
Repeat rows 1 and 2 until your piece measures 22" (56cm). For me, this was about 53 rows and I do recommend finishing after a purl row so that you can bind off on the knit side.
Braiding and Seaming
Stack the bind off edges of your three strands on top of each other, each with the wrong side facing down. Thread a tapestry needle with one of the yarn tails and seam all three bind off edges together.
Begin braiding your three strands like you would for any other three strand braid.
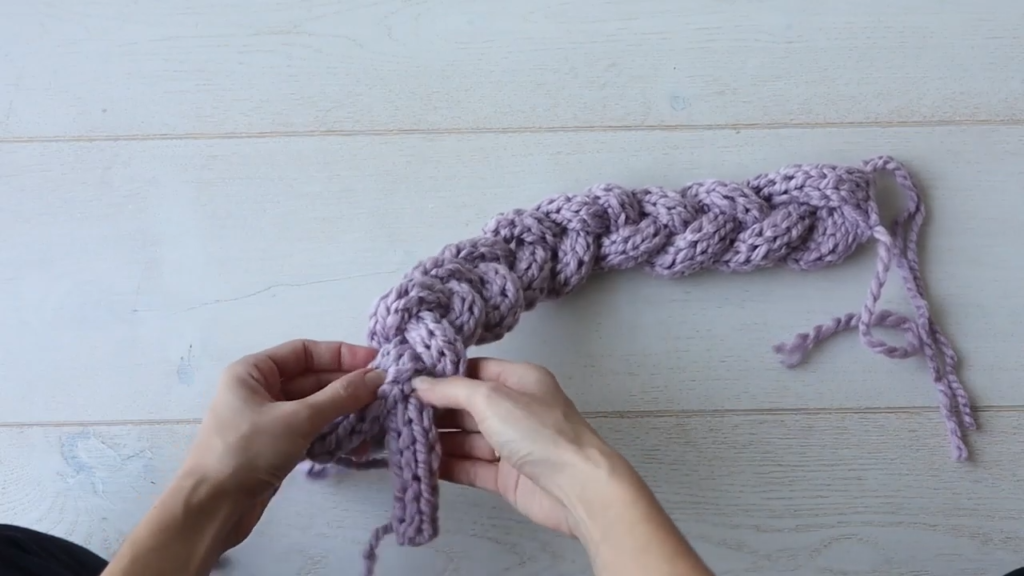
Finesse the braid until all ends are equal length, then seam the cast-on edges together the same way you seamed the bind off edges.
Finally, seam the cast-on seam and bind-off seam together to secure your piece into a circular headband.

Advanced Knit Braided Headband (cable braid).
Provisional Cast-On
To begin, with scrap yarn and a crochet hook, chain 3 chains. Then, cast 12 stitches onto your needle. Chain a few additional chains so that the crochet chain will not come undone as you knit but can still be unraveled later.
Braided Cable
With working yarn
Row 1: Knit all sts
Row 2: Purl all sts
Row 3: C4F (hold 4 sts in front on cable needle, k4, k4 off cable needle), k4
Row 4: Purl all sts
Row 5: Knit all sts
Row 7: K4, C4B (hold 4 sts in back on cable needle, k4, k4 off cable needle)
Row 8: Purl all sts
Repeat rows 1-8 until your piece measures about 21" (58cm).
Three Needle Bind-Off
Pick up stitches from your provisional cast on and unravel the scrap yarn. With the wrong sides of your work facing out, bind off both ends of your headband with the three needle bind-off.
There you have it! I hope you enjoyed these two different knitted braids! Be sure to check out the video tutorial as well.