It's the bane of beginner and seasoned crocheters alike: wonky edges and a stitch count that doesn't line up with the pattern! And "what to do" at the edge of your flat crochet projects seems to change from pattern to pattern and even stitch to stitch. In this tutorial, I'm going to try to help explain the reasoning behind phrases like, "doesn't count as one stitch" and "work into the top of your turning chain" so that you can really understand what your pattern writer is trying to tell you (or so you can even branch out into designing your own next project with stitch count confidence).
At its most basic level, crochet is really about two things:
1) Which stitch do I make?
2) And where do I put it?
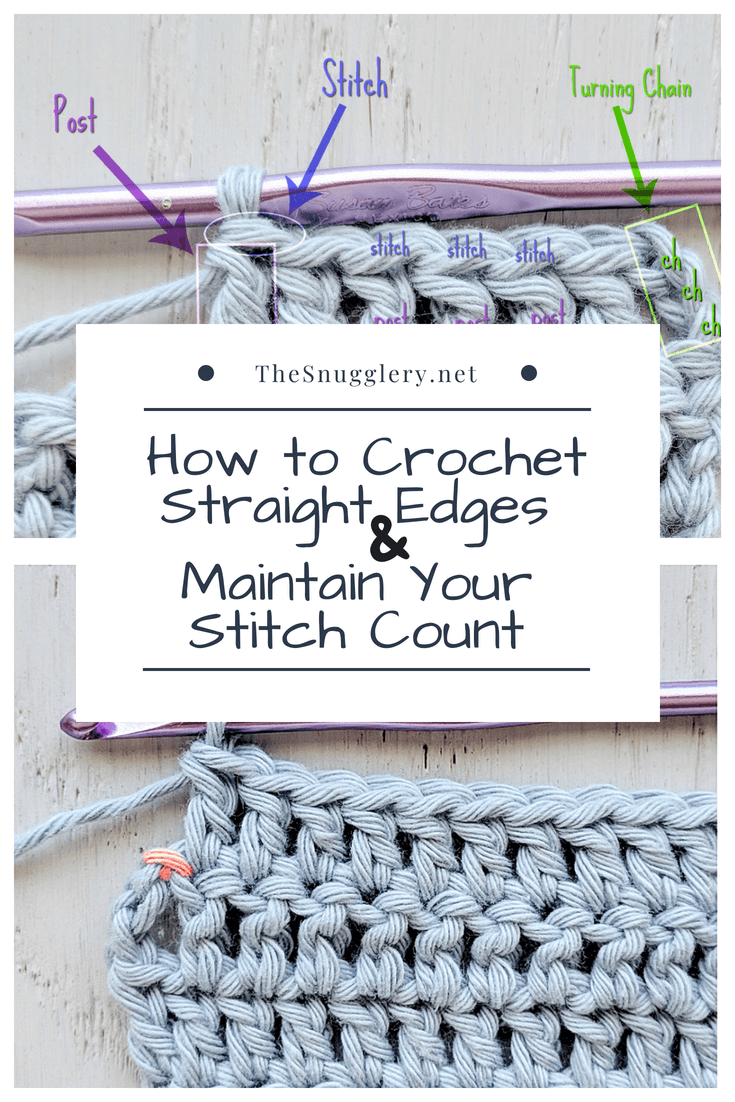
To answer either of these questions, let's break down the anatomy of a stitch:

In the photo above, on a sample of double crochet, take note of the location and appearance of the "post" and the "stitch", and how the stitch sits to the right (just behind its corresponding post). Also notice the 3 chain stitches at the beginning of the row (labeled in green in the image above).
In crochet, when starting a new row, you often have to make some amount of chains before you turn your work. You make this "turning chain" so you can get the right height for the stitch pattern of the new row.
The key to straight edges is knowing when that turning chain counts as a stitch, when it doesn't, and what that means for you.
When a pattern indicates that a starting chain "doesn't count as one stitch" You will work your first new stitch into the stitch below your chain. This means your first stitch of the row will line up with the last post of the previous row.
If the starting chain "counts as one stitch" you will work into the stitch next to your chain, matching up your first new stitch with the 2nd to last post of the previous row while your turning chain lines up with the last post.

It's really that easy to start a row! Simply work your first stitch into the very first stitch you see, if your chain "doesn't count as one stitch." Or work into the 2nd stitch of the row below if your chain "counts as one stitch."
That takes care of the beginning of the row, but what about the end? If the pattern indicates the turning chain counts as a stitch, you can't ignore the turning chain you made from the previous row when you reach the end of your new row. You must work a stitch into the top of that last chain.

In the swatch above, you can see the top chain of that turning chain before and after I worked a stitch into it.
If your pattern DOESN'T count the turning chain as one stitch, you get to ignore it at the end. Simply work into the last true stitch of your row and completely ignore any chains.
*Bonus tip
It's most common in patterns with double crochet for the turning chain to count as a stitch. For single crochet, it's rare for the turning chain to count as a stitch, and half double crochet can go either way. If your pattern doesn't specify, assume it counts for double crochet and assume the turning chain doesn't count for single crochet. You can choose which method you like best for half double crochet as long as you remember the rules we discussed here.
Having a full understanding of the "counting as one, not counting as one" method is the best way to advance your crochet skills and tackle harder and harder patterns. I hope this explanation about keeping your crochet edges straight was helpful. No tricks, no gimmicks, just some old fashioned crochet know-how. Now you can tackle more complex projects with confidence!
Hey visual learners! There's a video now. Yay!
More Guides
- 6 Crochet Stitches You ALREADY Know (If You Can Make Single, Half Double, And Double Crochets)
- DIY Crochet T-Shirt Poncho – Upcycle an Old Tee into Festival-Ready Style
- Are You Really Gonna Crochet A Labubu? - Paid, and Free Patterns To Help You On Your Lafufu Journey
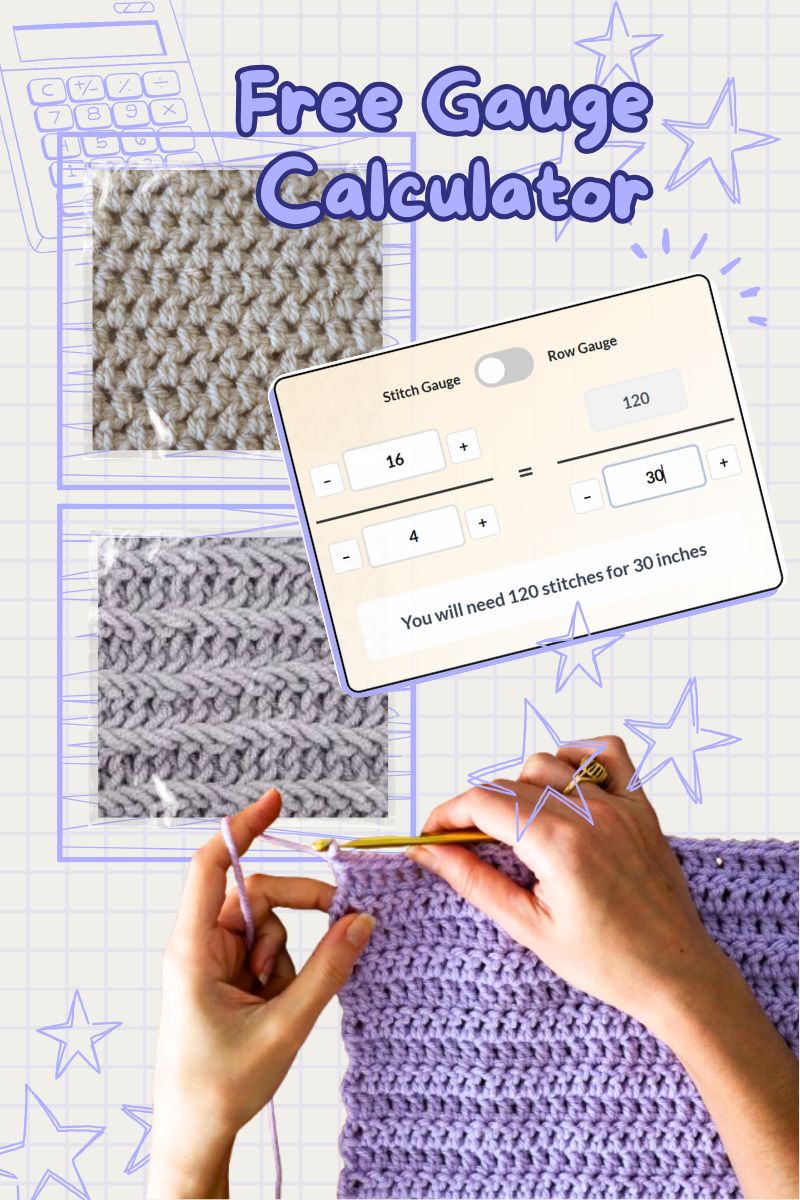
- Free Gauge Calculator: Your Key to Pattern Matching AND Creation


This was awsome! This is something that has always confused me. I struggle with reading patterns, especially the ones that assume you know what they are saying. Thank you for taking the time to post this.