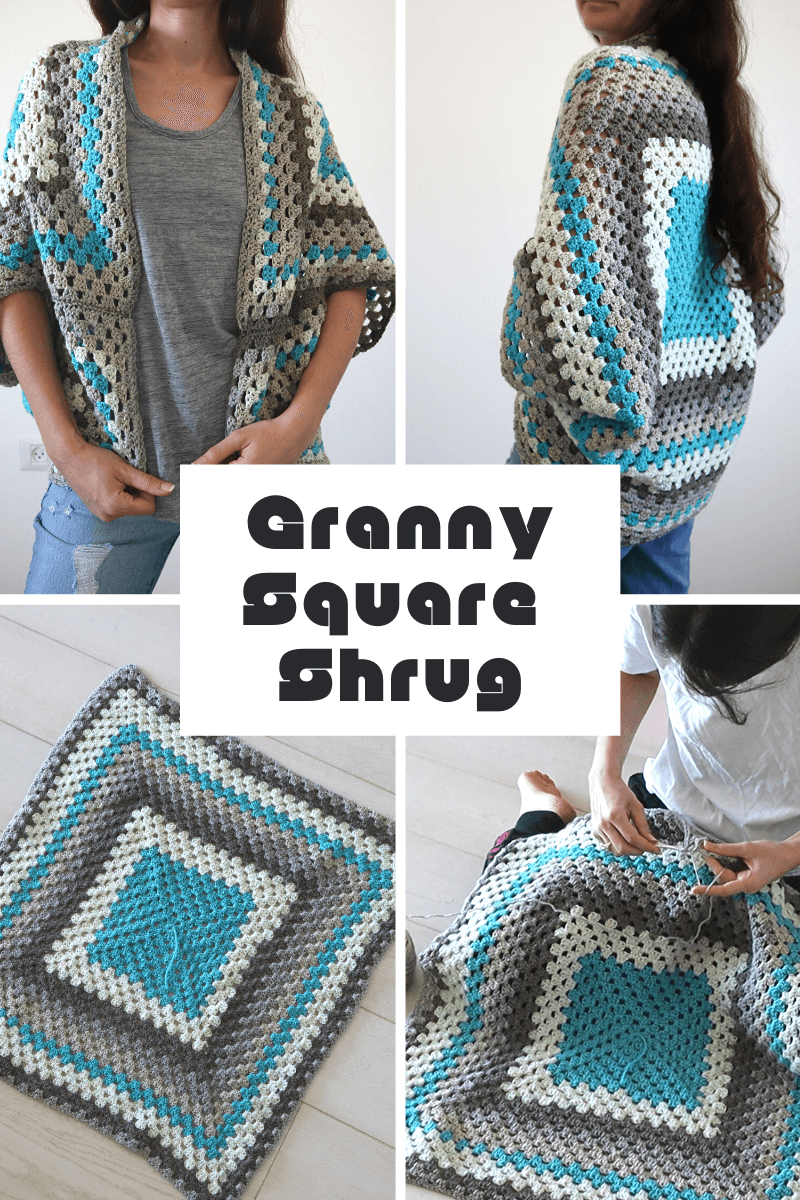
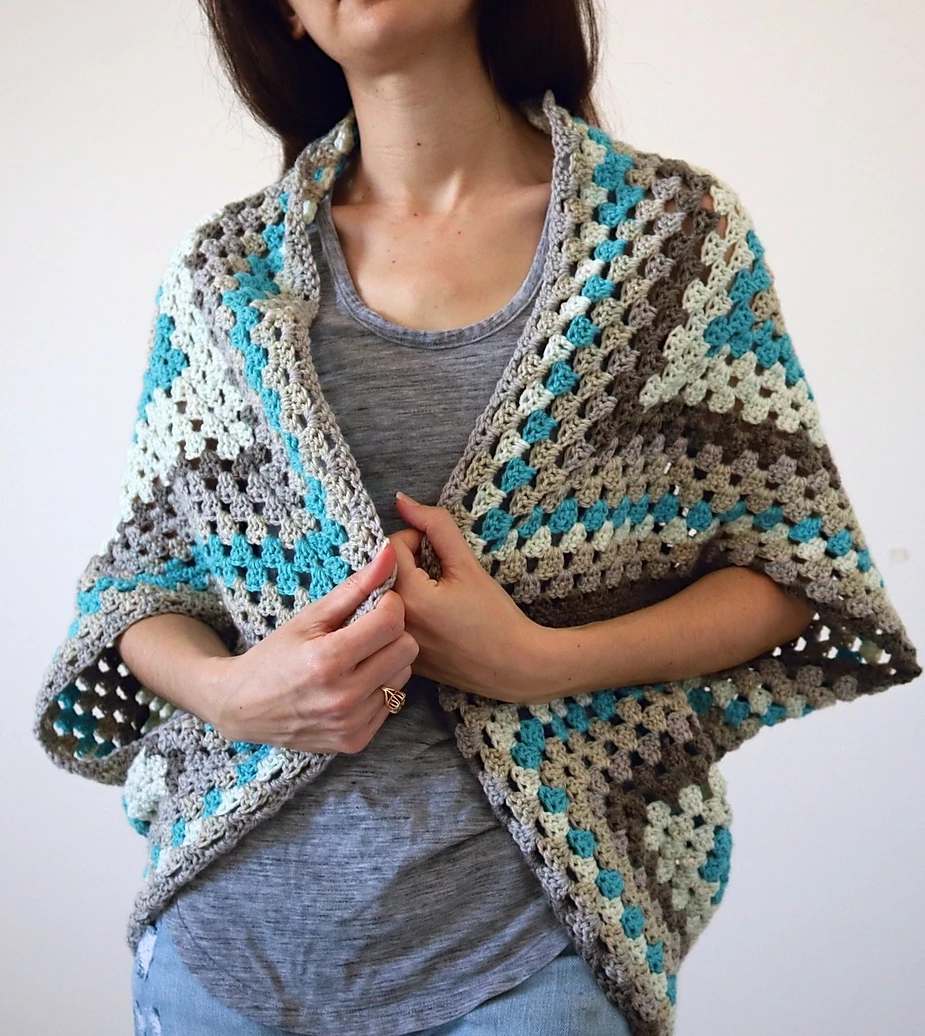
Did you know you can crochet a shrug from a regular o'll granny square? With this pattern, I'll show you how to crochet this continuous granny square motif and how to seam it into a cozy cocoon cardigan.
Beginner Friendly is the name of the game with this cardigan pattern. If you've never crocheted a wearable garment before, this is a great one to start with! There's even a helpful video tutorial for visual learners. You can find the video here:
For a printable, downloadable PDF version of the pattern, click HERE
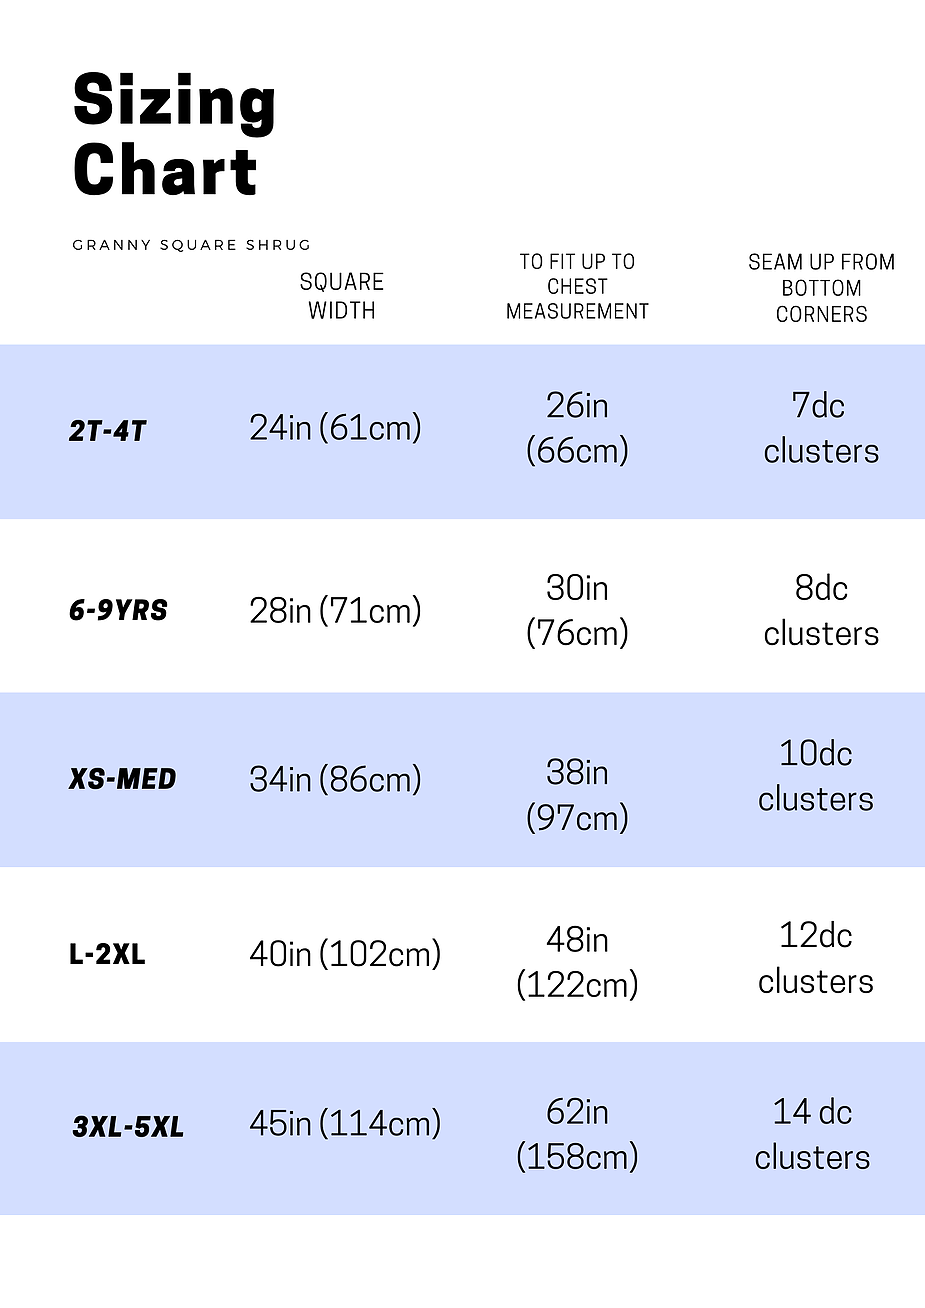
Yarn I used Caron cakes original in the colorway cake pop to do all the color work for me. You can use any yarn or yarn weight you'd like! What matters is the absolute size of your finished square. And I've got a handy dandy sizing chart for you so you know exactly how big to make your granny square for a shrug in any size. I used a 5.5mm crochet hook, consider going up a hook size or so from what your yarn calls for for added drape to your shrug
Pattern
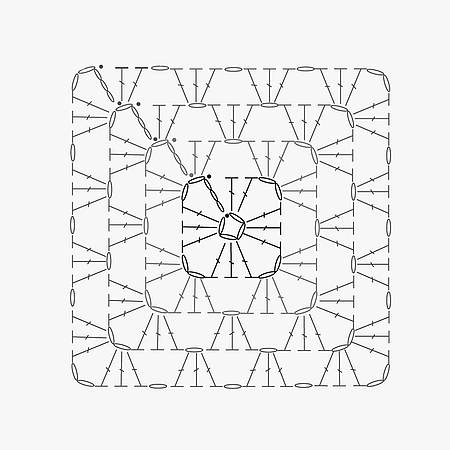
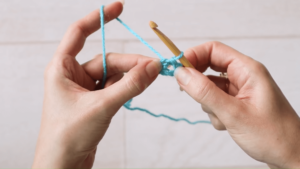
To begin, ch4. Sl st to the first ch to join in the rnd
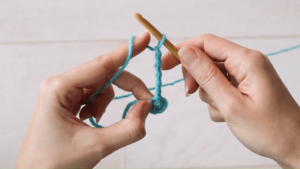
Rnd 1: ch5 (counts as dc and ch2) and *make 3dc into the ch4 ring, ch 2* rep between ** two more times. Then make 2dc into the ring and sl st to the 3rd ch of your starting ch5 to complete the rnd.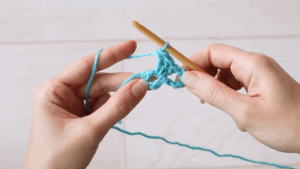
Rnd 2: Sl st into the ch space and ch5. Make 3dc into the ch space, *ch1. 3dc, ch2, 3dc all into the next ch space* rep between ** two more times. Ch1 and make 2dc in the next ch space. Sl st to the 3rd ch of your starting ch5 to complete the rnd.
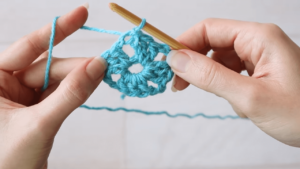
Rnds 3+: Sl st into the ch space and ch5. Make 3dc into the ch space, ch1. Work 3dc, ch1 into each ch1 space from prev rnd and work 3dc, ch2, 3dc, ch1 all into each ch2 space from prev rnd. When you reach the last corner, work 2dc in the last corner space and sl st to 3rd ch of starting ch5 to complete the rnd.

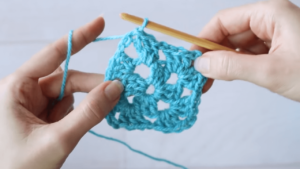
Repeat round 3 until your square measures the length/width on the sizing chart for your target size. Then move on to the seaming instructions.
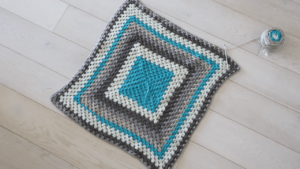
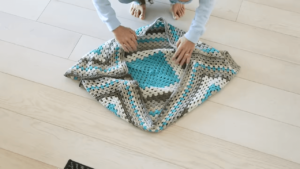
I also want to note that this continuous granny square likes to twist a little cattywampus since we never turn our work. So if yours is skewing like mine pictured below, don't worry... that will get fixed once it's seamed.
Seaming
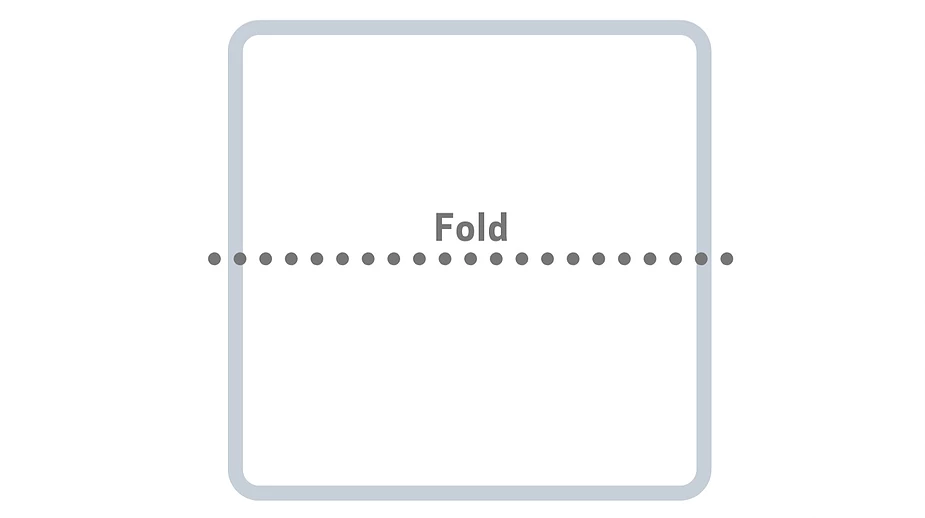
Step 1 to seaming is to fold your square in half.
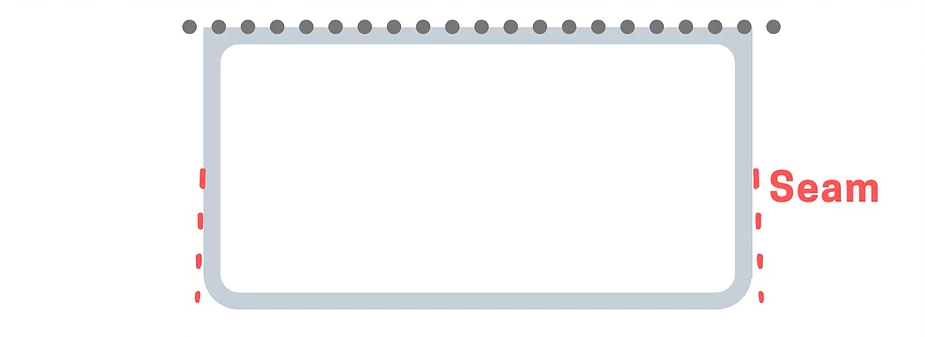
Then, using the solid slip stitch granny square joining method, seam up the sides for the number for granny clusters indicated on the sizing chart.
Here's a link to a video tutorial for that solid slip stitch granny square join: https://youtu.be/6C8kYidFMrc
 Essentially, all you do is slip stitch the back loops of every stitch together. You may also use any granny square joining method of your choice! Just be sure to seam together the correct number for granny square 3dc clusters for your size.
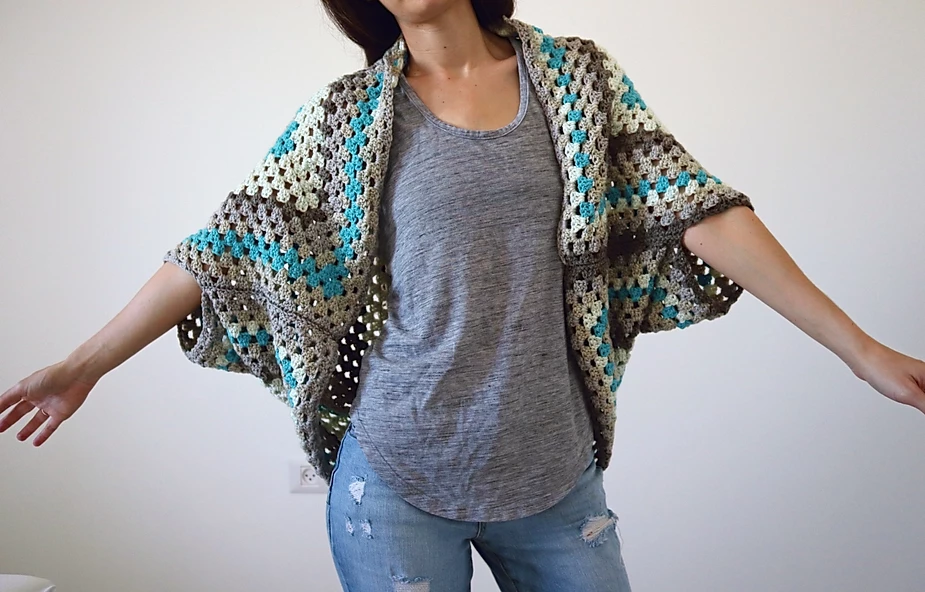
There you have it! I hope you enjoy this method of making a cardigan from a granny square. And I love how seamless the continuous granny square looks as a cardi. If you make you're own, tag me wherever you're sharing pictures 'cuz I'd love to see it!