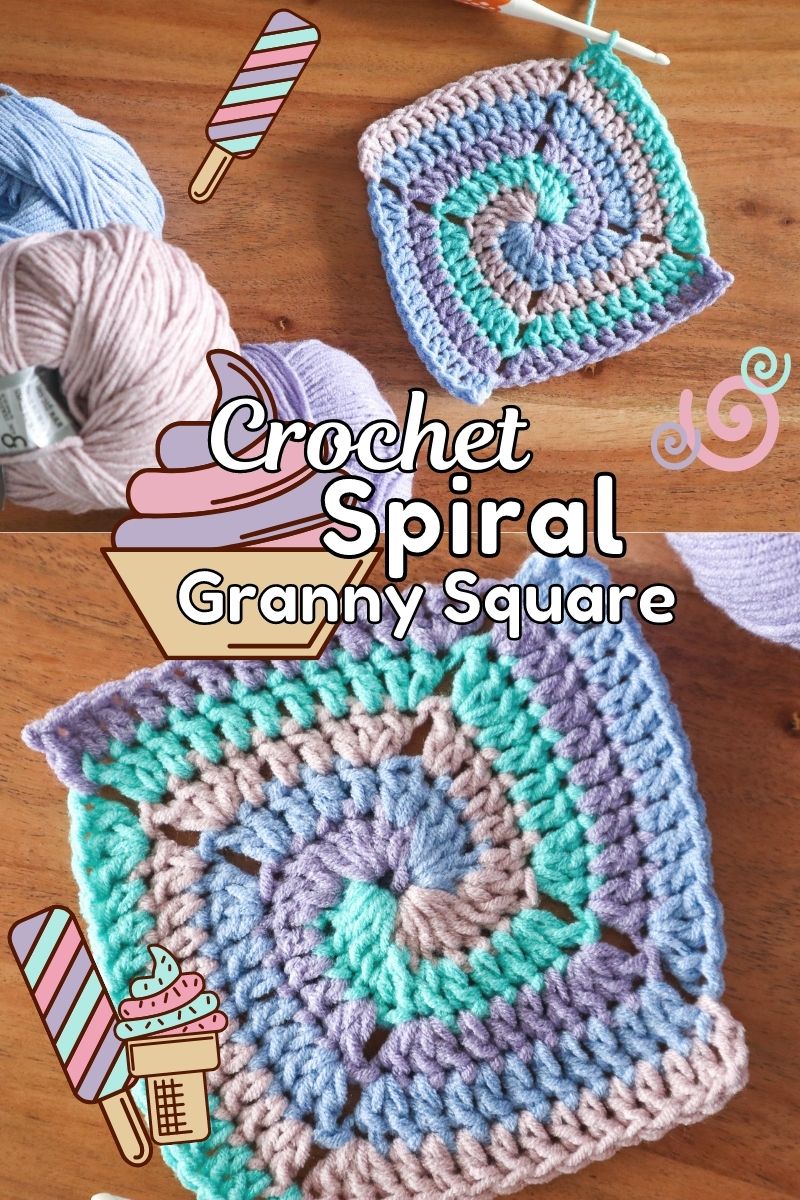
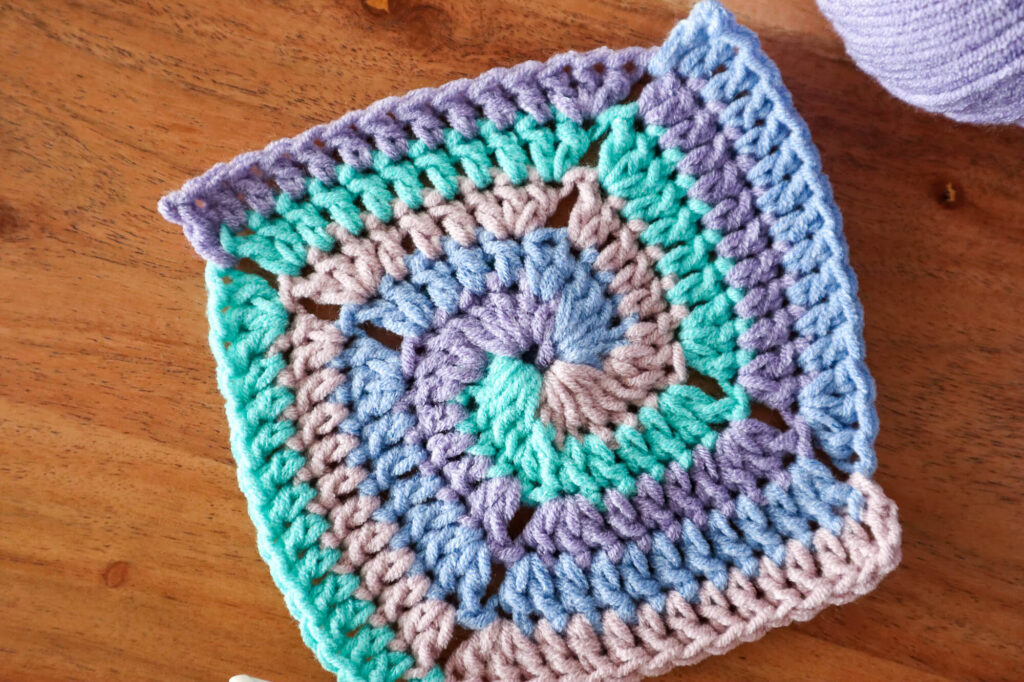
I love a good granny square! And I think this spiral, 4 color granny square is the most eye-catching of them all. You may have seen other tutorials for spiral squares out there but the construction of this one is a little bit different.
I had a hard time finding a spiral granny square method that laid perfectly flat, had color changes that made sense to me and could be continued around and around to any size. So I sort of developed my own way to make a spiral granny square!
Upon writing these instructions down, I realized that this pattern sounds a lot more complicated in words than it actually is! This is why I encourage you to check out my video tutorial:
That way, you can see how fun and easy this square really is.
Materials
Lets get the nitty gritty details out of the way.
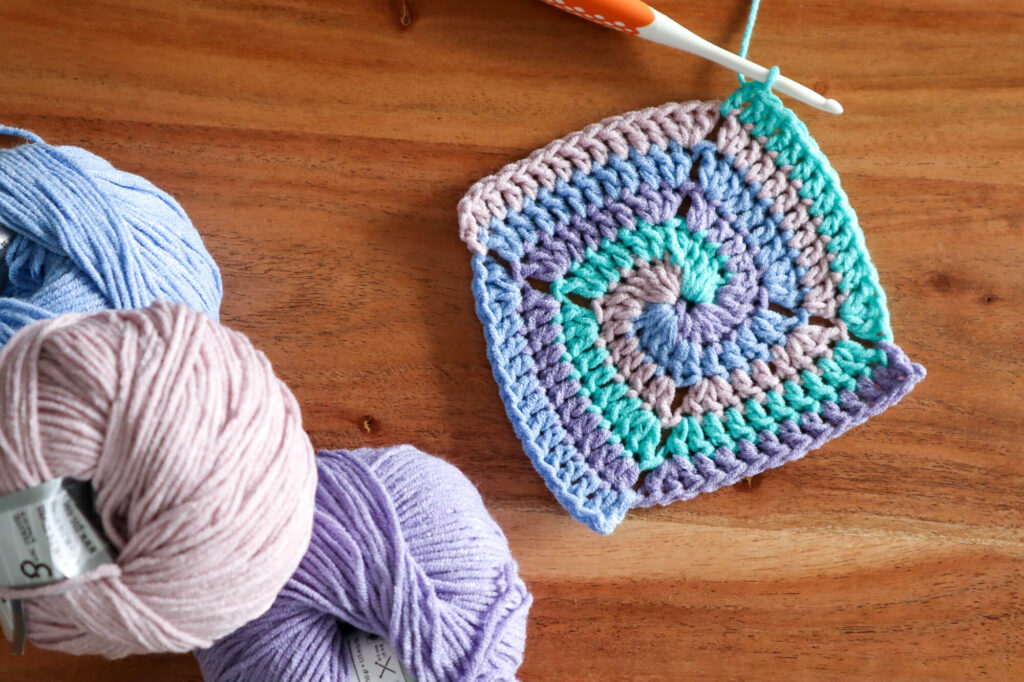
You could make this crochet motif in any weight yarn and corresponding hook size. In the example you'll see in this blog post, I used DK weight yarn and a 4.5mm (G+) crochet hook.
You'll need 4 different colors of yarn to obtain the same color pattern, but the spiral can be crocheted in fewer colors as well. I'll refer to them as colors "A, B, C and D" with A being the first color you work with in each round and D being the last.
It's important to remember which are your first and last colors while working the pattern.
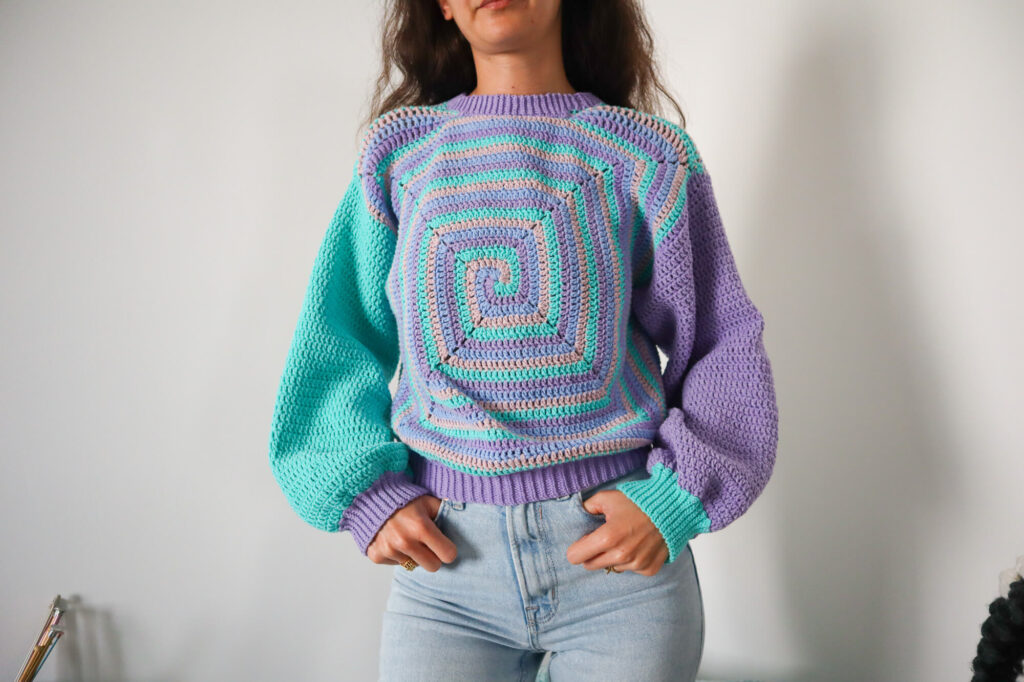
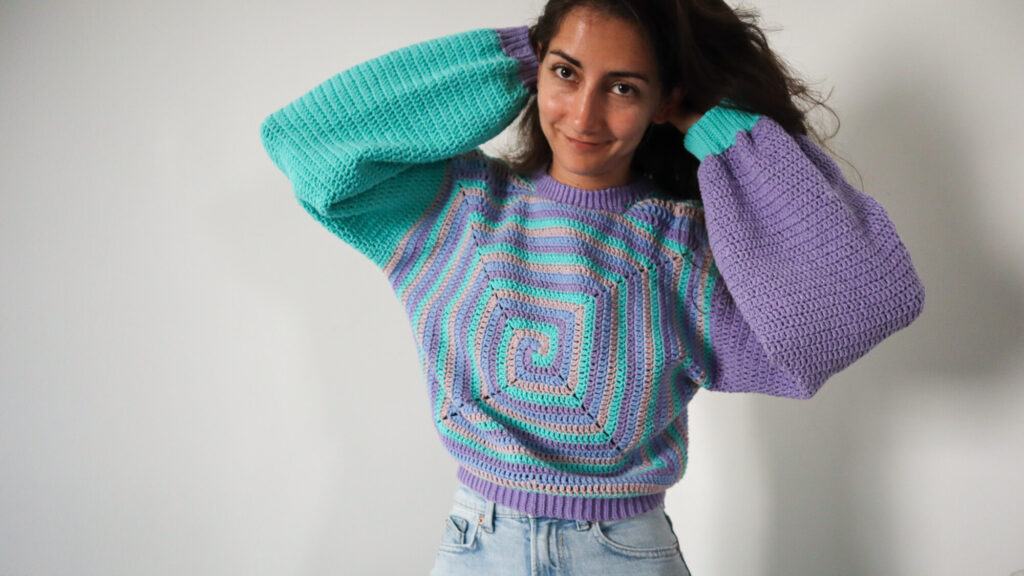
The amount of yarn you'll use will depend on how big you grow your square! This one can be continued to any size square which made it perfect for my "square sweater"! It's a sweater template I made to help you turn any crochet square into a sweater, easily. You can check out that post here
Overview
This pattern is written much like any other crochet pattern but keep in mind we will be working in rounds around and around our square without ever turning our work or joining previous rounds with slip stitches (like typical granny squares).
While reading the pattern, when you see "with color X," remove your hook from the previous color, insert your hook into the new color and continue on in the instructions.
To keep your live loops in other colors from unraveling while you are working with your active color, you can pull those loops up long before removing your hook or use a clipping stitch marker to keep the live loops in place until you need them.
Throughout the pattern, you'll be working the stitches of your current color into the previous rounds stitches of the next color. So color A stitches are always worked into color B stitches. Color B into color C and so on.
Spiral Granny Square
Round 1
In color A, chain 4 and slip stitch into the first chain to form a little ring
With color A: Into the ch4 ring, 1sc, 1hdc, 3dc
With color B: Fasten onto the ch4 ring and work, 1sc, 1hdc, 3dc into the center of the ring
With color C: Fasten onto the ch4 ring, 1sc, 1hdc, 3dc into the center of the ring
With color D: Fasten onto the ch4 ring, 1sc, 1hdc, 3dc into the center of the ring

Round 2
With color A: 2dc in the next sc from previous row (sc of color B, check "overview" above for explanation), 1dc in next hdc.
With color B: 2dc in the next sc from previous row, 1dc in next hdc.
With color C: 2dc in the next sc from previous row, 1dc in next hdc.
With color D: 2dc in the next sc from previous row, 1dc in next hdc.

Round 3
With color A: 1dc in each of the next 3 sts. In the next st, 2dc, ch1, skip 1, in last st of color b, 3dc.
With color B: 1dc in each of the next 3 sts. In the next st, 2dc, ch1, skip 1, in last st of color c, 3dc
With color C: 1dc in each of the next 3 sts. In the next st, 2dc, ch1, skip 1, in last st of color d, 3dc
With color D: 1dc in each of the next 3 sts. In the next st, 2dc, ch1, skip 1, in next st of color a, 3dc

Round 4 (all even rounds)
With color A: 1dc in each st of color b up to the st before the ch1 space. 3dc in the st before the ch1, ch1, 2dc in next st. (don't work into the ch1 space, like in other granny squares).
With color B: 1dc in each st of color c up to the st before the ch1 space. 3dc in the st before the ch1, ch1, 2dc in next st.
With color C: 1dc in each st of color d up to the st before the ch1 space. 3dc in the st before the ch1, ch1, 2dc in next st.
With color D: 1dc in each st of color a up to the st before the first ch1 space of color A. 3dc in the st before the ch1, ch1, 2dc in next st.

Round 5 (all odd rounds)
With color A: 1dc in each st of color b up to the st before the ch1 space. 2dc in the st before the ch1, ch1, 3dc in next st.
With color B: 1dc in each st of color c up to the st before the ch1 space. 2dc in the st before the ch1, ch1, 3dc in next st.
With color C: 1dc in each st of color d up to the st before the ch1 space. 2dc in the st before the ch1, ch1, 3dc in next st.
With color D: 1dc in each st of color a up to the st before the first ch1 space of color A. 2dc in the st before the ch1, ch1, 3dc in next st.

Repeat rounds 4 and 5 until your square is as wide as you'd like!
on the final round, work 1dc in each stitch from the previous round until you reach the stitch before the ch1 space (true for all colors) and make 1dc in the stitch before the ch1 space and 1dc into the chain 1 space. Fasten off.

And thaaaat is how you crochet a spiral granny square that you can make as big as you'd like and lays perfectly flat! Let me know if you like this motif and what you plan to make with it! And if you want to see how I used mine in this sweater design, click the pic and it will take you there!
Thanks for stopping by my blog! You might also like one of these posts here:
More Tutorials
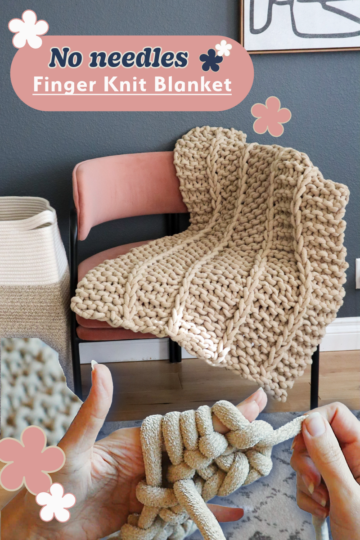
- How to Finger Knit a Chunky Ribbed Blanket (No Needles Required!)
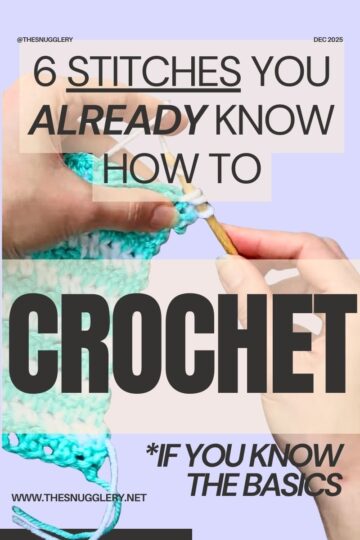
- 6 Crochet Stitches You ALREADY Know (If You Can Make Single, Half Double, And Double Crochets)
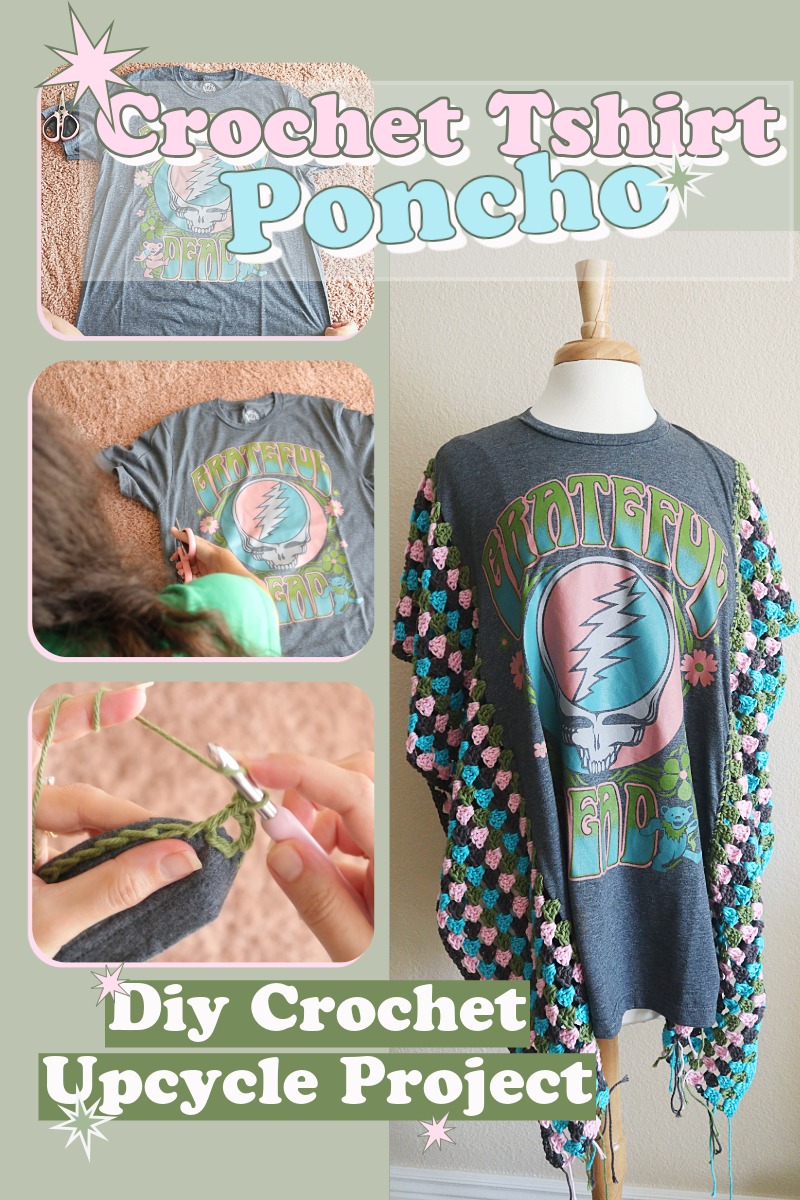
- DIY Crochet T-Shirt Poncho – Upcycle an Old Tee into Festival-Ready Style
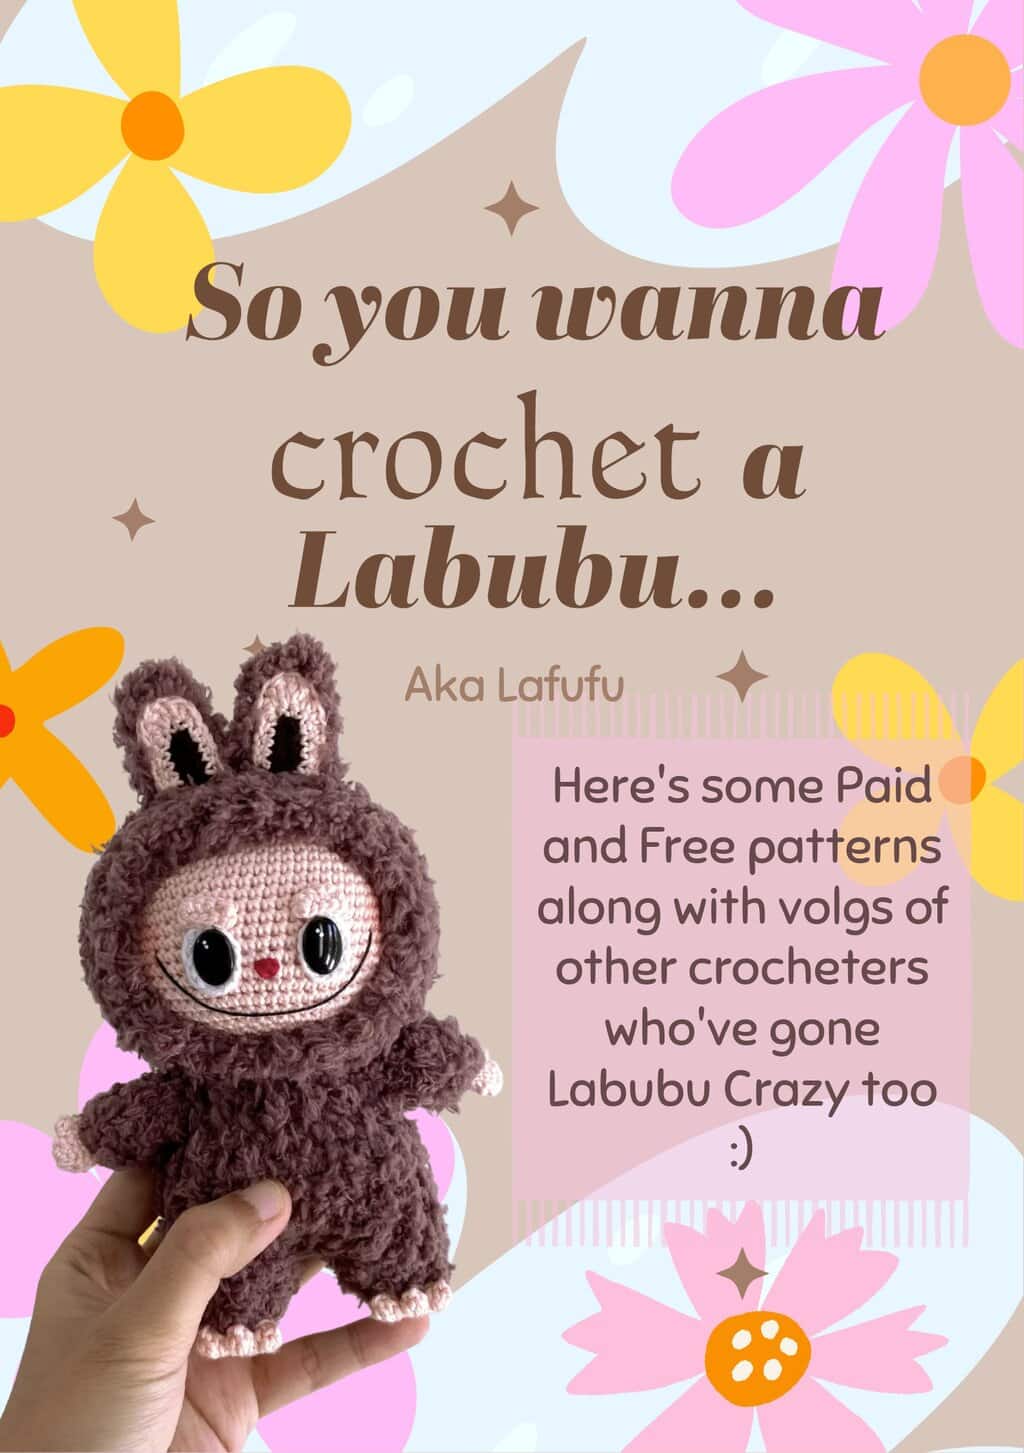
- Are You Really Gonna Crochet A Labubu? - Paid, and Free Patterns To Help You On Your Lafufu Journey