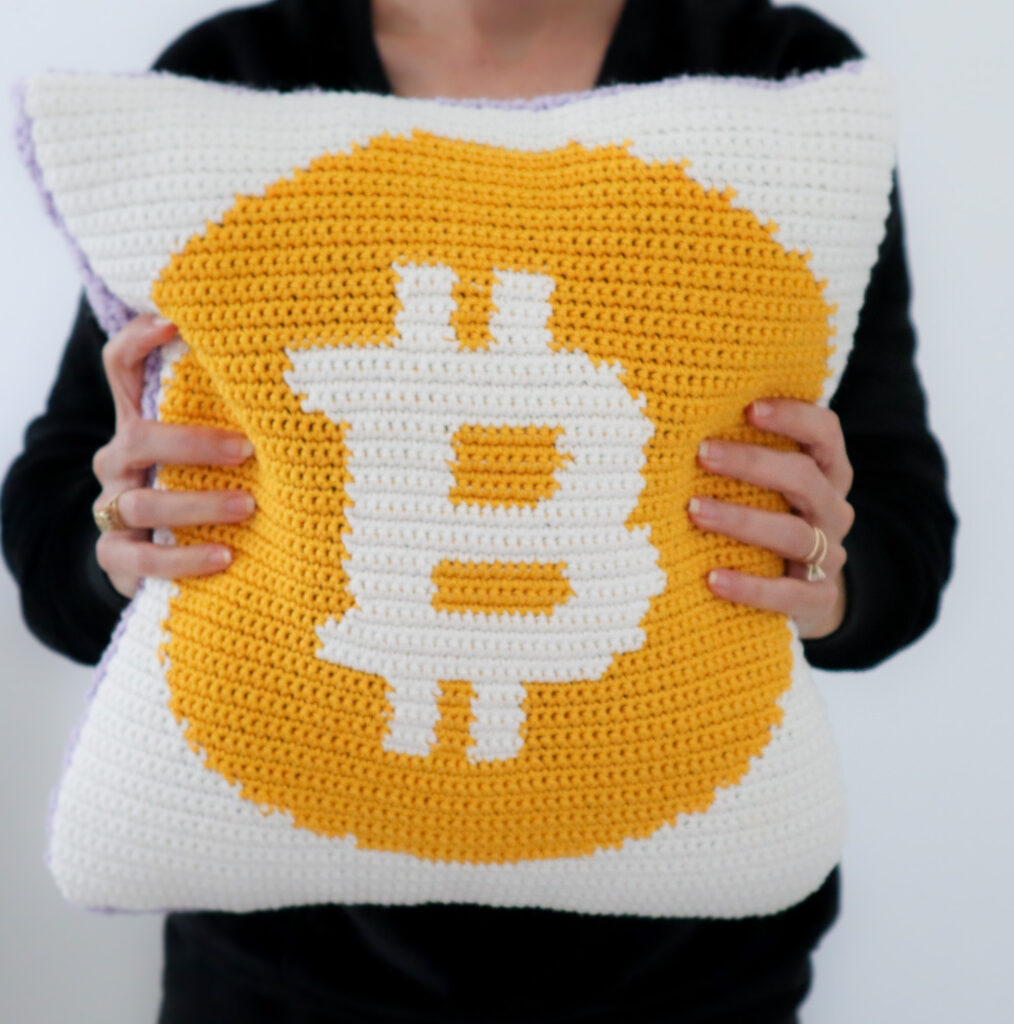
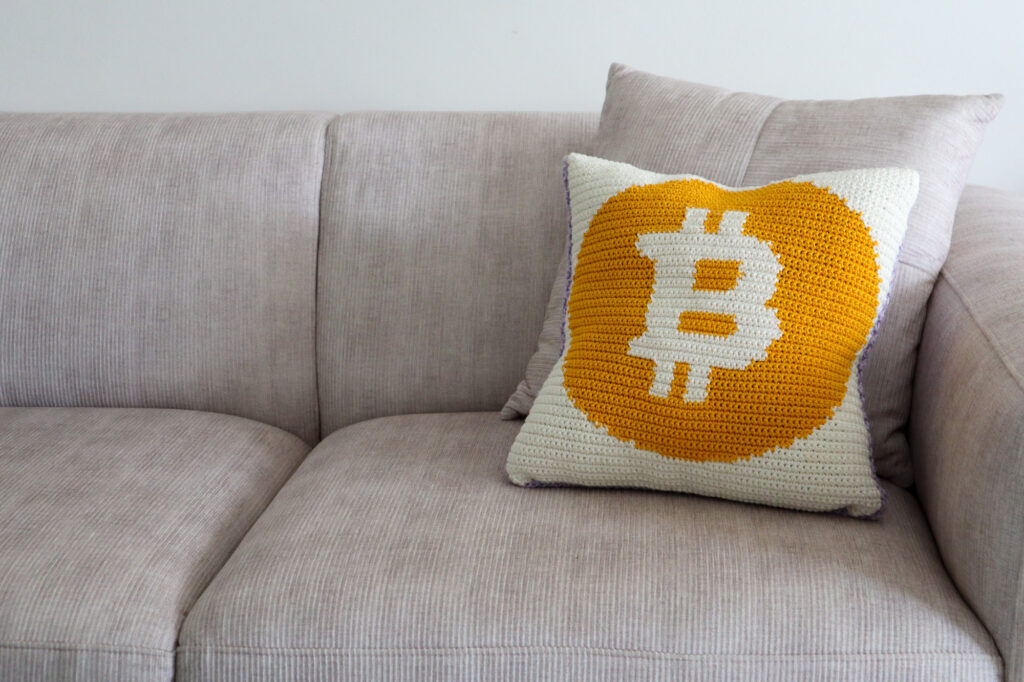
Scrap that amigurumi truck project cuz little Jonny is into crypto now. And from the moment he pulled out his phone at thanksgiving dinner to show you a bunch of glowy numbers and charts, you were thinking… "what do I crochet for this kid now???" Well don't worry, I got you.. we're gonna crochet this cool bitcoin pillow!
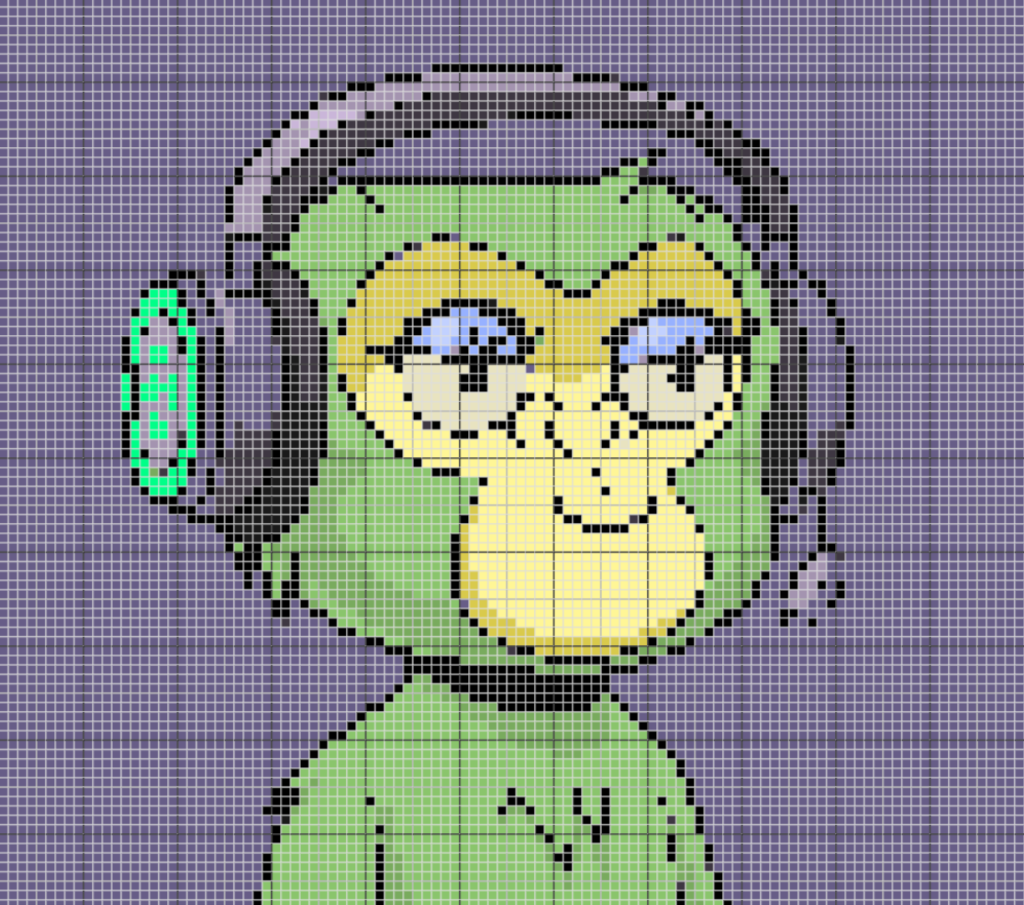
Now I'd be remis if I didn't mention that not everyone, that is into crypto, likes bitcoin. There's a chance little Jonny is more into an over priced picture of a monkey that he bought on Opensea. But, after this tutorial, you'll know how to make your own tapestry crochet patterns from any picture, so you can slap whatever thing your nephew is into these days, onto a pillow (which makes a pretty solid gift, imho).
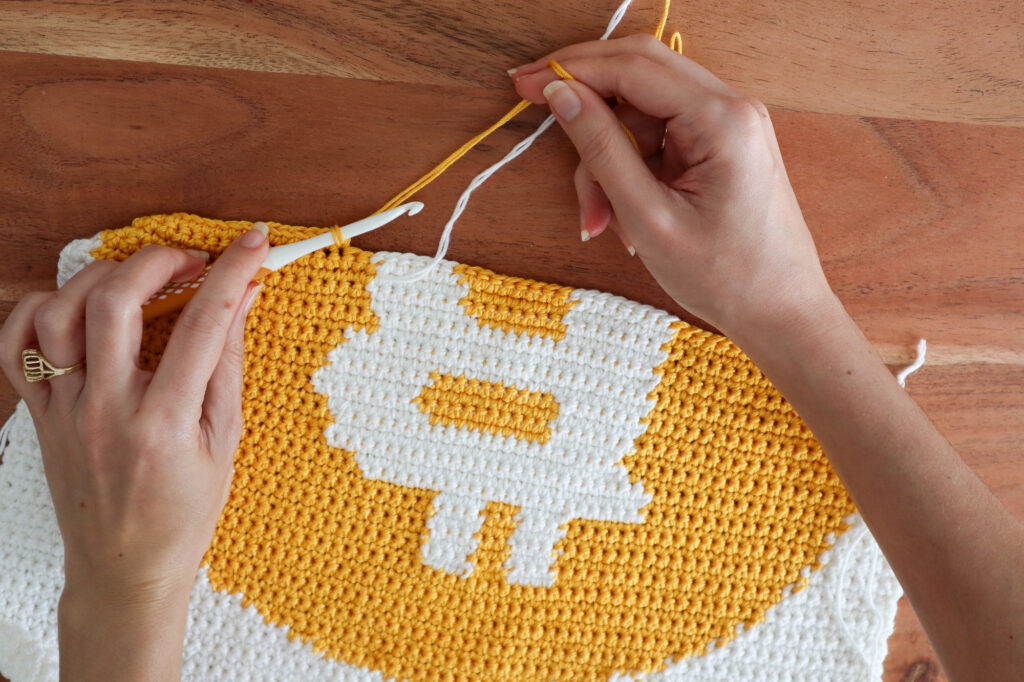
So yes, this is tapestry crochet: A great gateway into crochet colorwork for beginners because you can use crochet stitches you already know, don't have to manage a million little different color bobbins, and you can really create any design that you can fit into a grid just like I did for my bitcoin pillow.
At its most basic, tapestry crochet is a piece of single crochet. One where you've changed color at specific stitches while you worked along and you use a chart to let you know when to change color.
To create these grid charts, there are a few tools available. The most widely used is Stitchfiddle.com which is a great, simple tool to create any crochet or knitting chart you can think of.
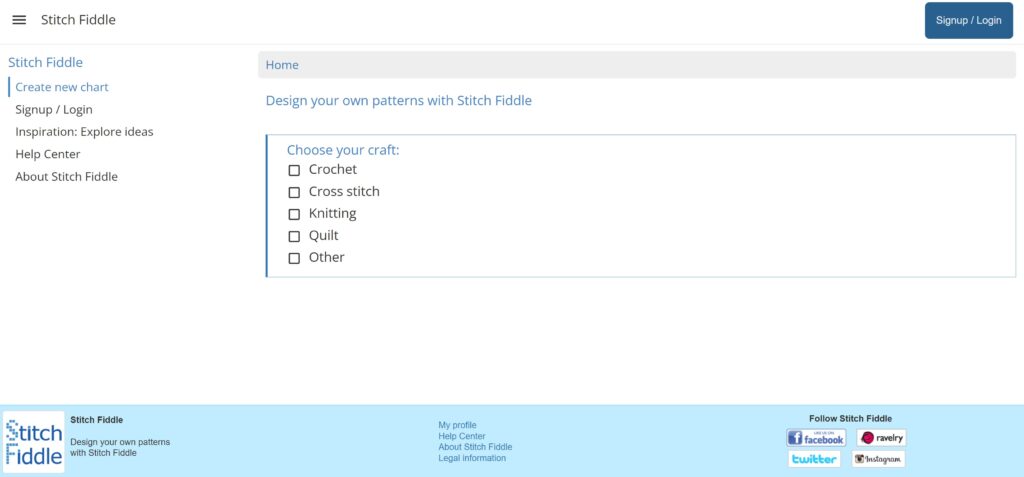
Select "Create new chart" ---> Crochet---> Crochet with colors
From here, you can choose to go freehand, where you will be able to click on individual squares to add color. Or you can select "from picture." Which lets you upload an image file, then you can tweak the design that imports until it suits your needs. When I import a file, I usually have to lower the color count and size before I get a chart that I can crochet with.
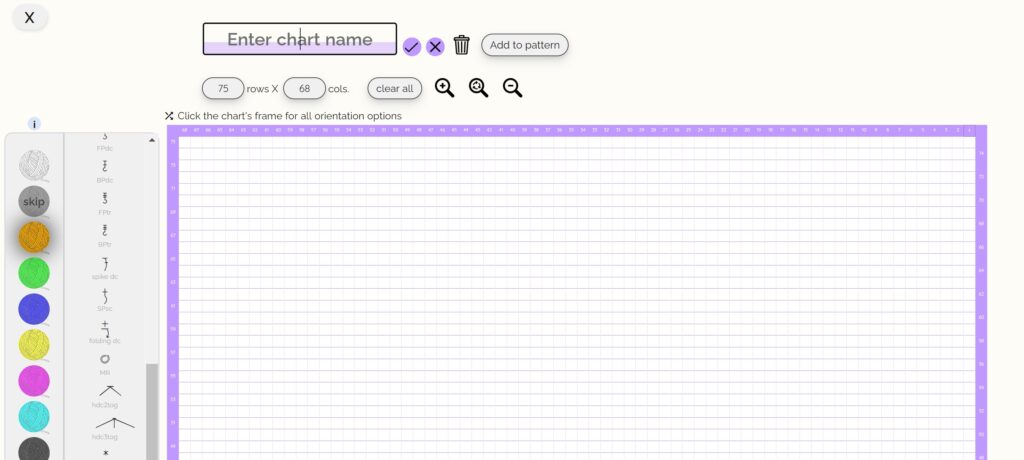
Another fabulous color charting tool is built into Ribblr. If you haven't heard of Ribblr before, It's a new pattern marketplace (full of free patterns too) which I've discussed before in THIS video. You can follow along with the bitcoin pillow chart on Ribblr by clicking HERE and see how you like their charting tool! It works much the same way as Stitchfiddle but creates a chart that is interactive for whoever is reading the pattern.
You may also download the printable chart by clicking on the image below:
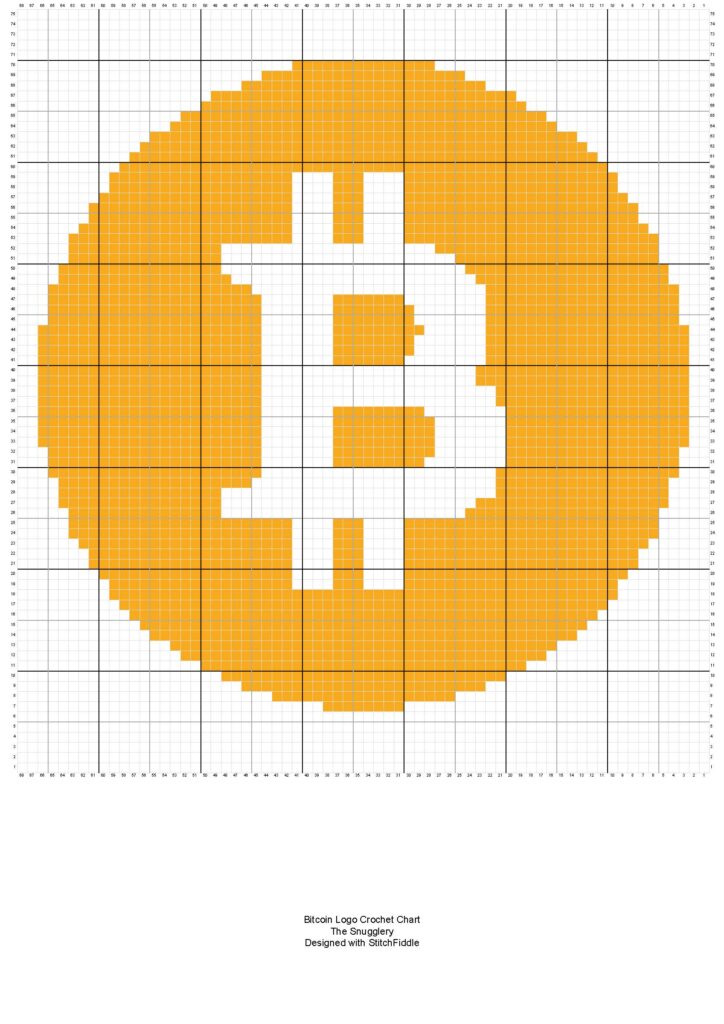
Reading Tapestry Crochet Charts
Now that you've got your chart, lets quickly go over how to read it. In this and most tapestry crochet patterns, one square represents one stitch. And each row of squares, horizontally, represents one row of single crochet.
Reading the odd number rows is very easy because you'll read from right to left and crochet from right to left as well.

In this zoomed in example, you can see the first orange squares come in at stitch 31. So on row 7, you'll work 30 white squares, then switch to orange.
It gets slightly trickier when it comes to even numbered rows. Since we turn our work in crochet, on every even numbered row, you're actually working on the reverse side of the project.
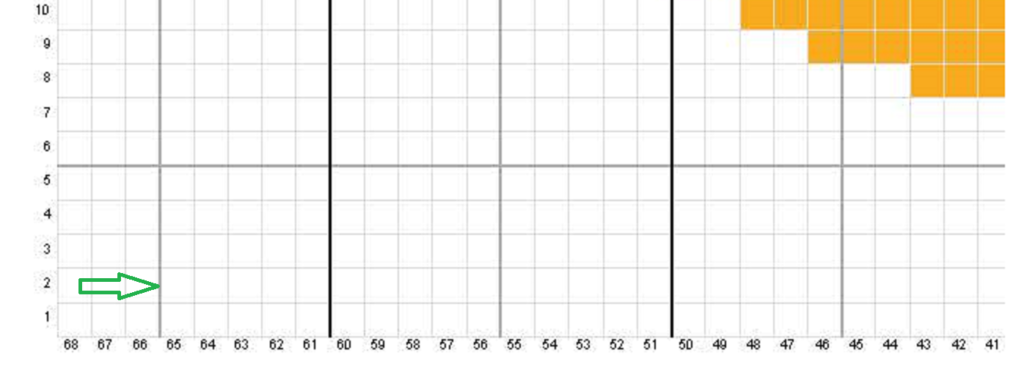
Rather than having a second, mirror-image version of the graph, you can read the same graph for both right and wrong sides of the work. Just from left to right while working on the "wrong side" or when you are at the start of an even numbered row.
So, above, if you were starting row 8, you would work 25 white squares, and then change to orange.
That covers when to change color, but HOW do we change color in tapestry crochet?
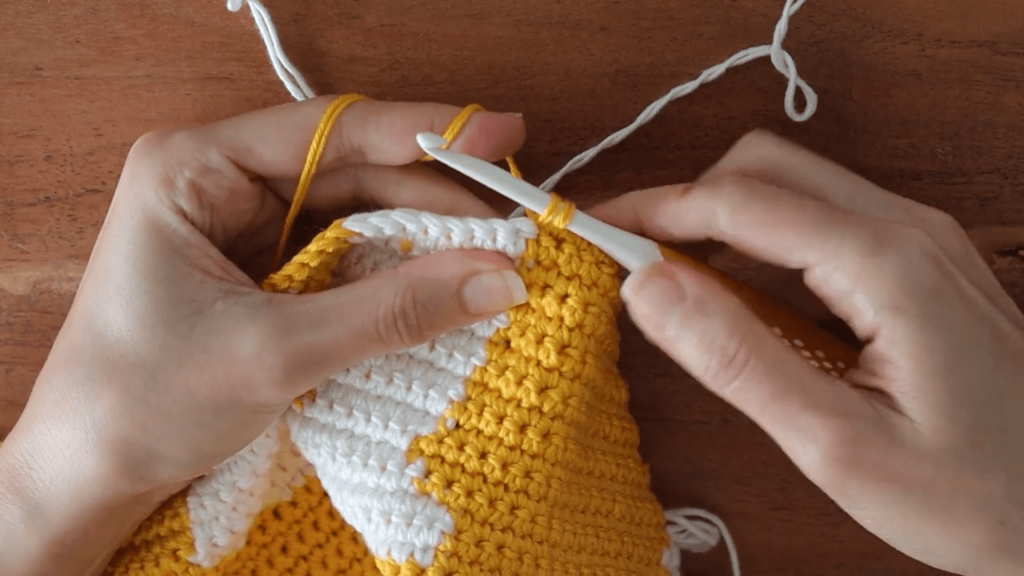
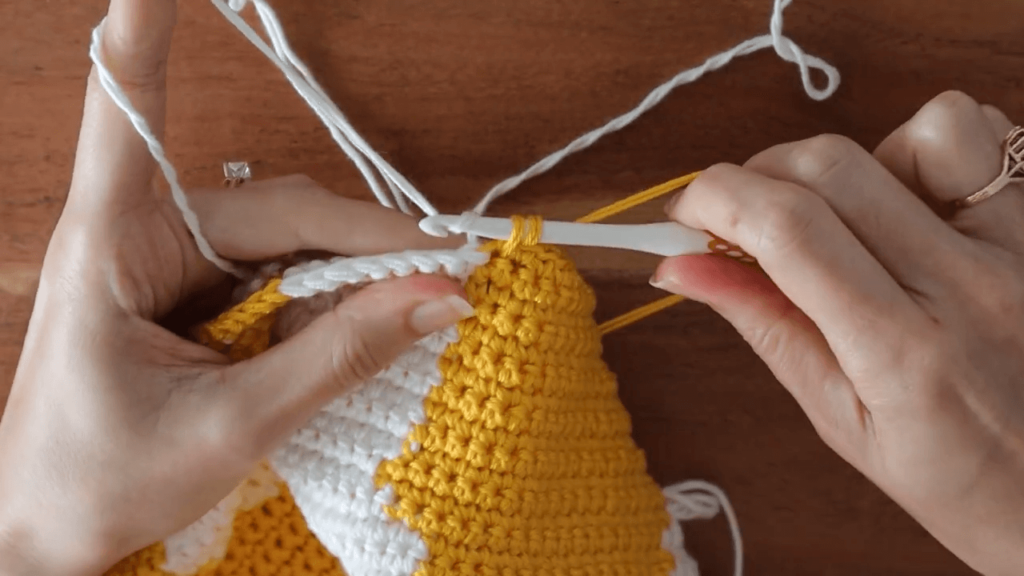
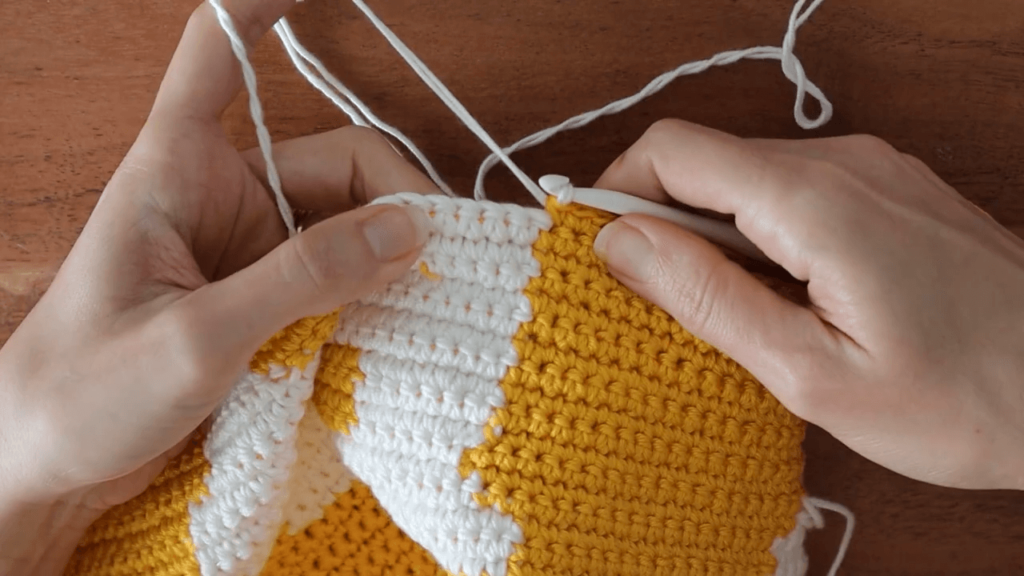
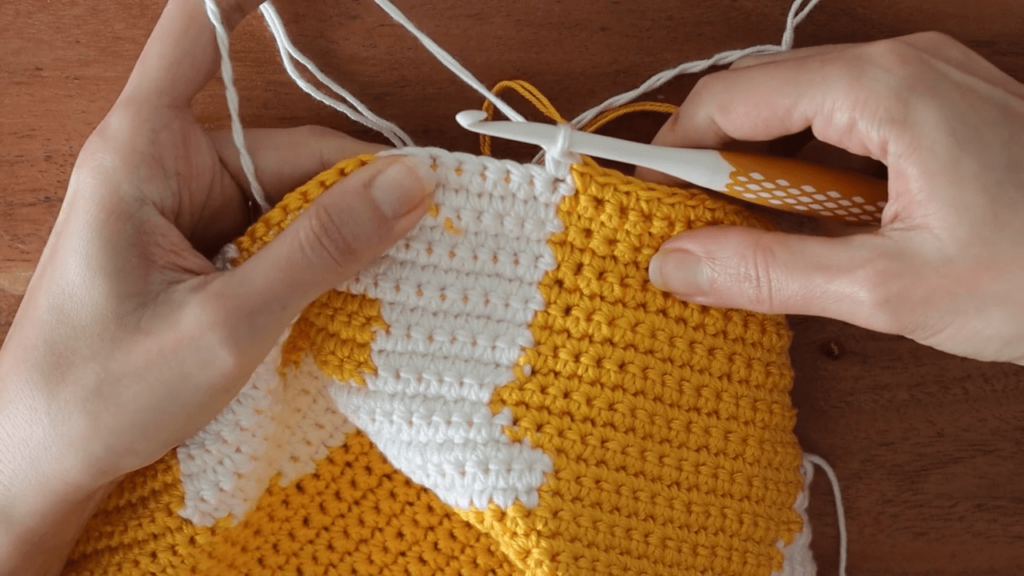
The way that gives the cleanest result where you control exactly where the color goes, is to complete that last single crochet of the previous color in the new color, thereby giving the next stitch the correct color little hat on top.
...complete that last single crochet of the previous color, in the new color
Insert your hook into the stitch, yarn over and pull up a loop, and then yarn over with the new color, pull through two to complete the single crochet.
Carrying Colors
Now if I just continued on in the new color, this would be intarsia. I would need a new bobbin of yarn in the old color waiting for me on the other side.
What makes tapestry crochet a little simpler, is that we carry all the colors we need across the work, never breaking the yarn meaning less ends to weave in, fewer bobbins to keep track of and you can go really freeform with it as well because you have any color you want available to work with at any time.
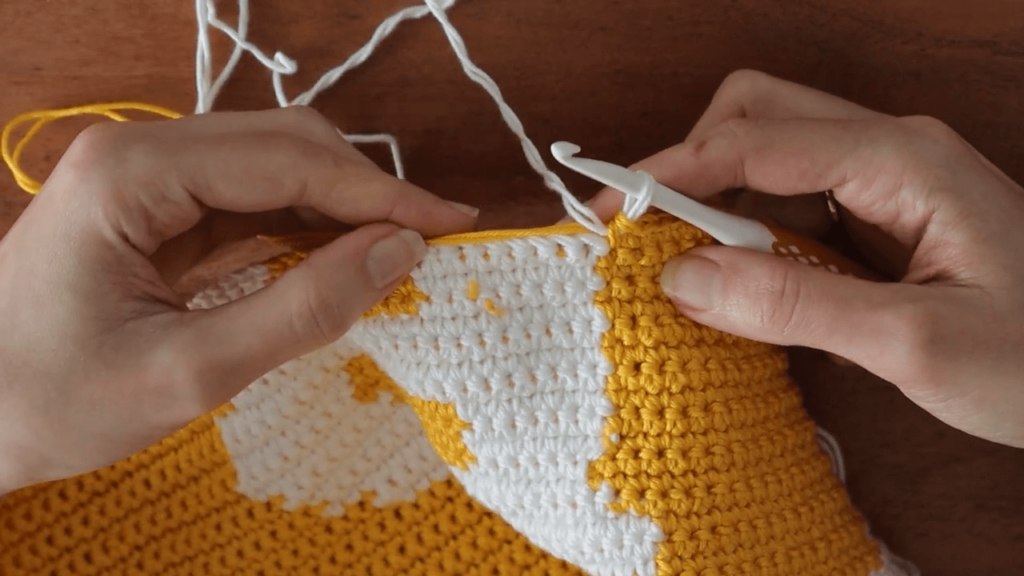
To do that, simply lay the working yarn of your old color across the top of the stitches. Then, as you work in the new color, the old strand gets buried under the stitches that you're working.
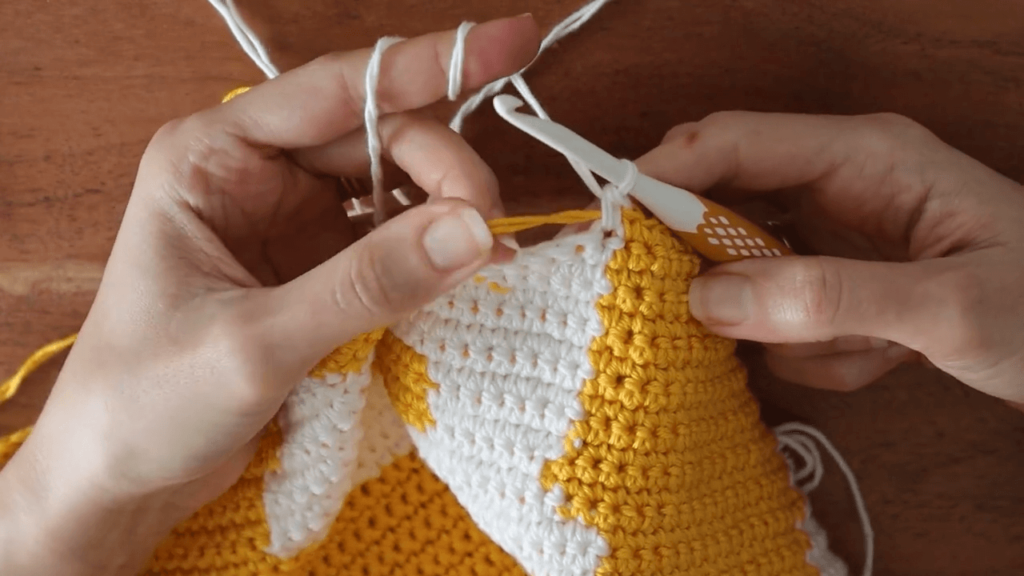
It's really that easy! Then, the old color is always available to switch back to if your chart says so.
Bridging across multiple stitches
While following your chart, you make come to a point where the yarn you need is a ways away from the stitch you need to use it in.
To bridge the gap, grab the yarn from the distant stitch and lay it all across the stitches you intend to crochet over. Take care to make sure the strand is not too tight that it will pull the work in and not too loose that it will produce any excess. Then, complete the stitches while burying that extra strand along with any other colors you may be carrying across as well.
Crochet Bitcoin Pillow Pattern
With these tapestry crochet tips, you already have all the knowledge required to follow my bitcoin pillow chart! No written pattern required.
Guage
18sts by 21 rows on a 4"x4" swatch of single crochet using a 4.5mm (G+) crochet hook.
That is the gauge needed to get a 15x15 inch pillow cover suitable for a 16 inch square pillow insert.
I used two strands of borderline fingering weight yarn because I was looking for the perfect bitcoin nacho yellow color and couldn't find it in a worsted weight yarn. But the gauge is typical of a lighter worsted or heavy 3 weight yarn and that hook size.
If your gauge is different, It's still okay! You'll just wind up with a different size pillow, so I suggest waiting to buy the pillow insert until you've crocheted your piece and know what the final measurement will be. Whatever it is, grab a pillow insert that is 1 to 2 inches wider than your pillow cover.
So how about the back??
You can absolutely make two copies of the charted pattern, seam them together and stuff with a pillow insert before seaming the final side.
I was feeling a little lazy, however, and crocheted a plain back panel in double crochet, which totally worked too. If you crochet a plain panel for the back, just make sure it's the same size as your tapestry crochet panel.
There you have it!
I hope you liked this little intro into tapestry crochet and crochet colorwork. And I hope you (and your crypto obsessed loved one) love my crochet bitcoin pillow idea! I personally think its pretty cool that we can make these color charts and print your design out in yarn with your bare hands!! Isn't it neat when you think of it that way?
Let me know if you make this or any other design using my tips! Tag me on social media cuz I'd love to see them!
Still lost?? Well why don't you check out the video too?!
