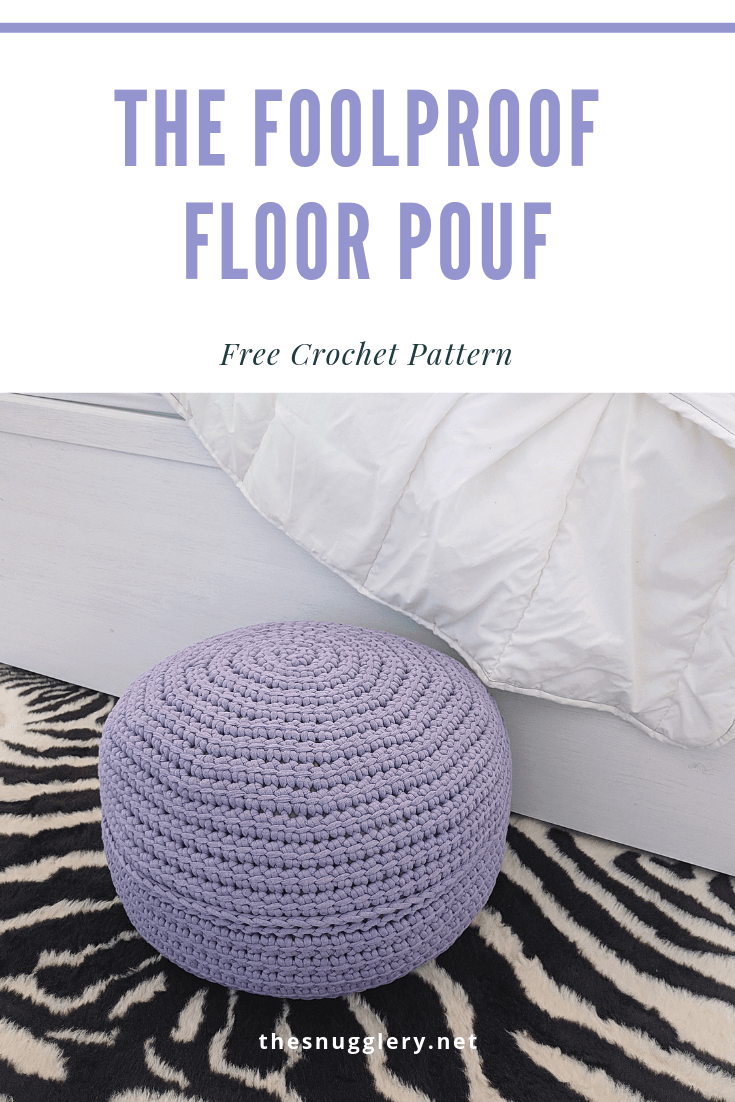
Even more exciting, this pattern comes with my first ever Youtube video tutorial! Check it out if your a visual learner (like me ?).
For a downloadable version of the pattern, click Here
By the way, a great “dupe” for the Kartopu Home Decor yarn that I used in this pattern is from Ice Yarn called Tube Cotton Jumbo and it comes in a bazillion colors!
Materials
For this pattern you’ll need about 525 yards (480 m) of a super bulky cotton tube yarn or t-shirt yarn. I used a 11.5mm crochet hook but use whichever hook you feel gives you the tightest gauge while still being comfortable to work with. You’ll also need two removable stitch markers.
dc(s)=double crochet(s) sc= single crochet ch=chain sl st=slip stitch st(s)=stitch(es) rnd=round
ldc= linked double crochet – illustrated below
With this pattern, the size of the pouf is completely customizable. My finished pouf was 10″ tall and 18″ across.
For stuffing the pouf, I recommend two round pillow inserts about 2 inches wider than your pouf circumference.
However, I used a couple old pillowcases and stuffed them full of re-purposed cloth like old towels and blankets. My pouf has a little more “character” and a lump or two here and there but I liked being able to use up some old fabric I had around the house.
Linked Double Crochet
Before we start the pattern, lets review the linked double crochet stitch. To complete a linked double crochet (ldc), Insert the hook into the horizontal bar in the center of the post of the previous dc stitch (shown in green), yo and pull up a loop.
Crochet Pouf Pattern
To begin, make a magic loop and chain 1
Round 1: Make 3scs into the magic loop, then make one regular dc into the magic loop. Make 6 more linked double crochets (ldcs) into the magic loop. Tighten the loop, and make 1ldc in each sc stitch from the beginning of the rnd (10sts -not counting scs).
Round 2: Make 1ldc in the next st, place your marker in the st you just made to mark the beginning of rnds. Make 1 more ldc in the same st. Make 2ldcs in each stitch of the rnd (20sts).
Round 3: Make 2ldc into your marked stitch. Move marker up to the first of those 2 sts. Make 1ldc into the next st, 2ldcs into the next st. Repeat 1ldc, 2ldc to the end of the rnd (30sts).
Round 4: Make 2ldc into your marked stitch. Move marker up to the first of those 2 sts. Make 1ldc into the next st, 1ldcs into the next st, 2ldcs into the next st. Repeat 1ldc, 1ldc, 2ldc to the end of the rnd (30sts).
When your piece is as wide as you want your pouf to be, stop increasing and only work 1ldc in each st of the rnd, making sure to move your marker ever rnd.
Work 4 rows of no increases (more for a taller pouf, less for a flatter pouf) and don’t yet fasten off.
You can stuff your pouf before you seam or after you’ve seamed the pouf about half way.
Insert your pillow forms or whatever stuffing method you prefer. As I mentioned above, I filled my pouf with a pillowcase full of old towels. Not glamorous but it did the job!
Seaming
Line up your two pieces with your last stitches of each piece side by side. Using the working yarn from one piece, slip stitch the back loops of your last rounds together. I did this by working half way around the pouf with the working yarn from the bottom piece, and the other half way with the working yarn from the top piece.
Happy stitching!
-
Product on sale
 Half Double Diamond Baby Blanket – Crochet Baby Blanket PatternOriginal price was: $6.50.$5.20Current price is: $5.20.
 -
Product on sale
 Crochet Mermaid Tail Blanket Pattern – for Super Bulky YarnOriginal price was: $6.50.$5.20Current price is: $5.20.
 -
Product on sale
 C2C Boba Tea Graphgan – Corner to Corner Crochet PatternOriginal price was: $6.50.$5.20Current price is: $5.20.


