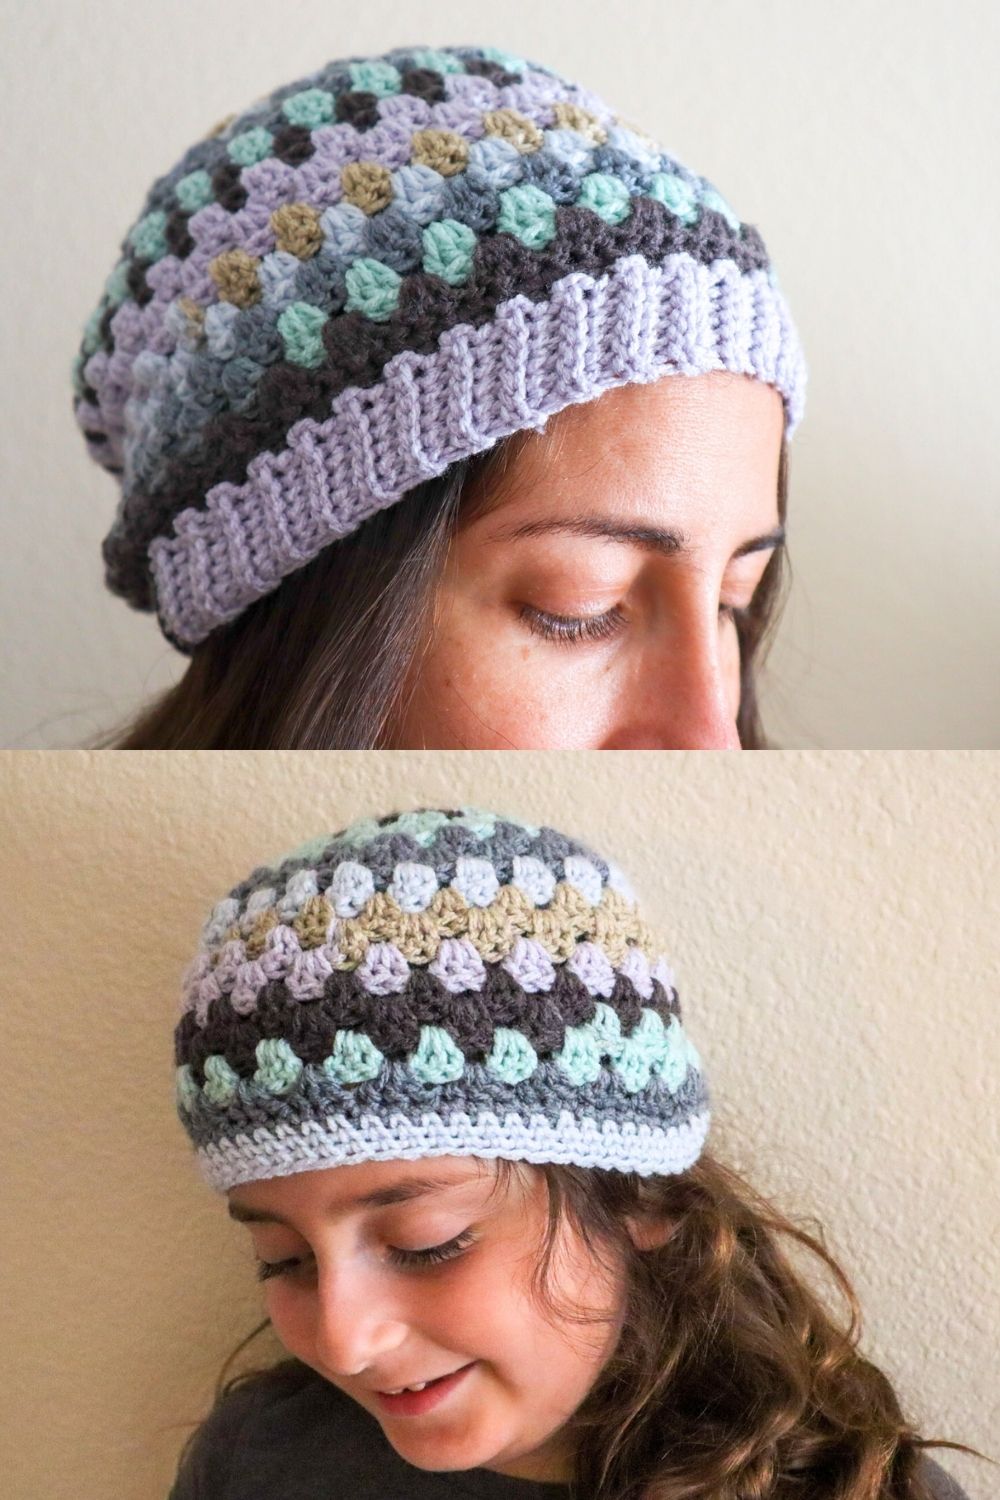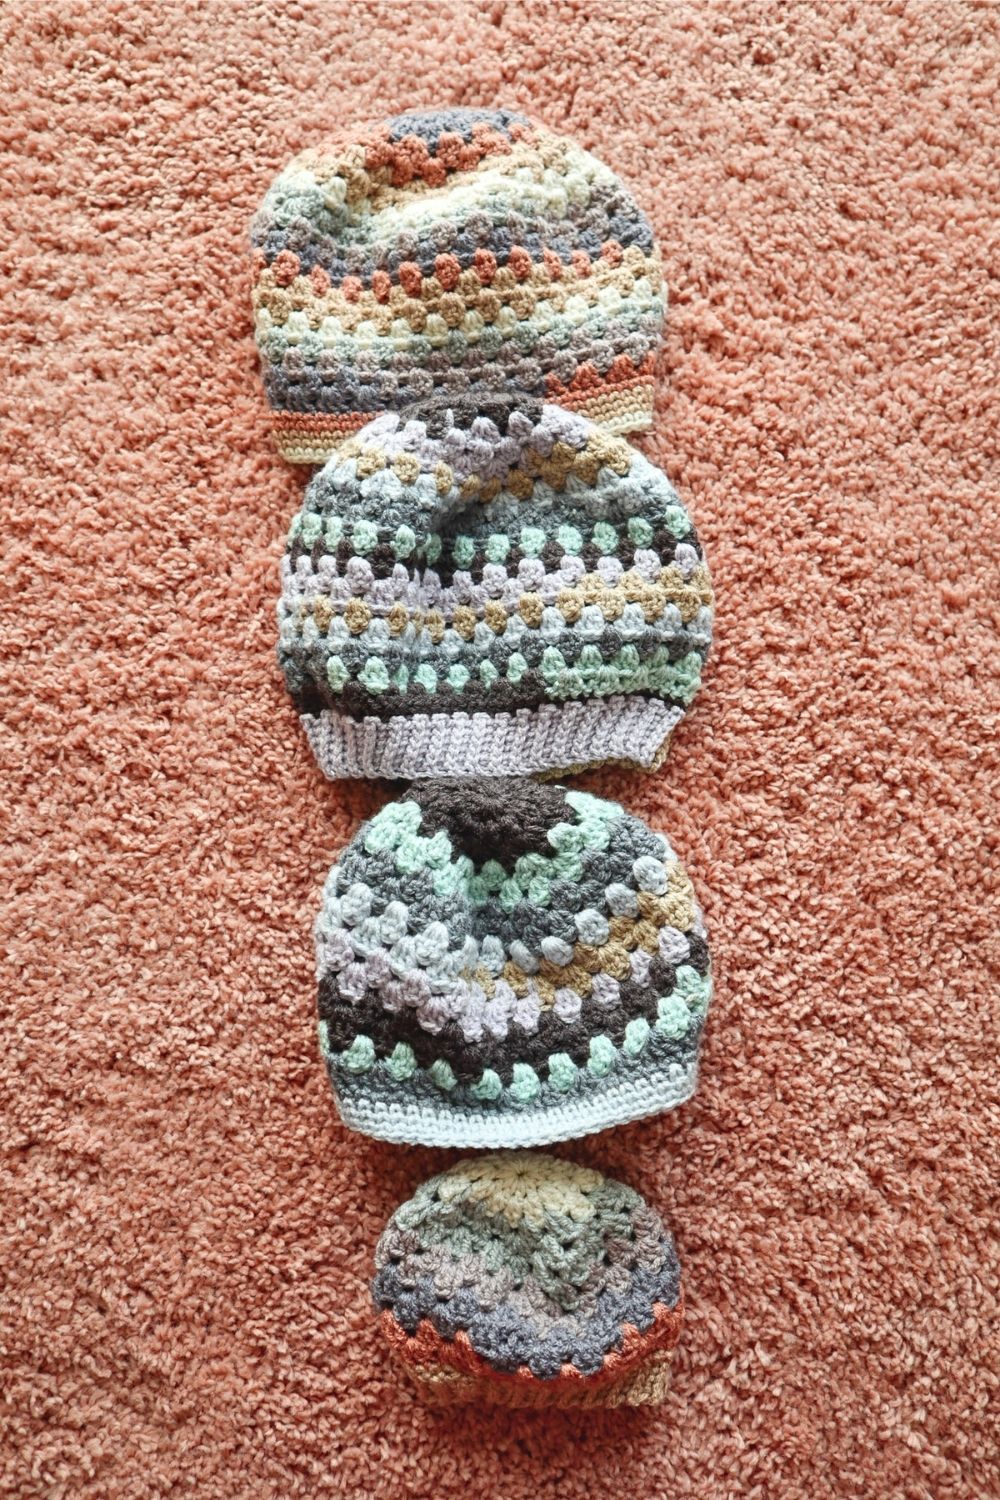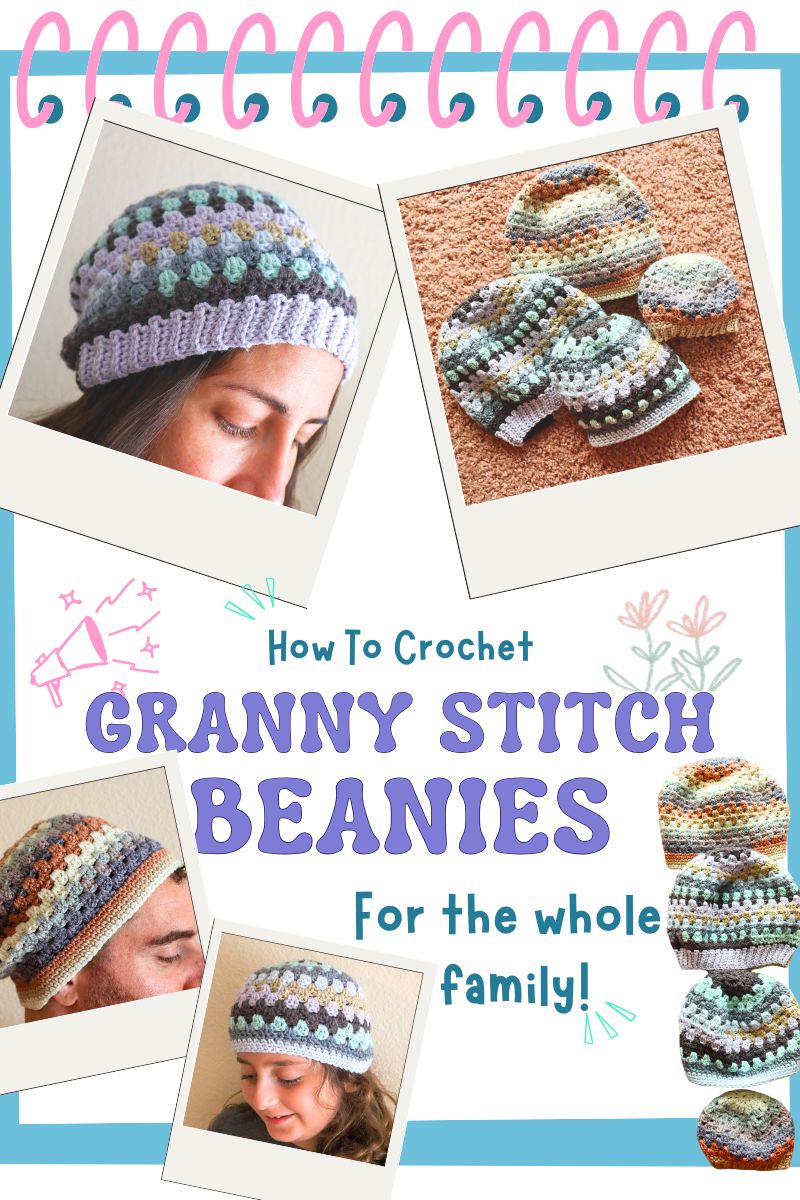
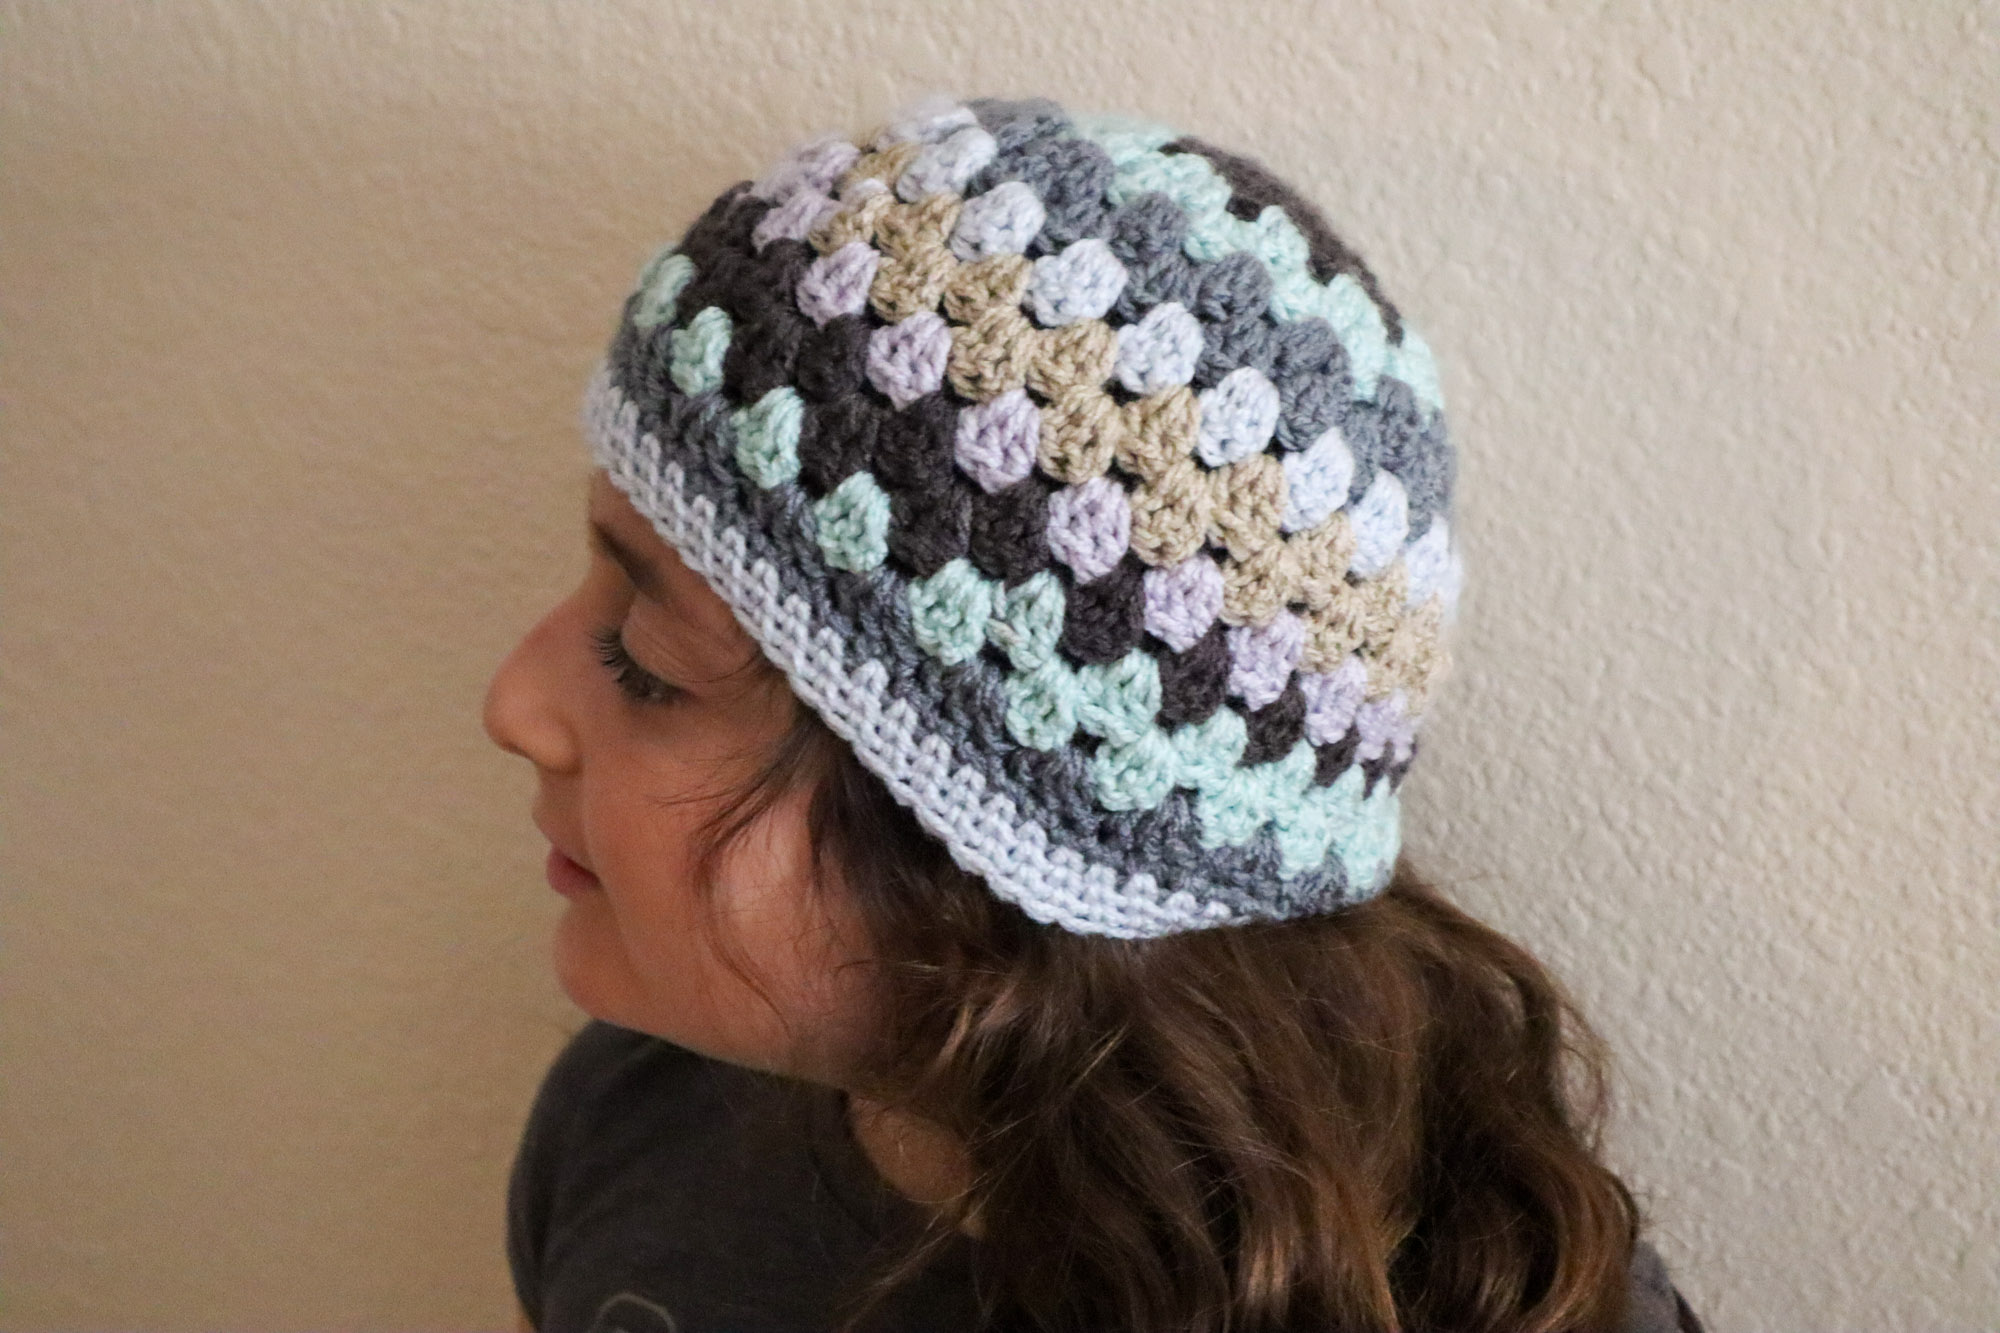
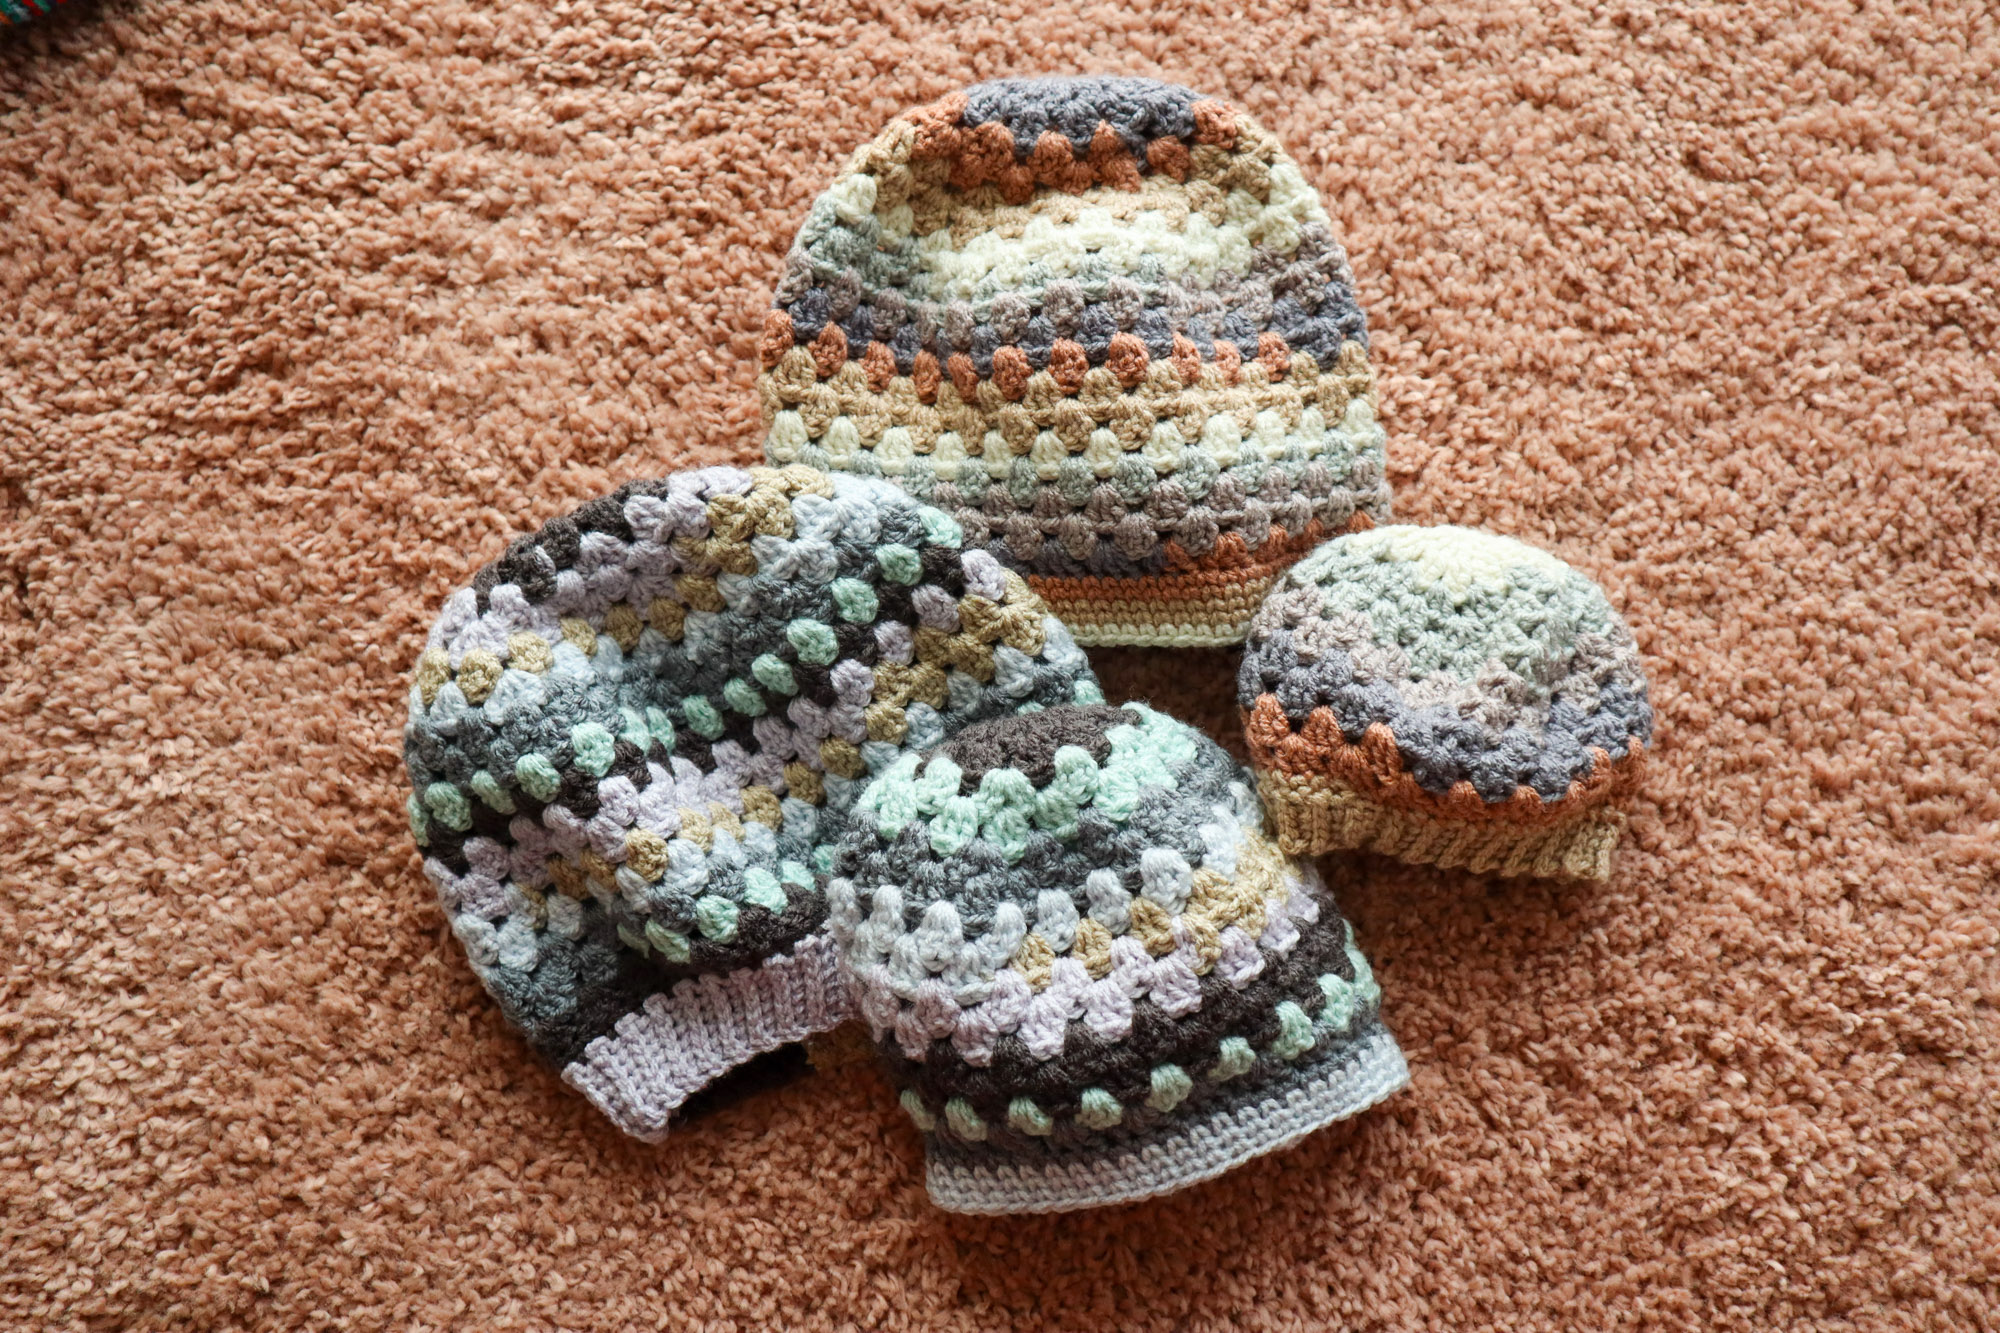
Looking for a free granny stitch beanie pattern with sizes for absolutely everyone? You've found it! This easy crochet beanie pattern is perfect for beginners and uses the classic granny stitch, which shows off self-striping yarns especially well. Plus, I'm including a free sizing chart so you can make matching beanies for the whole family!
Jump to:
Why You'll Love This Granny Stitch Hat Pattern
This crochet granny stitch beanie is seriously one of m y favorite patterns because:
- It's beginner-friendly and uses basic stitches
- The granny stitch creates beautiful texture with natural stretch
- One pattern works for all sizes (baby through adult!)
- It's completely customizable with different brim options
- Works great with self-striping yarn for fun color variations
Materials
Yarn: I used Caron Cinnamon Swirl Cakes in Cookie Mint (for the ladies) and Oyster (for the fellas), but you can use any weight yarn since we will be working towards absolute measurements. We'll talk a bit about adjusting your hat to fit later on in the pattern.
Hook Size: I used a 4.5mm (G hook) with the yarn I used, but you might need to adjust for gauge (I'll explain below)
Other Supplies:
- Scissors
- Optional yarn needle for weaving in ends
- Measuring tape
Free Sizing Chart
Grab my free hat sizing chart to get perfect measurements for every size!
Video Tutorial
Getting Started
To begin, chain 4 and sl st to the first ch to make a little ch4 ring.
Round 1: Ch 3 (counts as your first dc), then work 11 more dcs into the ring for 12 total dcs. Here's a quick tip-crochet around your yarn tail as you go, then pull it tight to close up that center hole. Slip stitch to complete the rnd.
Growing the Top of the Hat
Round 2: Ch 3 and turn. Rather than working in tops of sts, instead, insert your hook between the posts of stitches and work 2 double crochets in each space between posts. You'll have 24 double crochets when you're done (12 groups of 2). Sl st to your starting chain to complete the rnd.
Quick note about self-striping yarn: If you're making matching hats in really different sizes, you might want to not turn your work on smaller hats to keep the stripes thinner and better match for the larger hats where you do turn your work. That's what I did for my baby size hat.
Round 3: Ch 3, turn, work 2 dc in space below (first granny cluster). Skip 2 dc, work 3 dc in next space. Continue working 3-dc clusters in each space between 2-dc groups. Sl st to complete the rnd.
Increase Repeat
Round 4: Ch 3, turn, work 2 dc in space below. Then, work 4dc in the next space. Continue alternating 3dc and 4dc in each space available. Sl st to the starting chain.
Round 5: Ch 3, turn, complete a 3dc granny stitch in the space below. Then (and whenever you come to a 4dc cluster) separate the 4dc in the middle. Work one 3dc cluster in between the first 2 and the next 2 dcs of the 4dc cluster. Continue working 3dc granny stitches in each available space and in the center of each 4dc cluster. Sl st to turning chain to complete the rnd.
Repeat Rounds 4 and 5 until your circle is as wide as the "crown" measurement for your desired size. Measure the circle right across.
When it comes to repeating round 4, you will add an extra 3dc cluster between each 4dc cluster.
- First "round 4": (3dc, 4dc)
- Second "round 4": (3dc, 3dc, 4dc)
- Third "round 4": (3dc, 3dc, 3dc, 4dc)... and so on
Using the Sizing Chart
For baby size, I only needed Round 5 once. For small adult, I repeated three times using my 4.5mm hook.
Adjusting for Gauge: With my 4.5mm hook, three repeats was perfect for the small adult size. But two repeats fell short for kid size, so I switched to 5mm and that made a crown circle that was perfect for the "kid" size hat.
Since you must end on Round 5, adjust hook size rather than adding rounds if you need to nudge measurements by about half an inch.

Crocheting the Sides
Once your crown reaches the right width, just work regular granny sts (3 dc in each space) around and around, sl st and turning at the end of rounds.
Continue until you reach the "length" measurement from the chart. I stopped one half inch short to make room for a brim.
Adding a Brim (two options)
Setup Round (for both brim styles):
- Ch 1, turn
- Work 1dc in each of the next 7dc from the prev rnd. Then sc2tog (insert in st and pull up loop, insert in next st and pull up loop, yo and pull through all 3)
- Repeat around: 7 sc, sc2tog
- Sl st to first sc
Ribbed Brim
- Ch 7, skip first ch, work 6 sc back toward hat
- Anchor to hat with a sl st in next 2 sts on hat, turn
- Sl st in back loops of those 6 sc
- Ch 1, turn, work 6 sc in back loops of sl sts. Again sl st to the next stitch on the hat, and sl st in the next stitch after that as well.
- Repeat sc row and sl st row until no sts remain on the hat.
Count sts from the end to make sure you still have 6-it's easy to accidentally work into hat sts.
When complete, seam starting ch to final row together, using back loops.
Waistcoat Stitch Brim
- Don't ch or turn
- Insert hook in center of next sc post (between the V), complete sc
- Work loosely on first round-trust me on this
- Continue in spiral, working waistcoat st into each sc
- When brim reaches desired width, sl st and fasten off
Final Thoughts
That's it! The beauty of this pattern is the sizing chart works for any crochet circle, not just granny st. So once you nail the technique, experiment with different stitches where you can create a circle.
These work up quickly, look way more impressive than the effort required, and the self-striping yarn does half the visual work. Perfect for gifts or cozy matching family hats.
If you make these, I'd love to hear which brim style you chose. Happy crocheting!
I know you'll wanna save this one for later
Here are some extra photos to pin to Pinterest for later!