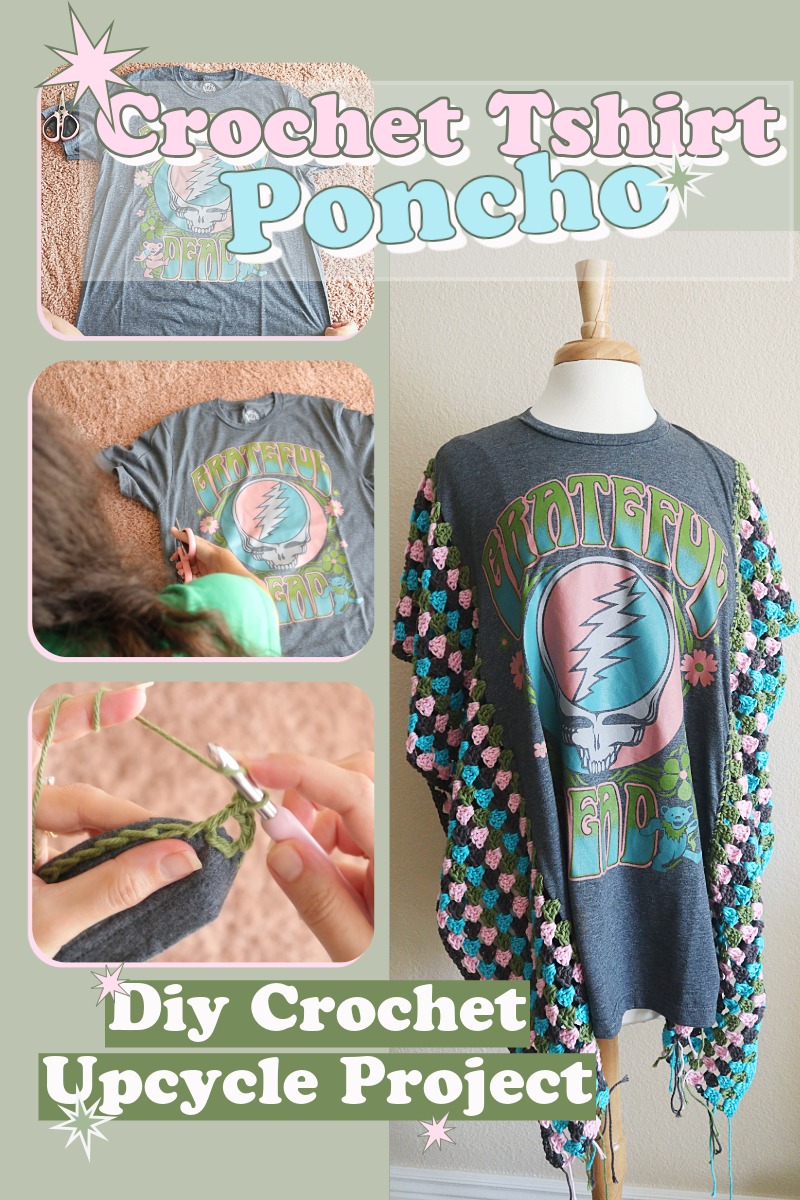
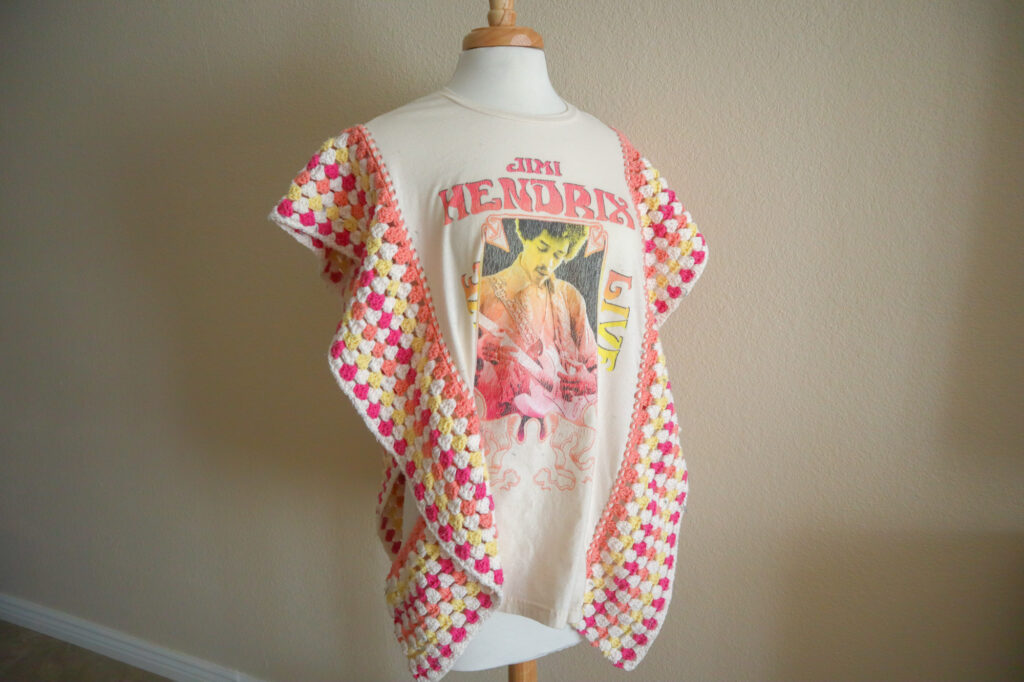
If you've been scrolling through crochet or DIY feeds lately, you've probably spotted the crochet T-shirt poncho trend. It's such a fun way to give new life to an old shirt, and the best part? Each one comes out totally unique.

The basic idea is simple: grab a t-shirt, cut off the sides and sleeves, create a foundation row along the edge, and crochet a granny stitch motif until you've got a breezy poncho. But as with most DIY projects, there are a few different ways to get from point A to point B. I tried a handful of methods myself, and I'll walk you through what worked (and what didn't) so you can dive in with confidence.
Cutting the T-Shirt
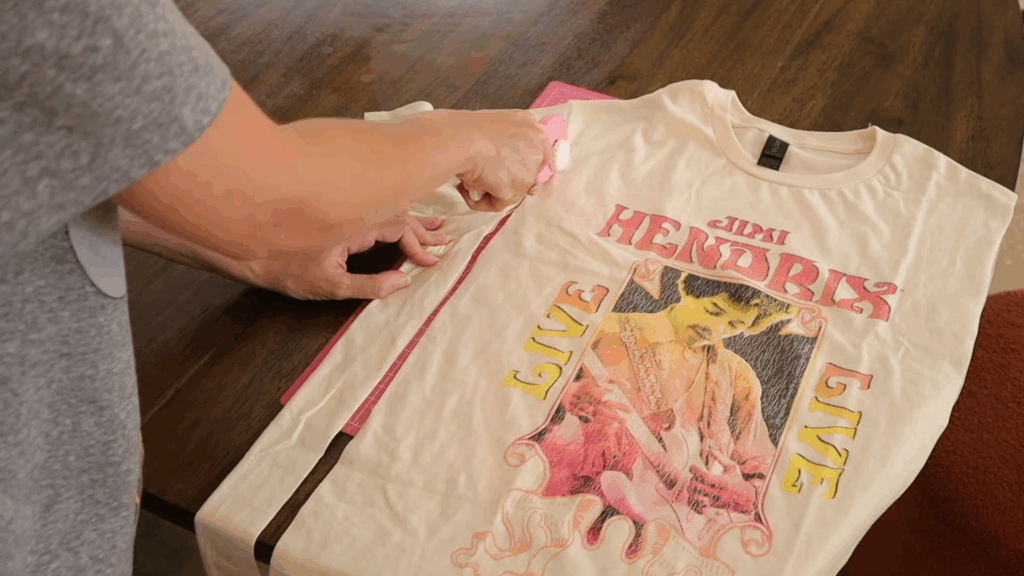
My first attempt? I just hacked away at the sides with scissors. Honestly, it worked, but it was sloppy, imprecise, and kind of stressful. Luckily, T-shirt fabric curls under and hides a lot of mistakes, so no harm done.
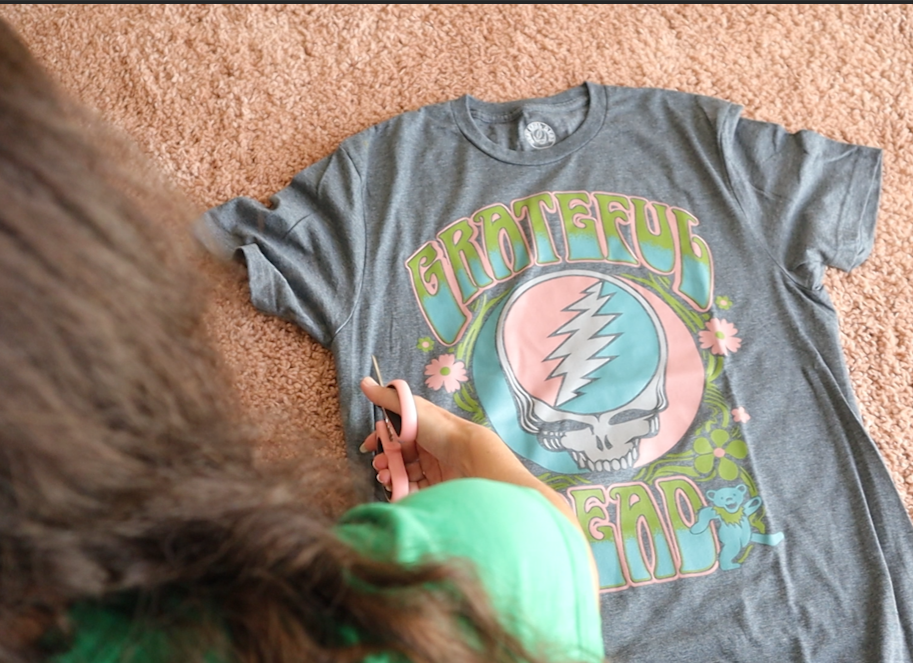
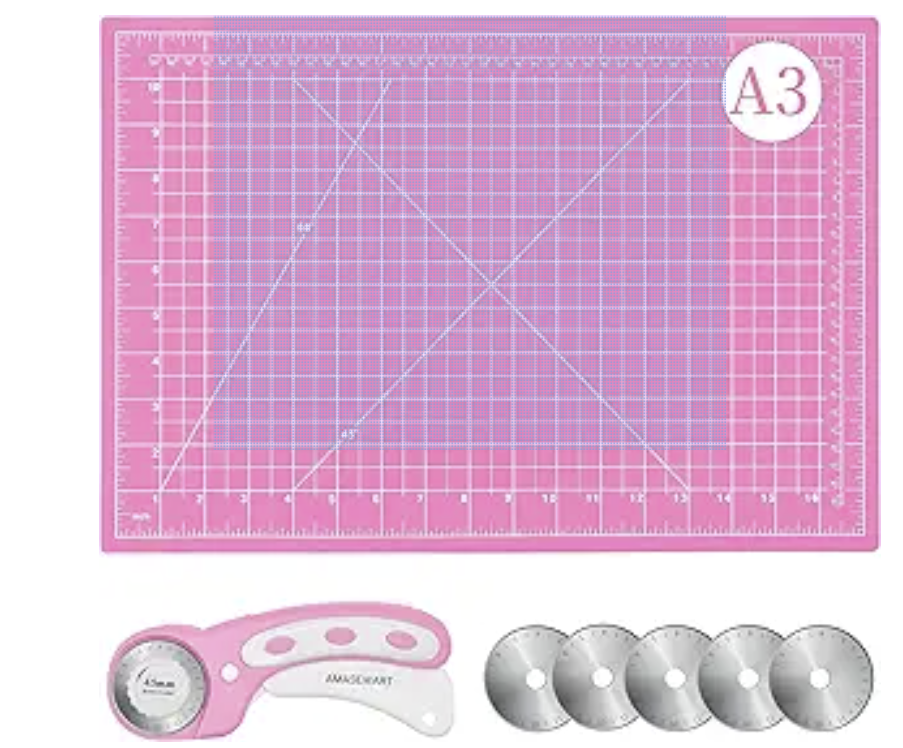
What I actually recommend, though, is investing in a cutting mat and a rotary cutter (the 45mm size is pretty standard). This setup gives you beautifully clean, straight cuts through both layers of the shirt at once. Totally worth it if you want crisp edges and a smoother experience.
Making Holes In The Shirt To Get Yarn Through
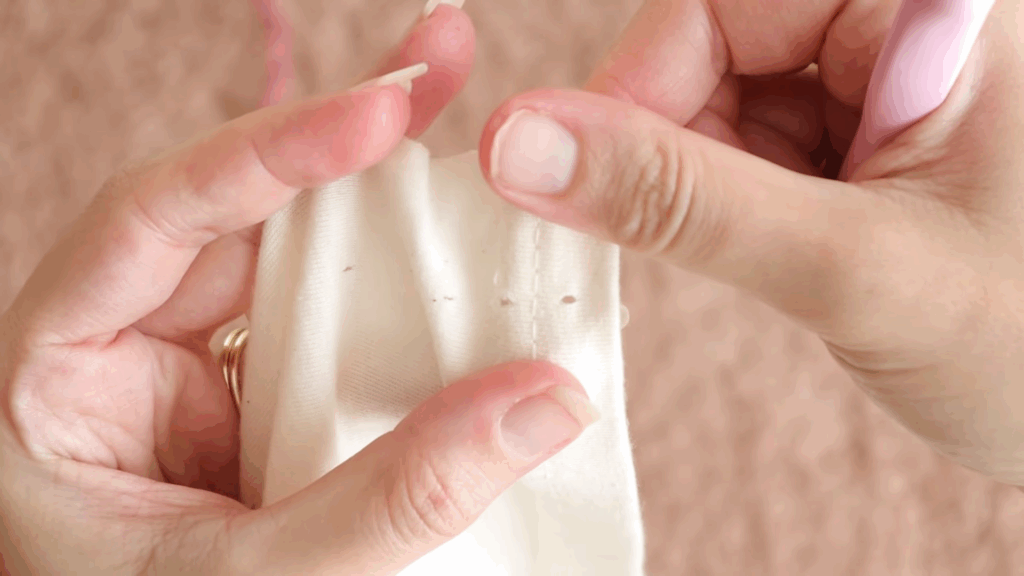
Next up: how do you actually get your yarn into the shirt? You'll need evenly spaced entry points along the edges.
Here are the methods I tested:
- Mark and cut by hand - On my first shirt, I measured and marked half-inch spaces with a pen, then poked holes manually. Doable, but a little tedious.
- Rotary cutter with a perforating blade - This was my favorite! The perforating blade I found had 12 little "pokies" around the wheel, which made evenly spaced half-inch holes with minimal effort. Just unroll your shirt flat, press the blade into the fabric about an inch or two from the edge, and roll upward. Magic.
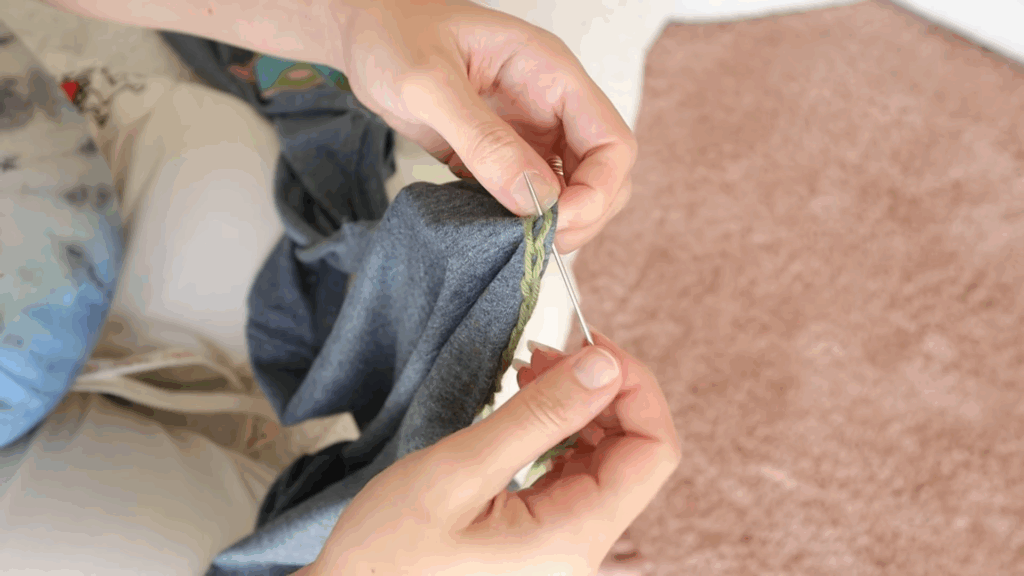
- Embroidery chain stitch - If you're worried about holes stretching over time, you can embroider a chain stitch around the edge instead. It adds neat little V-shaped stitches that you can crochet directly into. The downside: it's fiddly and time-consuming.
I ended up liking the perforated rotary cutter method best. It was by far the quickest, gave me evenly spaced holes, and got me crocheting onto my shirt the fastest. But if you want maximum durability and don't mind putting in a little extra work, employing the embroidery chain stitch gives you perfect stitches to work into with minimal holes in your actual t-shirt.
Adding Crochet To The Shirt
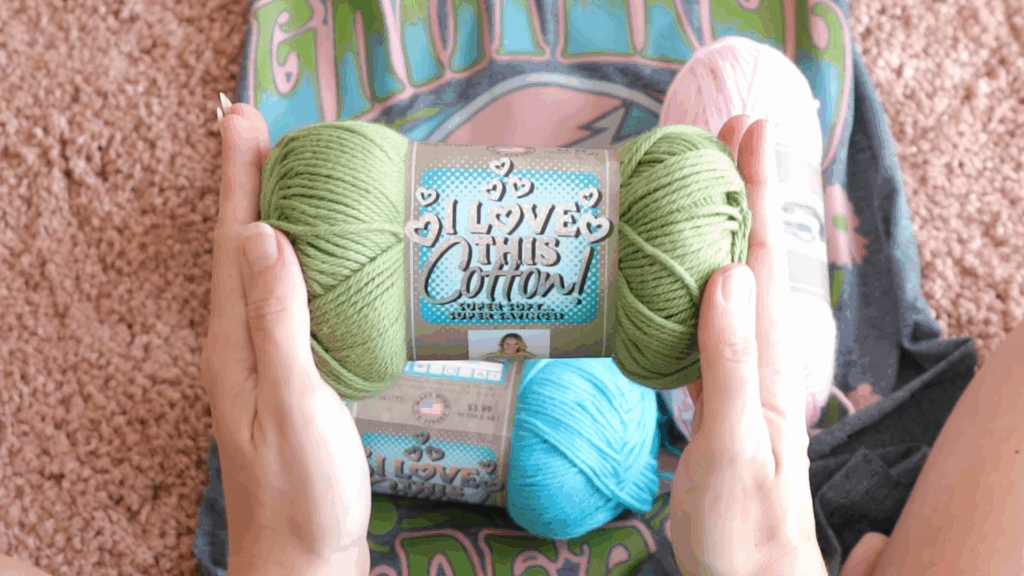
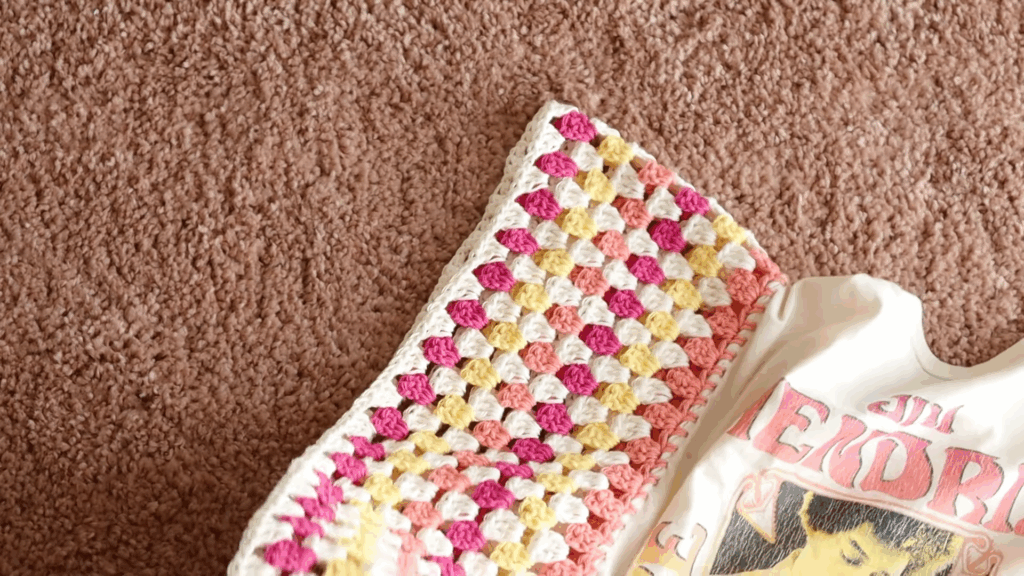
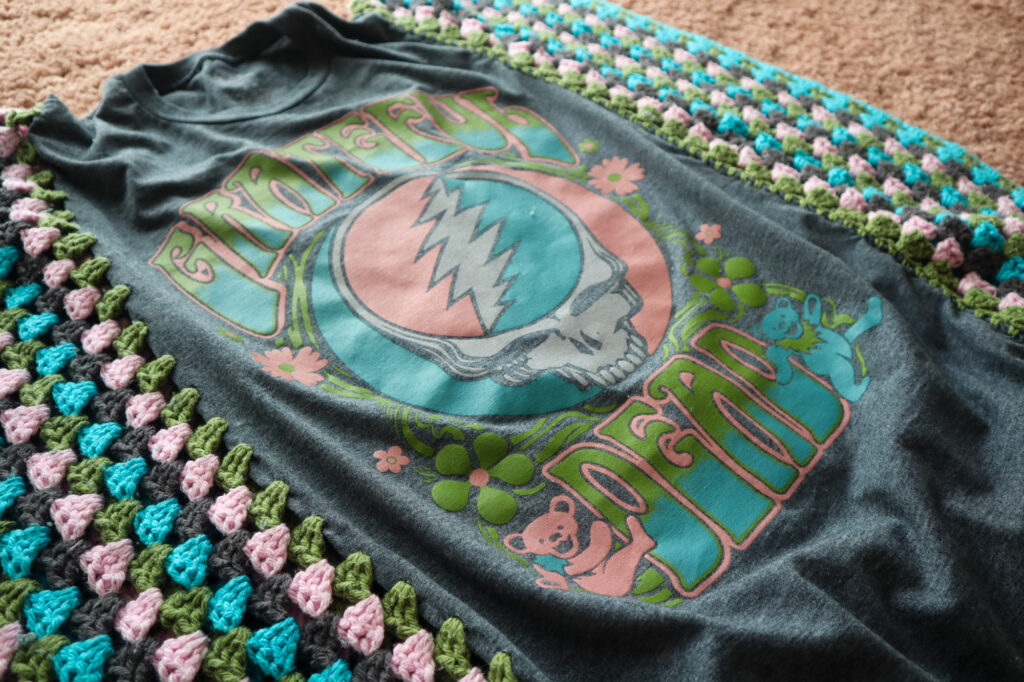
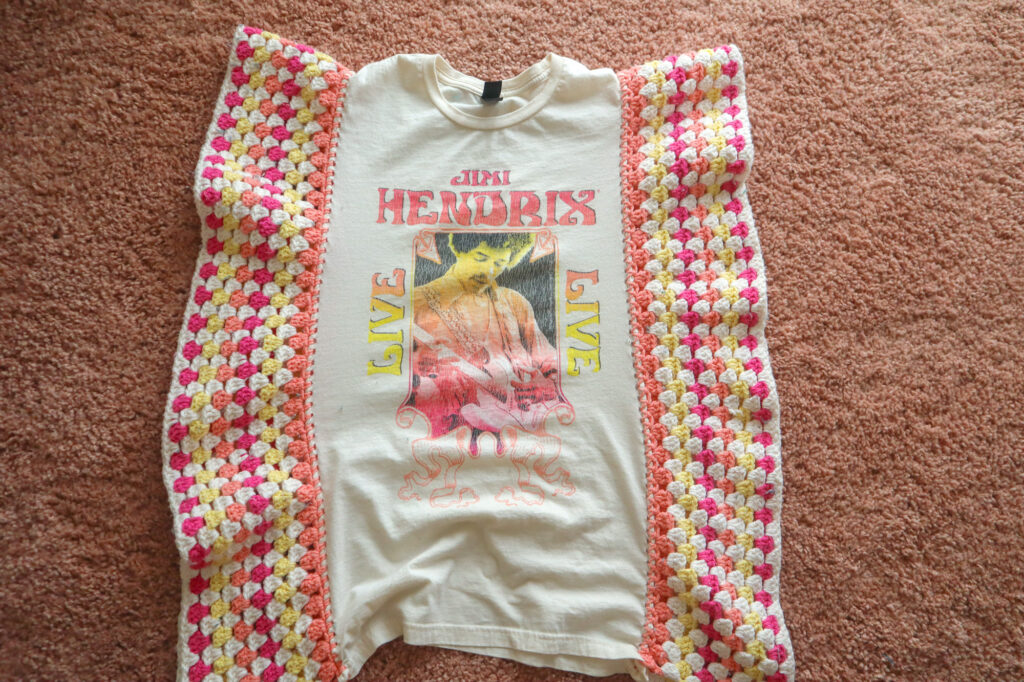
It's important to pick a yarn that's gonna match the drape of your t-shirt fabric. I tried Michael's Loops and Threads cotton which is pretty comparable to other worsted weight cotton yarns out there. I'd say it was on the stiff side. I faired better with Hobby Lobby's "I Love This Cotton." It was much drapier.
You can crochet directly into holes you've made, stitches or otherwise anchoring yarn you've sewn to the sides, or create a row of single crochet to start then continue on in the granny stitch.
Step by Step Tutorial
For no-nonsense instructions, below you'll find all the info you need to know to get this project going quick!
Plus, there's a video tutorial too! Yay:
Supplies You'll Need
- An oversized T-shirt (go one or two sizes up for a flowy fit)
- Worsted weight cotton yarn (soft, drapey cotton works best), in colors that compliment your shirt or it's design.
- 5.5 mm crochet hook
- Self healing cutting mat + 45mm rotary cutter
- 12 prong Perforating blade for rotary cutter
Step 1: Cut the T-Shirt
- Lay your shirt flat on a cutting mat.
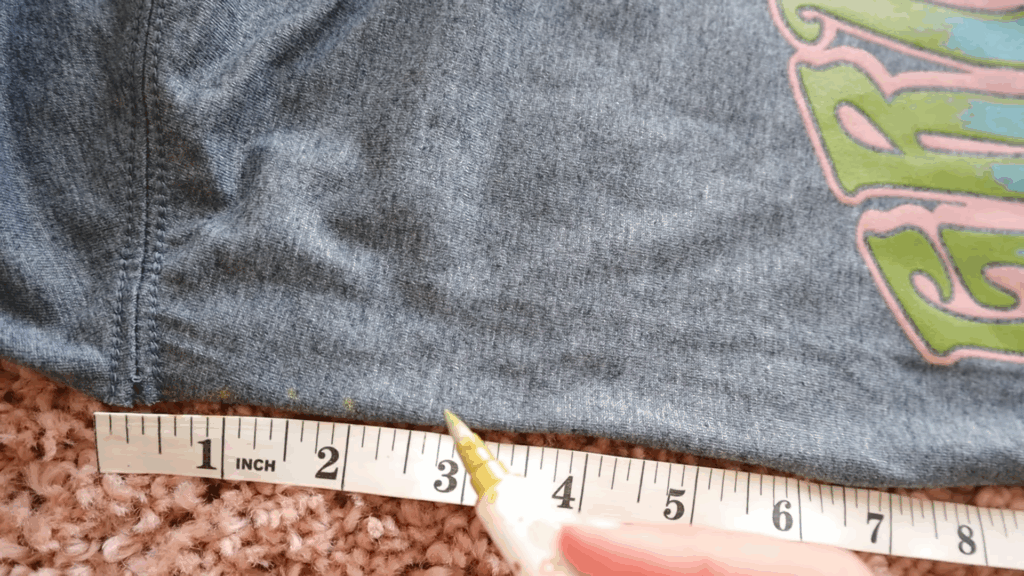
- Use a rotary cutter to cut off the sleeves and side seams in one smooth line. Be sure to graze the sleeve seam (about 1" in from the edge of the shirt at the bottom).
Step 2: Creating the Holes to Work Into
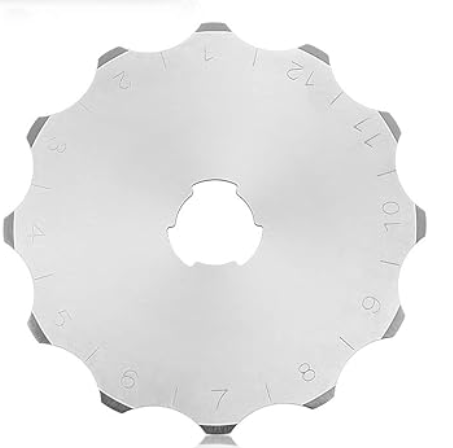
- Swap your cutting blade for the perforating blade in the rotary cutter.
- About 1" in from your original cut, run the perforating blade along the edge of the shirt.
- You should have holes spaced about 0.5" apart.
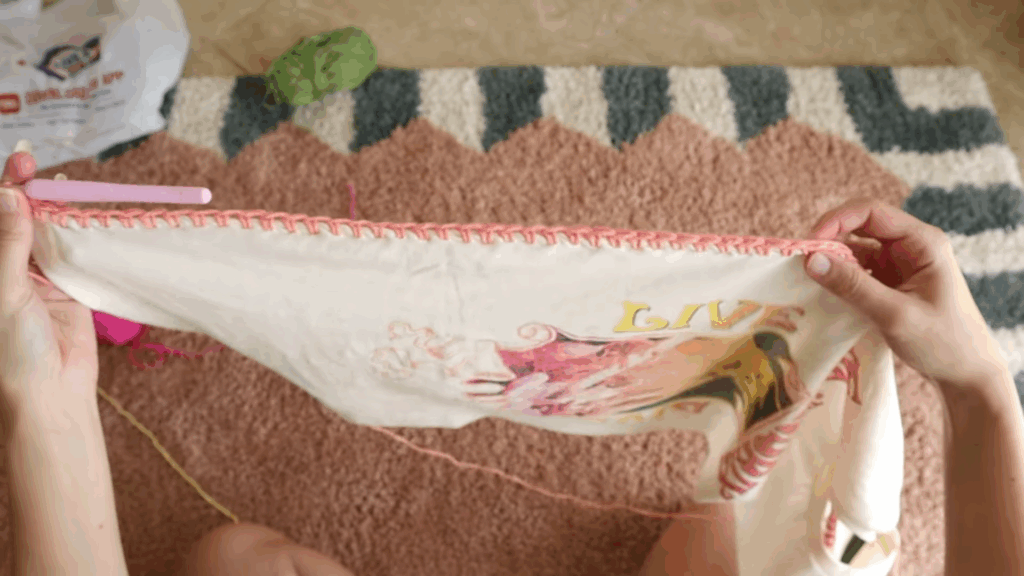
Step 3: Crochet the Foundation Row
- With the front of the shirt facing you, insert your hook into the first perforated hole.
- Pull up a loop (preferably in a color complementing your main shirt color), chain 1. Into the next hole, insert your hook, pull up a loop and complete a single crochet.
- *Loosely* work a single crochet in each perforated hole along the shirt edge.
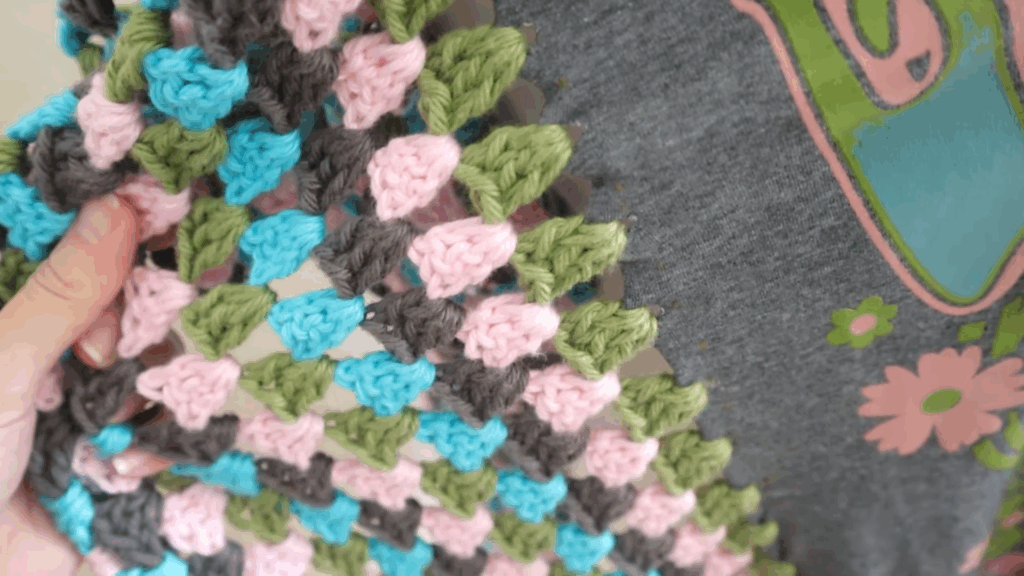
Step 4: Granny Stitch Pattern
- Row 1: Chain 3 + 1 (counts as 1dc), skip 2 stitches, and work 3 double crochets into the next stitch. That's your first granny cluster. *Chain 1, skip 1, 3dc in the next stitch* repeat across the single crochet foundation row. Finish with a chain 1 + 1 double crochet in the last stitch.
- Row 2: Change color if desired. Chain 3 (counts as 1dc), turn, and complete a granny stitch into the first chain space by working 2 more dc. *Ch1, 3dc in next ch sp*, repeat the granny stitch pattern, ending with 2 double crochets in the last space + 1 double crochet into the 3rd chain of the turning chain.
- Row 3 and beyond: Repeat rows 1 and 2, changing color as desired.
Work 14 rows for shirts like mine or for even longer for a more poncho-y poncho.
Final Thoughts
This crochet T-shirt poncho DIY is the perfect mix of upcycling, crochet, and effortless style. It's breezy, fun to wear, and totally customizable depending on your yarn, shirt size, and color choices.
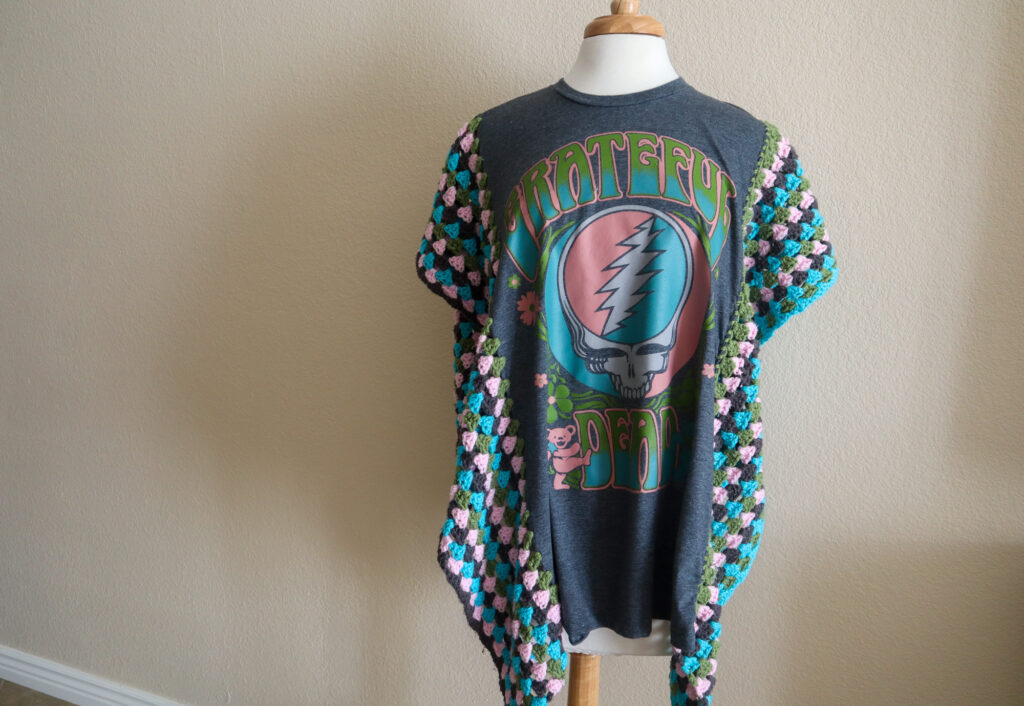
Whether you go for quick-and-easy perforated cuts or take your time with embroidery, the result is a one-of-a-kind poncho that's just begging for a music festival (or a lazy Sunday afternoon).
If you give this project a try, I'd love to hear how you made yours unique. Happy crocheting!


I’ve done a feed these and I always feel like it bunches up where the t shirt meets the yarn. I use a rotary cutter but maybe I’ll try the embroidery method. Has this happened to you before?