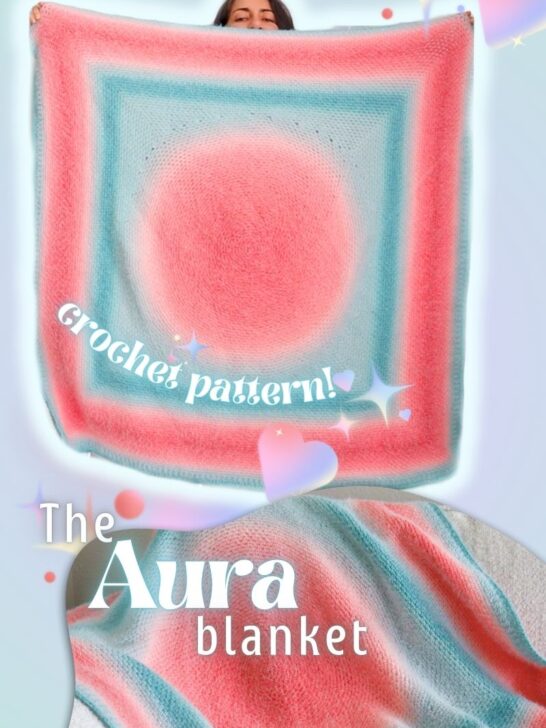
Have you discovered Perfect Phasing yarns yet? Available in Bernat Blanket and Colorama Halo, these innovative yarn cakes deliver the gradual color changes we crocheters have been dreaming of since Caron Cakes first hit the market. Today, I'm excited to share a pattern that makes the most of these gorgeous gradients: The Aura Blanket.
Pattern Overview
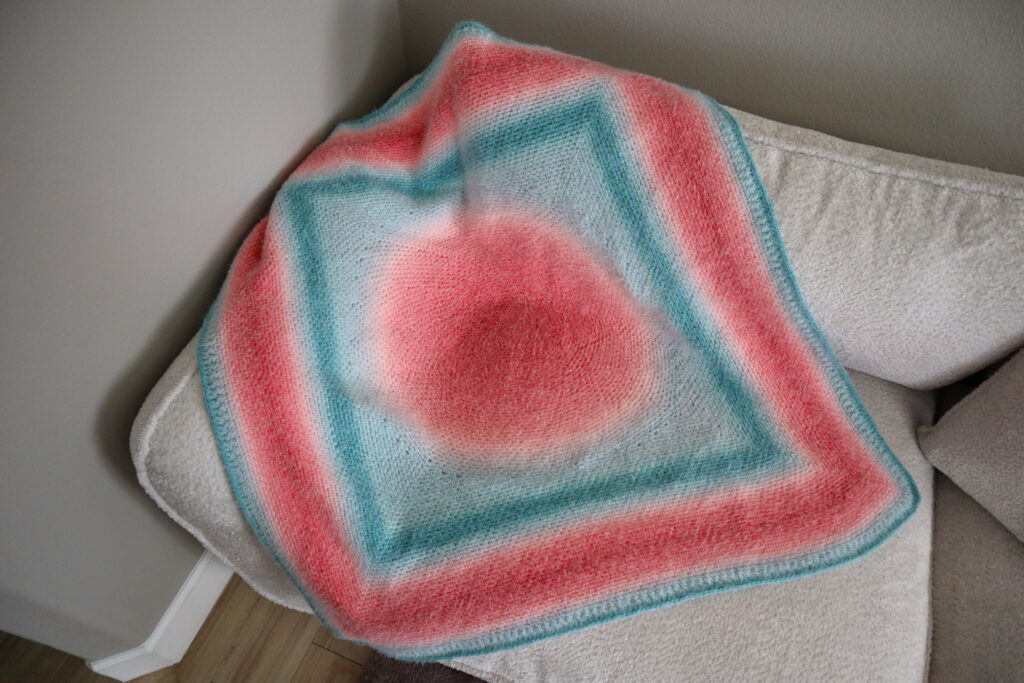
This unique design begins from the center with a soft, radiant circle that gradually transforms into a square. The pattern uses the drapey linen stitch to showcase the beautiful color transitions perfectly. The finished blanket measures 42" x 42".
I HIGHLY recommend checking out the video tutorial for this pattern! I went into some linen stitch un-charted territory with this one and some parts of it are simply best demonstrated rather than written down!
Materials Needed
- 4 cakes of Colorama Halo yarn
- 6.5mm crochet hook
Note: If you're using a different Perfect Phasing yarn, simply go up one hook size from what the ball band recommends. Keep in mind your finished circle size will vary.
The Pattern
Starting the Circle
- Begin with a magic circle from the center of your yarn cake
- Round 1: Work 6 sc into the magic circle, slip stitch to first sc (6 sc)
- Round 2: 2 sc in each stitch around, slip stitch to first sc (12 sc)
- Round 3: Set up the linen stitch pattern - (sc, ch 1) in each stitch around, slip stitch to first sc (12 sc, 12 ch-1 spaces)
The Linen Stitch Circle
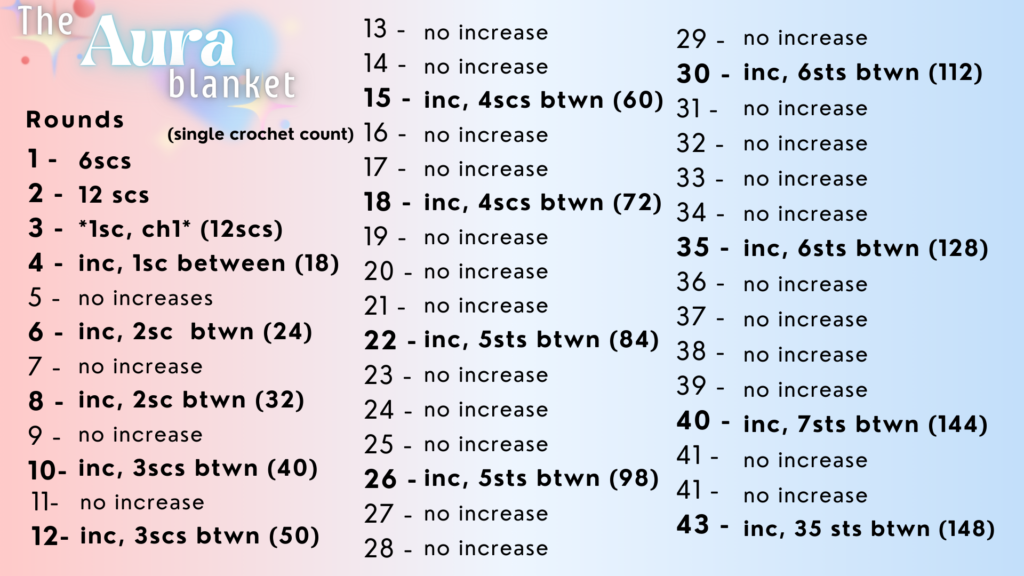
From Round 4 onwards, we'll work into the chain spaces rather than the single crochet stitches. And every single crochet will be followed by a chain 1. The pattern includes increase rounds and rounds without increasing.
To begin rounds, work right into the first available chain space. To end rounds, slip stitch into the first sc of the round.
Don't work ahead: While many circle motifs follow a predictable increase pattern, this design required different round by round instructions to lay flat. Be sure to check written instructions for the remainder of the circle.
Round 4: *(sc, ch1, sc, ch1) all in the same ch sp. sc, ch1* rep between ** to end of round (18scs, 18ch1s)
Round 5: *sc, ch1* in each chain space. (18scs, 18ch1s)
Round 6: *(sc, ch1, sc, ch1) all in the same ch sp. (Sc, ch1)x2* rep between ** to end of round (24scs, 24ch1s)
Round 7: *sc, ch1* in each chain space. (24scs, 24ch1s)
Round 8: *(sc, ch1, sc, ch1) all in the same ch sp. (Sc, ch1)x2* rep between ** to end of round (32scs, 32ch1s)
Round 9: *sc, ch1* in each chain space. (32scs, 32ch1s)
Round 10: *(sc, ch1, sc, ch1) all in the same ch sp. (Sc, ch1)x3* rep between ** to end of round (40scs, 40ch1s)
Round 11: *sc, ch1* in each chain space. (40scs, 40ch1s)
Round 12: *(sc, ch1, sc, ch1) all in the same ch sp. (Sc, ch1)x3* rep between ** to end of round (50scs, 50ch1s)
Round 13: *sc, ch1* in each chain space. (50scs, 50ch1s)
Round 14: *sc, ch1* in each chain space. (50scs, 50ch1s)
Round 15: *(sc, ch1, sc, ch1) all in the same ch sp. (Sc, ch1)x4* rep between ** to end of round (60scs, 60ch1s)
Round 16: *sc, ch1* in each chain space. (60scs, 60ch1s)
Round 17: *sc, ch1* in each chain space. (60scs, 60ch1s)
Round 18: *(sc, ch1, sc, ch1) all in the same ch sp. (Sc, ch1)x4* rep between ** to end of round (72scs, 72ch1s)
Round 19: *sc, ch1* in each chain space. (72scs, 72ch1s)
Round 20: *sc, ch1* in each chain space. (72scs, 72ch1s)
Round 21: *sc, ch1* in each chain space. (72scs, 72ch1s)
Round 22: *(sc, ch1, sc, ch1) all in the same ch sp. (Sc, ch1)x5* rep between ** to end of round (84scs, 84ch1s)
Round 23: *sc, ch1* in each chain space. (84scs, 84ch1s)
Round 24: *sc, ch1* in each chain space. (84scs, 84ch1s)
Round 25: *sc, ch1* in each chain space. (84scs, 84ch1s)
Round 26: *(sc, ch1, sc, ch1) all in the same ch sp. (Sc, ch1)x5* rep between ** to end of round (98scs, 98ch1s)
Round 27: *sc, ch1* in each chain space. (98scs, 98ch1s)
Round 28: *sc, ch1* in each chain space. (98scs, 98ch1s)
Round 29: *sc, ch1* in each chain space. (98scs, 98ch1s)
Round 30: *(sc, ch1, sc, ch1) all in the same ch sp. (Sc, ch1)x6* rep between ** to end of round (112scs, 112ch1s)
Round 31: *sc, ch1* in each chain space. (112scs, 112ch1s)
Round 32: *sc, ch1* in each chain space. (112scs, 112ch1s)
Round 33: *sc, ch1* in each chain space. (112scs, 112ch1s)
Round 34: *sc, ch1* in each chain space. (112scs, 112ch1s)
Round 35: *(sc, ch1, sc, ch1) all in the same ch sp. (Sc, ch1)x6* rep between ** to end of round (128scs, 128ch1s)
Round 36: *sc, ch1* in each chain space. (128scs, 128ch1s)
Round 37: *sc, ch1* in each chain space. (128scs, 128ch1s)
Round 38: *sc, ch1* in each chain space. (128scs, 128ch1s)
Round 39: *sc, ch1* in each chain space. (128scs, 128ch1s)
Round 40: *(sc, ch1, sc, ch1) all in the same ch sp. (Sc, ch1)x7* rep between ** to end of round (144scs, 144ch1s)
Round 41: *sc, ch1* in each chain space. (144scs, 144ch1s)
Round 42: *sc, ch1* in each chain space. (144scs, 144ch1s)
Round 43: *(sc, ch1, sc, ch1) all in the same ch sp. (Sc, ch1)x35* rep between ** to end of round (148scs, 148ch1s)
Creating the Corners
This is where the magic happens! Each corner is worked over 13 short rows, creating mini triangles that transform your circle into a square. The process involves:
- Into the next increase, work an increase (sc, ch1, sc, ch1 in same ch sp). Then, sc, ch1 in next ch sp. Sl st in next ch sp. Ch1 and turn.
- (for first corner only) Sc, ch1 in each chain space. Work an increase into the increase. Sc, ch1 in the next ch1 space (on the circle). Sl st in the next ch sp. Ch1, turn.
- Sc, ch1 in each chain space. Work an increase into the increase. Sc, ch1 in each chain space of your corner. Sc, ch1 in the next ch1 space (on the circle). Sl st in the next ch sp. Ch1, turn.
- Sc, ch1 in each chain space. Work an increase into the increase. Sc, ch1 in each chain space of your corner. Sc, ch1 in the next ch1 space (on the circle). Sl st in the next ch sp. Ch1, turn.
- Sc, ch1 in each chain space. Work an increase into the increase. Sc, ch1 in each chain space of your corner. Sc, ch1 in the next ch1 space (on the circle). Sl st in the next ch sp. Ch1, turn.
- Sc, ch1 in each chain space. Work an increase into the increase. Sc, ch1 in each chain space of your corner. Sc, ch1 in the next ch1 space (on the circle). Sl st in the next ch sp. Ch1, turn.
- Sc, ch1 in each chain space. Work an increase into the increase. Sc, ch1 in each chain space of your corner. Sc, ch1 in the next ch1 space (on the circle). Sc, ch1 in the next ch 1 space. Sl st in the next ch sp. Ch1, turn.
- Sc, ch1 in each chain space. Work an increase into the increase. Sc, ch1 in each chain space of your corner. Sc, ch1 in the next ch1 space (on the circle). Sc, ch1 in the next ch 1 space. Sl st in the next ch sp. Ch1, turn.
- Sc, ch1 in each chain space. Work an increase into the increase. Sc, ch1 in each chain space of your corner. (Sc, ch1 in the next ch1 space on the circle)x3. Sl st in the next ch sp. Ch1, turn.
- Sc, ch1 in each chain space. Work an increase into the increase. Sc, ch1 in each chain space of your corner. (Sc, ch1 in the next ch1 space on the circle)x3. Sl st in the next ch sp. Ch1, turn.
- Sc, ch1 in each chain space. Work an increase into the increase. Sc, ch1 in each chain space of your corner. (Sc, ch1 in the next ch1 space on the circle)x4. Sl st in the next ch sp. Ch1, turn.
- Sc, ch1 in each chain space. Work an increase into the increase. Sc, ch1 in each chain space of your corner. (Sc, ch1 in the next ch1 space on the circle)x4. Sl st in the next ch sp. Ch1, turn.
- On row 13, sc, ch1 in each ch1 space and increase into the increase, and when you reach your circle, you can continue on in linen stitch along the circle working up to the next increase
When you reach the 2nd increase, work the 13 row corner sequence again. However, row 2 is different for the remaining 3 corners:
- Row 2: Sc, ch1 in each chain space. Work an increase into the increase. Sc, ch1 in the next ch1 space (on the circle), sc, ch1 in the next ch sp on the circle. Sl st in the next ch sp. Ch1, turn.
All other rows will be the same as corner 1 for the other 3 corners.
Color Management Tip: When you notice your yarn is about to do a color transition during the corner short rows, grab a new yarn cake and unwind it from the outside until you reach the color that you're currently working. Cut the cake, cut the yarn on your project and reattach to the re-wound yarn. This will allow you to finish all four corners before transitioning to the outer cake color.
Growing Your Square
Once all corners are established, the pattern becomes delightfully simple:
- Work in continuous rounds
- Maintain the linen stitch pattern
- Work increases only in the corner spaces
As you run out of yarn, attach a new ball maintaining your color changes matching end to end and middle to middle.
Adding the Border
The border features a modified star stitch that complements the linen stitch beautifully
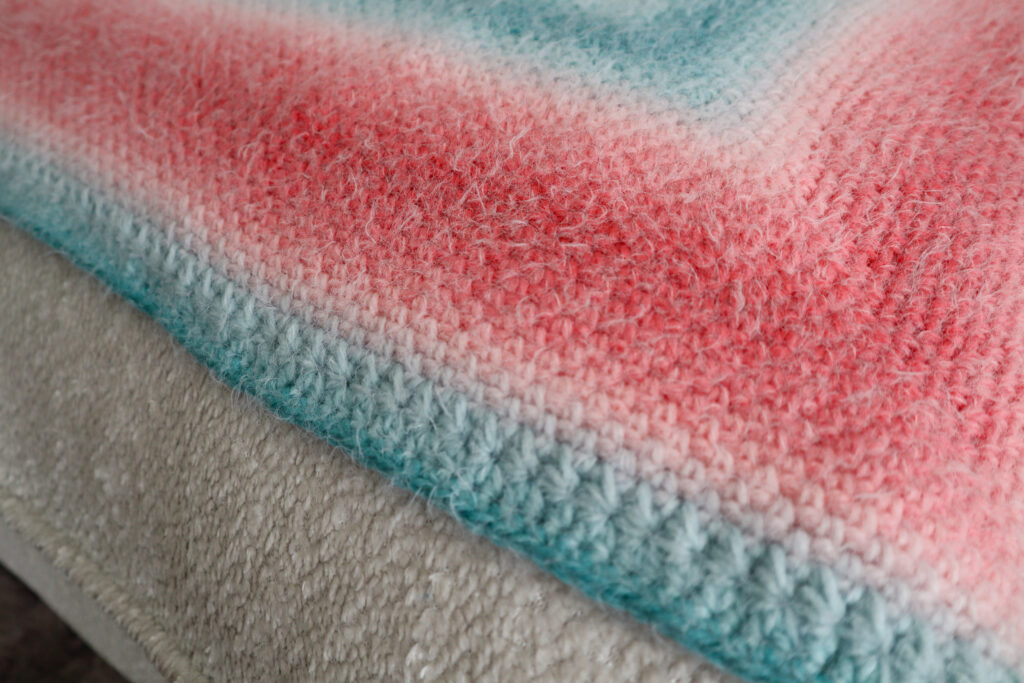
The first star stitch of the round will go like this:
- Slip stitch over to the first ch sp. And chain up 3
- Insert your hook into the 2nd chain, pull up a loop (2 loops on hook)
- Insert your hook into the 1st chain, pull up a loop (3 loops on hook)
- Insert your hook into the chain space you chained up from, pull up a loop (4 loops on hook)
- Yarn over (5 loops on hook)
- Insert into next chain space, pull up a loop (6 loops on hook)
- Yarn over, pull through 6. Chain 1
All remaining star stitches will be:
- Insert your hook into the ch1, pull up a loop (2 loops on hook)
- Insert your hook into the bar coming out of the ch sp below, pull up a loop (3 loops on hook)
- Insert your hook into the chain space below, pull up a loop (4 loops on hook)
- Yarn over (5 loops on hook)
- Insert into next chain space, pull up a loop (6 loops on hook)
- Yarn over, pull through 6. Chain 1
Repeat the 6 step star stitch to one chain space before the corner. To turn the corner in star stitch, work 2 star stitches into each ch sp on either side of the corner ch sp.
Star stitch round 2:
*(Work 2hdc in the center ch of a star stitch)x2, then work 1hdc in the center of the next star stitch.* Repeat to the end of the round, working 2x hdc in all corner star stitches.
Optional - A final round of single crochet if you have some spare yarn left.
Final Thoughts
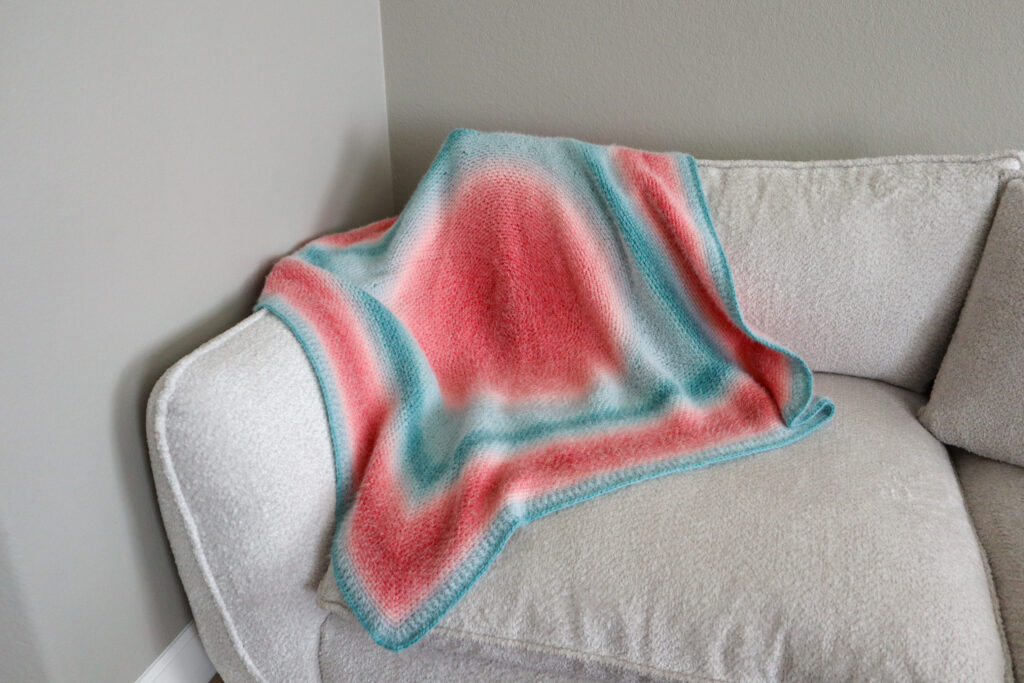
This pattern was truly a labor of love, involving multiple iterations to achieve the perfect balance of structure and flow. While it may look intimidating at first, the end result is a completely unique blanket with genuine wow factor. The combination of the linen stitch and perfect phasing yarn creates a wonderfully drapey, soft blanket that's both beautiful and functional.
The pattern may seem complex, but take it step by step, and you'll create something truly unique. The way the colors flow and the circle transforms into a square creates a stunning visual effect that's worth every careful stitch.
Happy crocheting! 💕

Anonymously Grateful
Friday 24th of October 2025
Thank you for documenting your linen stitch circle! You're right, it's not documented online, and the few documents I found were for...squares. They're technically in the round, but rather unhelpful! I'm in the testing phase of making a circle yoke top down sweater with linen stitch - all my tests were curling like I didn't increase enough (or at all), even when I nearly doubled the stitch count in round after round - your alternating increase/breathing room pattern is going to be so helpful! Thank you <3