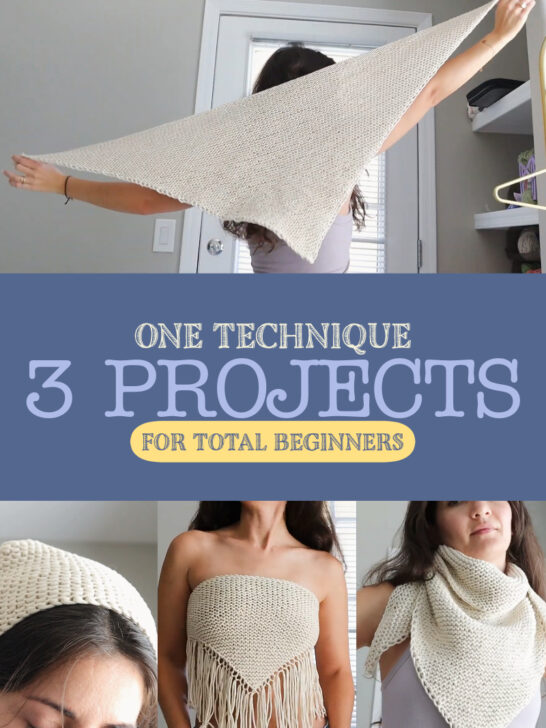
Brand new to knitting? Here are three projects you can start today! Maybe every member of your family has already received a rectangular scarf (or two, or three) and you’re ready to branch out and try other shapes. In this blog post, and corresponding YouTube tutorial, I’m demonstrating the EASIEST way to knit a triangle, from the bottom up.
Plus, I’ll give you all the details you need to finish your triangle into any one of three perfectly complete projects: a cute triangle headscarf, a boho-chic top, and a classic triangle shawl.
You Can Tri-it!
Think you don’t have the skills to try a triangle? Think again! You only need a few basic techniques for these patterns.
- Making a slip knot
- Yarn-over increase (i’ll show ya)
- The basic knit stitch
- Basic bind off
Best of all, you can use ANY weight yarn and ANY needle size! This is because I give absolute measurements and not stitch counts. Just keep in mind, as your project grows, you’ll need longer needles to accommodate all the stitches! Consider starting out with longer circular needles so you have plenty of room!
So grab a tape measurer and feel free to play around with different yarn weights to see how drapey, lacey or thick your project can be!
Getting Started
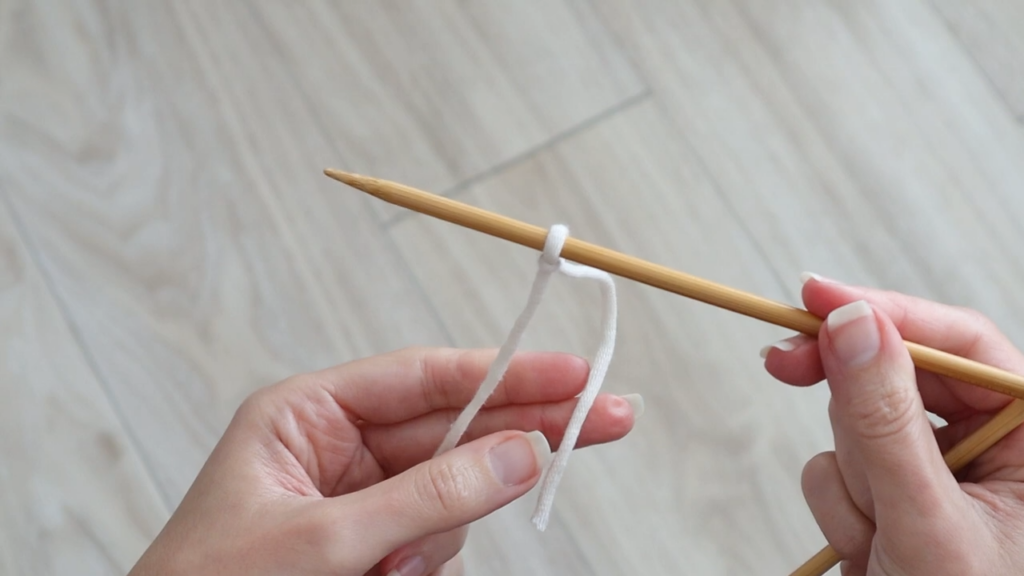
Assuming you’re an absolute beginner, we’ll start at the beginning, with a slip knot! To make a slip knot, fold your yarn end in half, twist it once and reach through the loop to grab the yarn attached to your ball (that’s called the “working” yarn). Pull up a loop and you’ve got a slipknot!
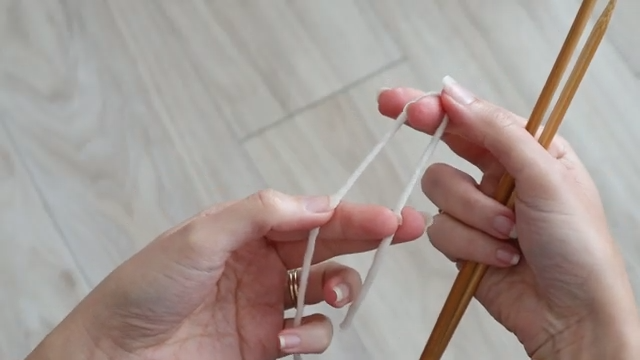
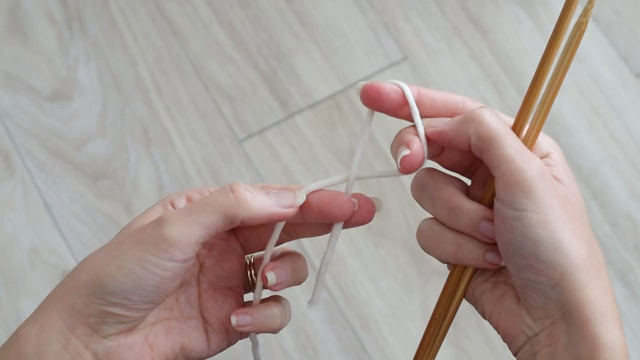
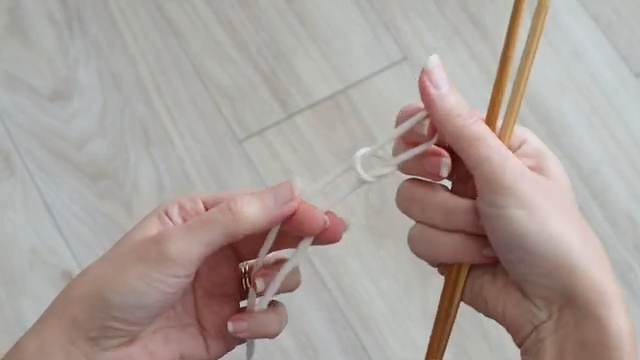
Place the slipknot on your left needle, and you’ve already knit row 1. Congrats!
Row 2: Drape the working yarn over your right needle (yarn over) and hold the yarn over down with a finger, while you knit front-to-back into the stitch on your left needle. Wrap the right needle counterclockwise, and pull a loop through the stitch. Drop the old stitch off your left needle.
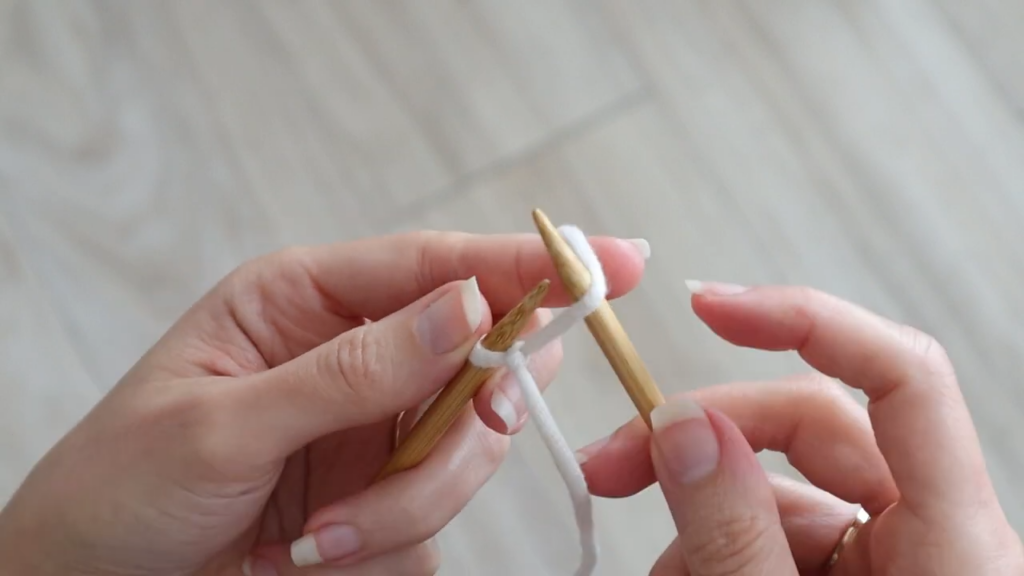
Now, you’ve got two stitches (a knit stitch and a yarn over) on your right needle! Swap needles to start row 3.
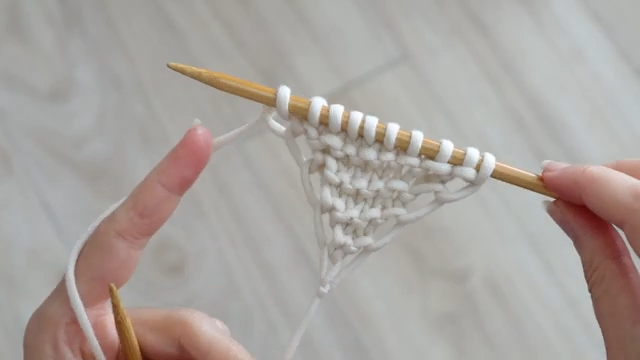
Row 3: Yarn over, knit remaining stitches.
And that’s it! Repeat row 3 over and over and your triangle will start to form after several rows.
Key Measurements For Each Project
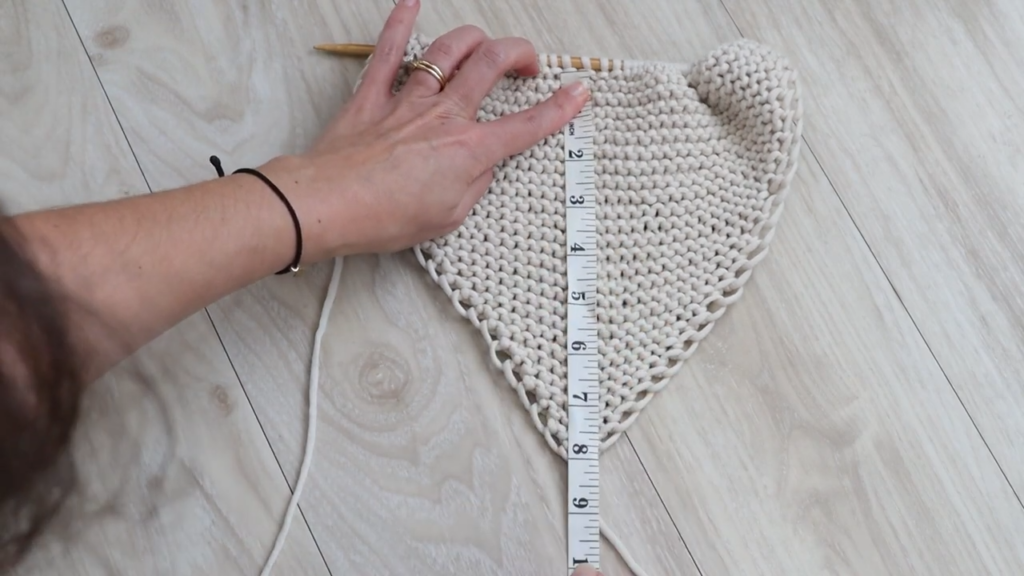
All you need to know now is how to measure your triangle and what measurements you’ll need for each project.
When I talk about measuring your triangle, I am referring to… Flattening out a spot in the center of the triangle, and measuring from top to tip.
| Project Type | Top to tip triangle measurment |
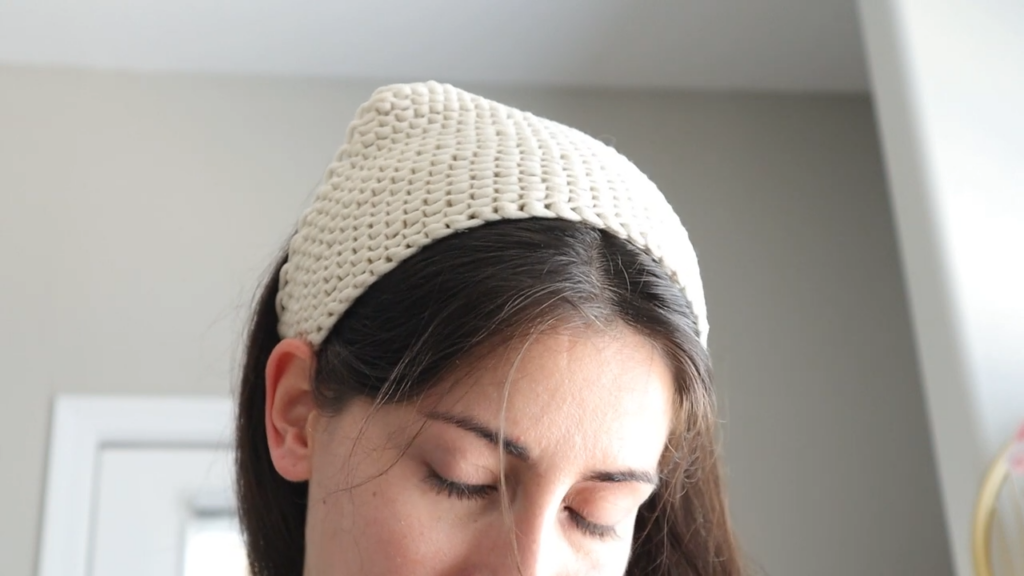
| Headscarf | 8in-9in for an adult size |
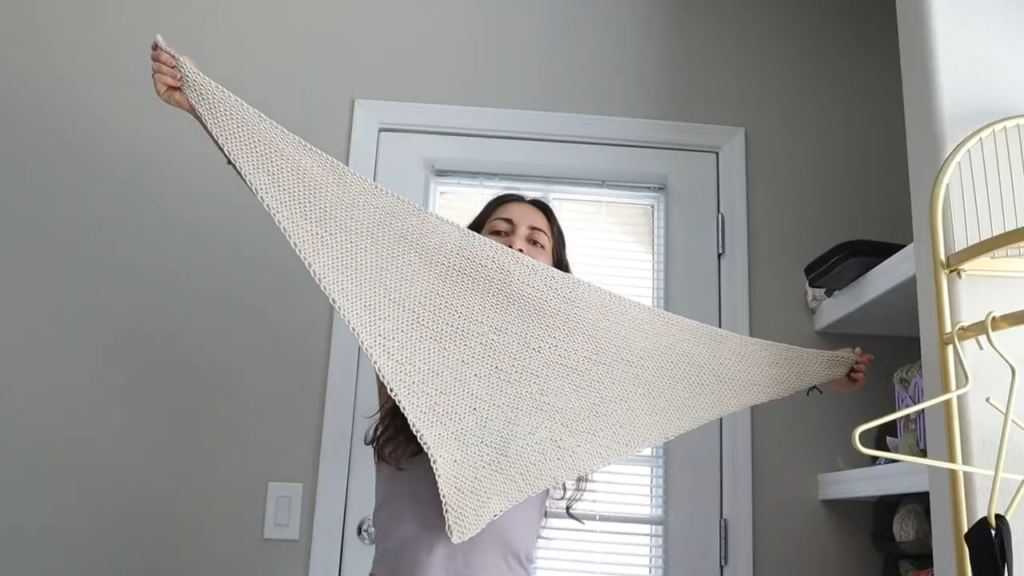
| Shawl | 20in-40in |
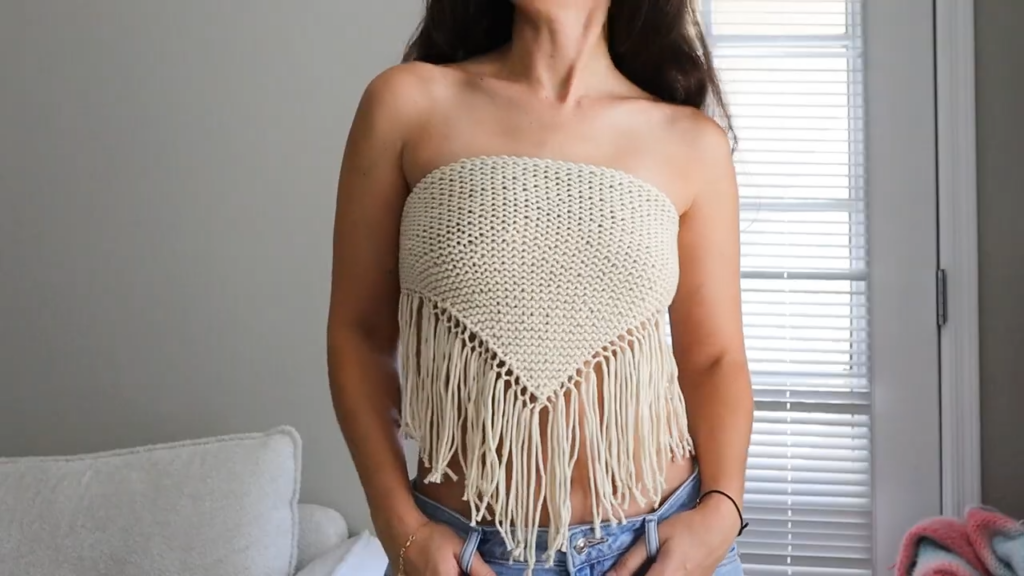
| Triangle Top | (Your bra band size ÷ 4)+3in |
Finishing
Each project will need to be “bound off” to get all the live stitches off your needles.
To do this, when your piece reaches the desired length, begin with a yarn over and knit 1 stitch. Pass the yarn over, over the stitch you just knit. Knit another stitch and pass the previous stitch over. Continue until each stitch is bound off. To keep this from being too tight, I like to swap my right needle for a larger one when I bind off!
Then, you’ll need to weave in your ends. There’s no right or wrong way to do this so long as the end is secure and out-of-sight. You can reference the Youtube tutorial to see how I did it!
Finishing The Headscarf
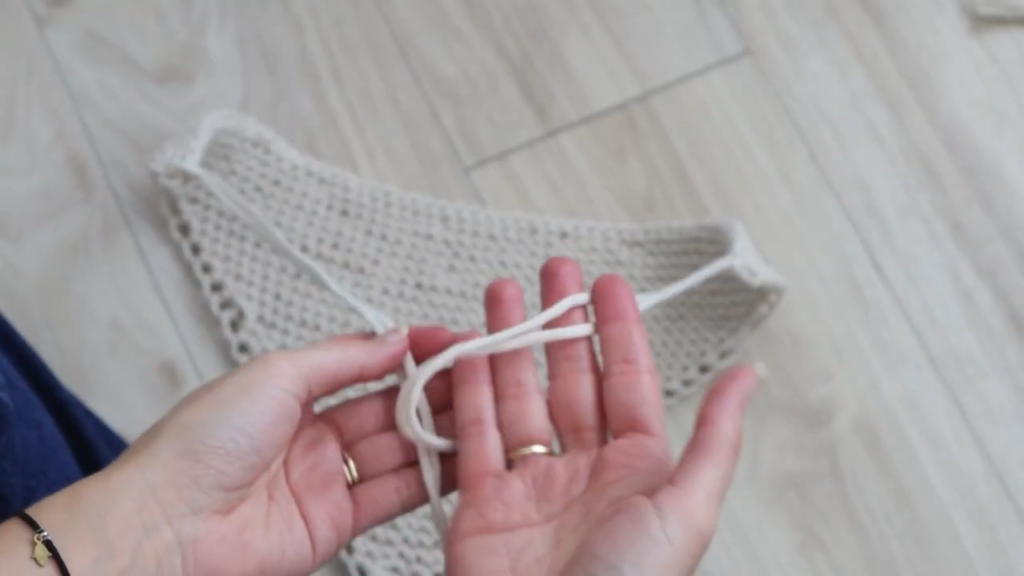
The headscarf needs some ties to secure it behind your neck. You can cut some lengths of yarn (about 20″) and fold them in half. Loop the strands through the corners on either end of your triangle.
Finishing The Triangle Top
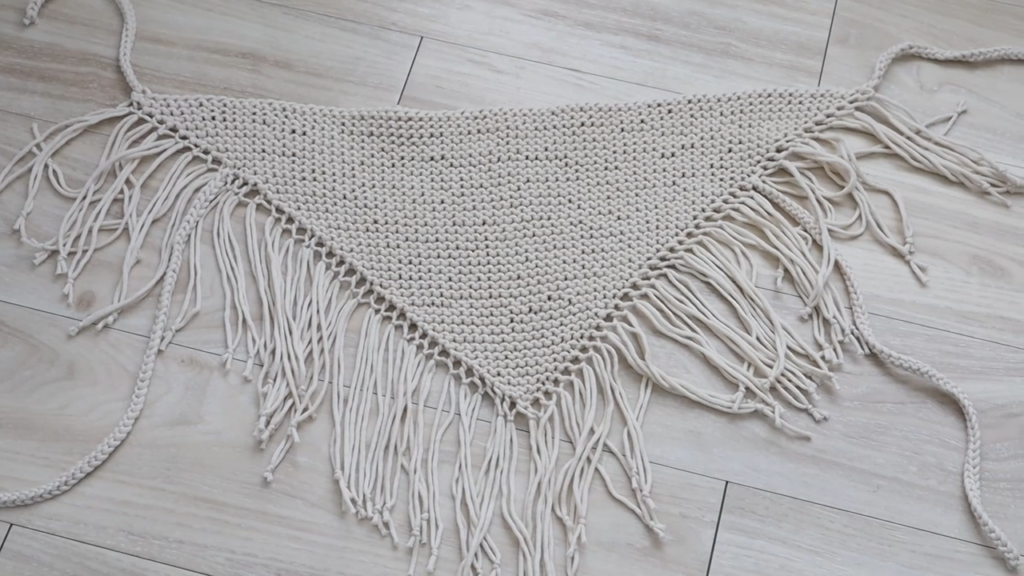
For my top, I added fringe to each of our yarn over details. To cut the fringe, I wrapped my yarn around a notebook and cut along one side to create a bunch of equal length strands. Fold each strand in half and loop it through each yarn over.
The top also needs ties or straps to secure it. There are many kinds of cords you can create with yarn or knitting: icords, crochet cords, crochet chains or even braiding plain strands of yarn. You can get creative with this part even harvesting some ribbon, or ties from other clothing items.
When you decide how you’re going to make your straps, make sure they are about 20-30 inches long and tie them to the corners of your triangle. I also added two more straps about a third of the way down the triangle to make it extra secure.
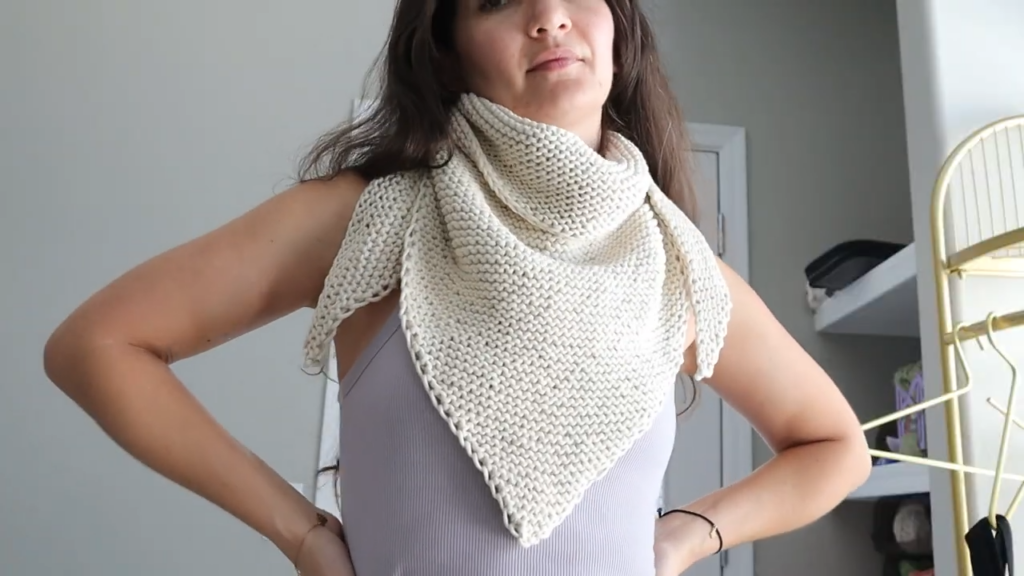
Finishing The Shawl
The shawl doesn’t need any extra finishing to be a perfectly perfect shawl! You could certainly add fringe similarly to how I added it to the triangle top. Below I’ll demonstrate some of my favorite ways to wear this shawl!

There you have it!
I hope you enjoyed my explanation of this technique. Don’t forget to check out the Youtube video and if you DO make any of these wonderful triangle projects, tag me wherever you are online because I’d love to see them!
Happy knitting, everyone! 🧶✨